
M-Trigger ETU Getting Started
Thanks for choosing our P90 M-Trigger ETU! This page has everything you need to get started.
This page is a work in progress as we get ready for full production of the M-Trigger ETU.
CUSTOMER SUPPORT
Full installation instructions are below. Need some help with the install or have questions? Contact us and we will help you out. I make and test every M-Trigger by hand, and I’d much rather you just ask me a question than have it not working! :)
For all support, you can use the Facebook Messenger button in the bottom right corner (please sign into Facebook first), or email us at 3dprinting@srairsoft.com.
LEAVE A REVIEW
Go ahead and install your M-Trigger and test it out. You’ll get an email in about 2 weeks where you can leave a review and share your thoughts. Thanks in advance!
International customers: you will probably get the review email before you actually get your M-Trigger due to longer shipping times. Be sure to check!
LIKE, FOLLOW, SUB
Here are all our social media links. We post about new products and airsoft events we go to. A like and follow really help us grow our business!
Installation
There are separate installation steps depending which spec you have - Standard TM, Krytac, or G&G. Skip ahead to your section.
Standard TM-Spec (Tokyo Marui, Novritsch, Classic Army, King Arms, Double Bell, Cyma, JG, Cybergun, and everything else that isn’t Krytac or G&G)
Update 2/20/24: I’m filming the installation video NOW! For now, please follow the steps below and PLEASE contact us if you need any help.
Disassembly
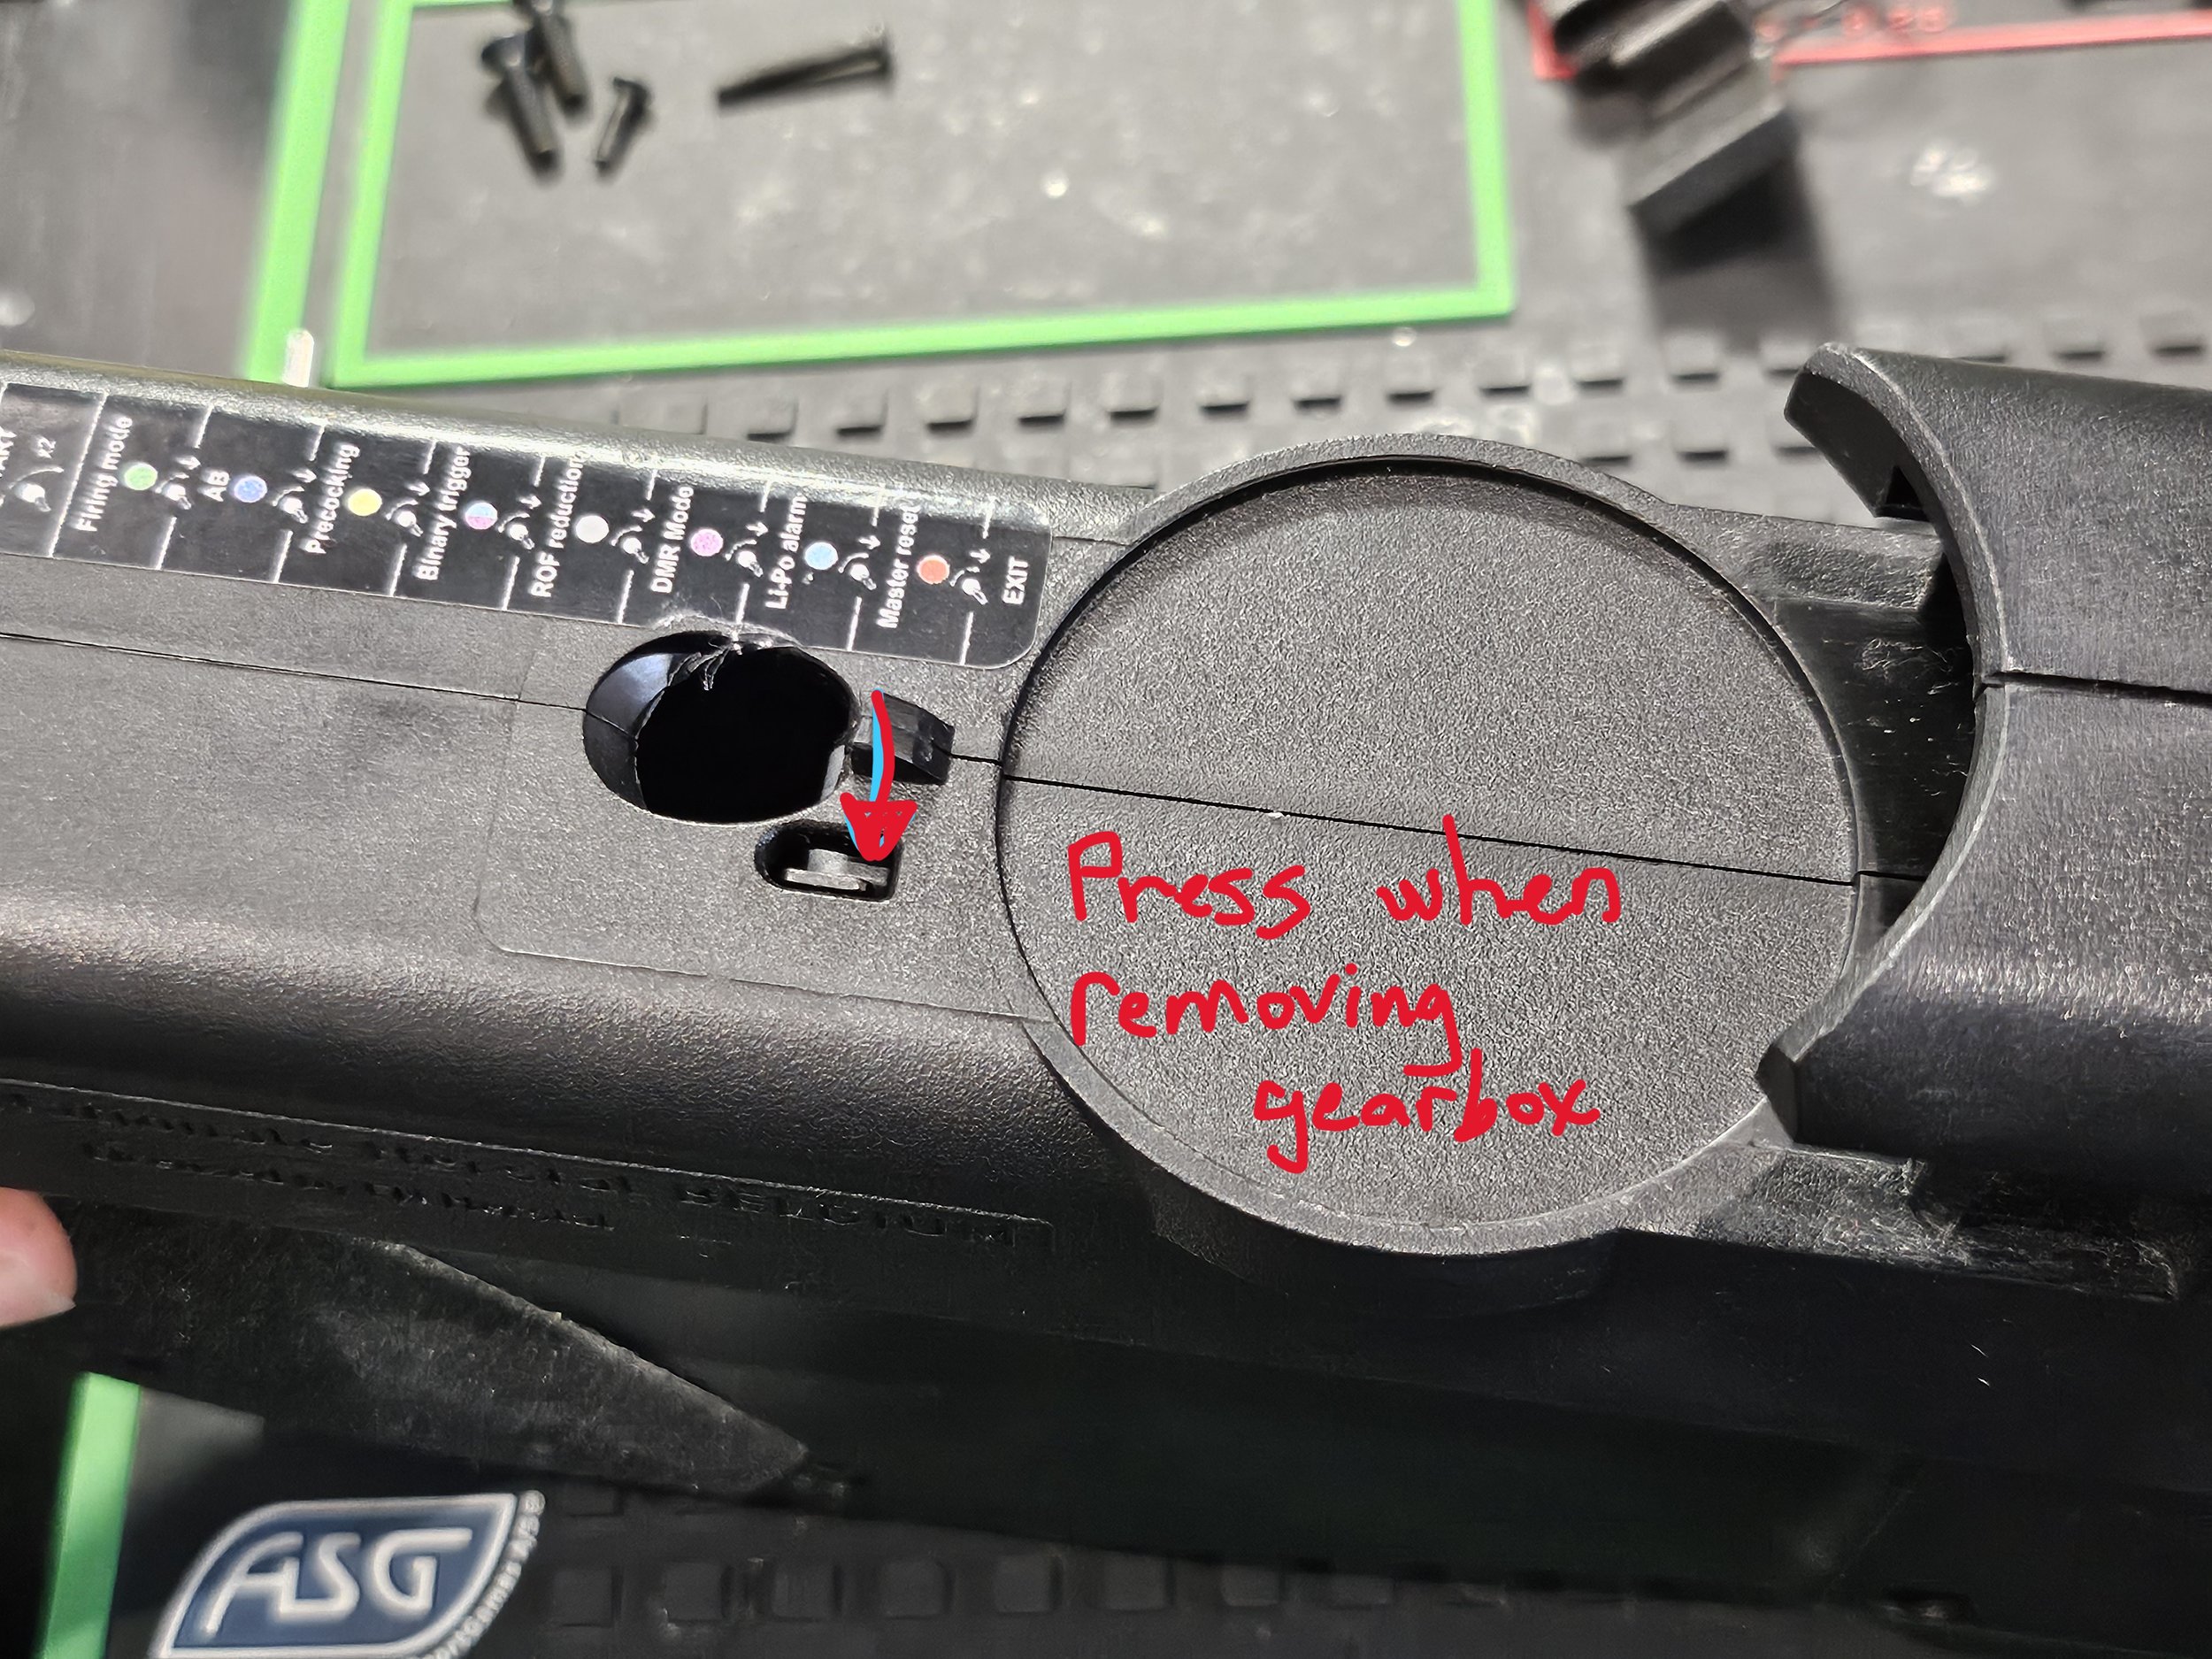
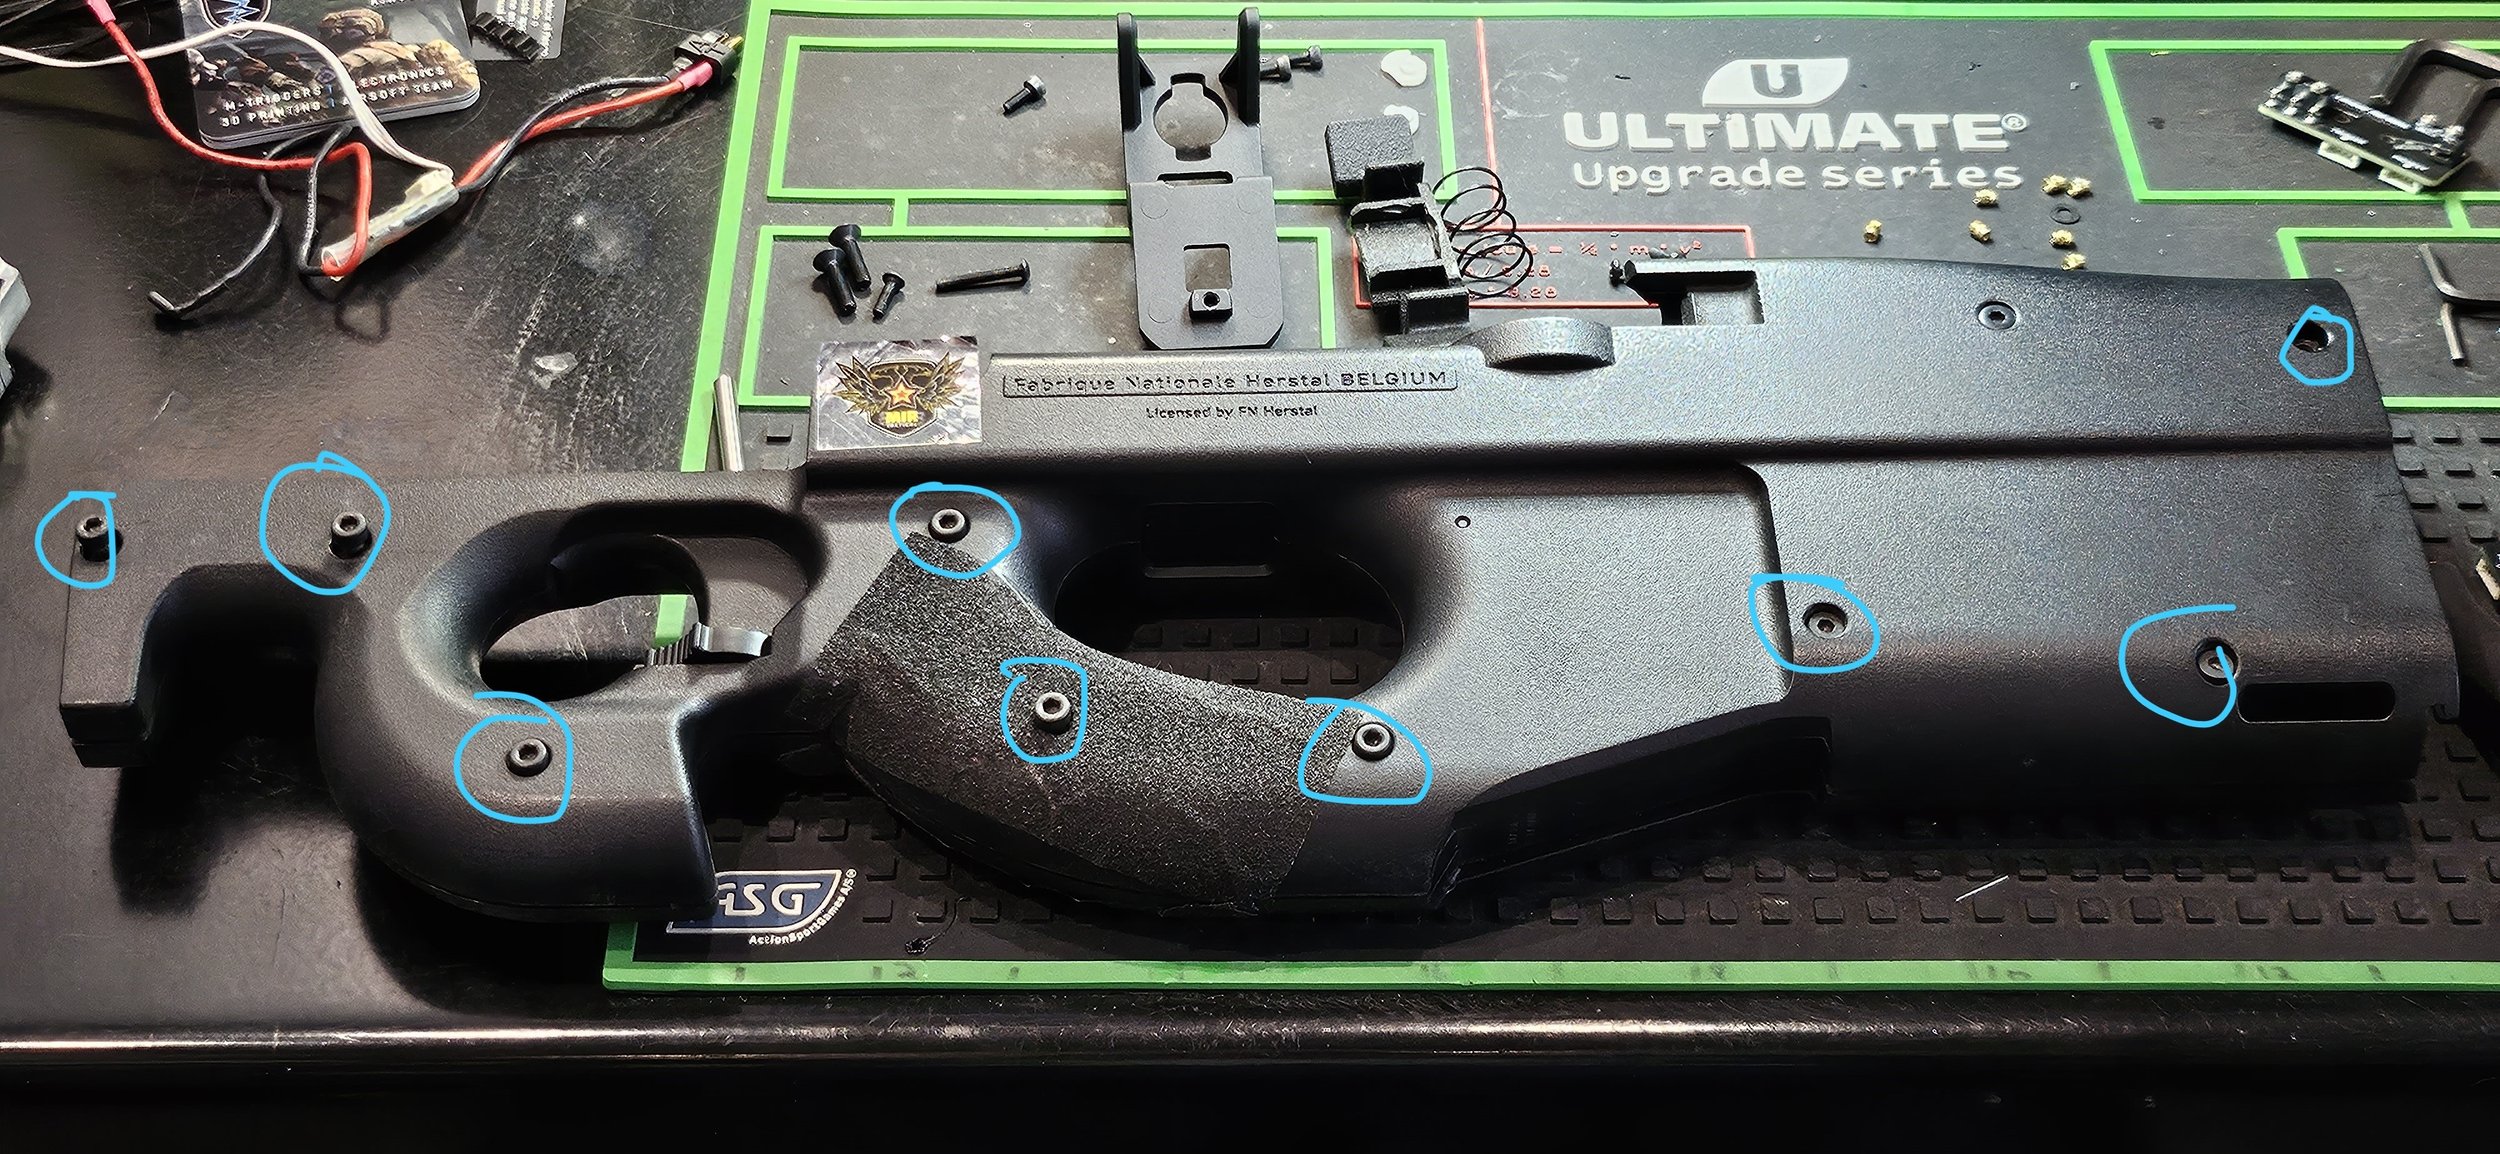
Remove the gearbox from the back of the gun.
Remove the front barrel assembly by pressing the button underneath the magazine and pushing forward.
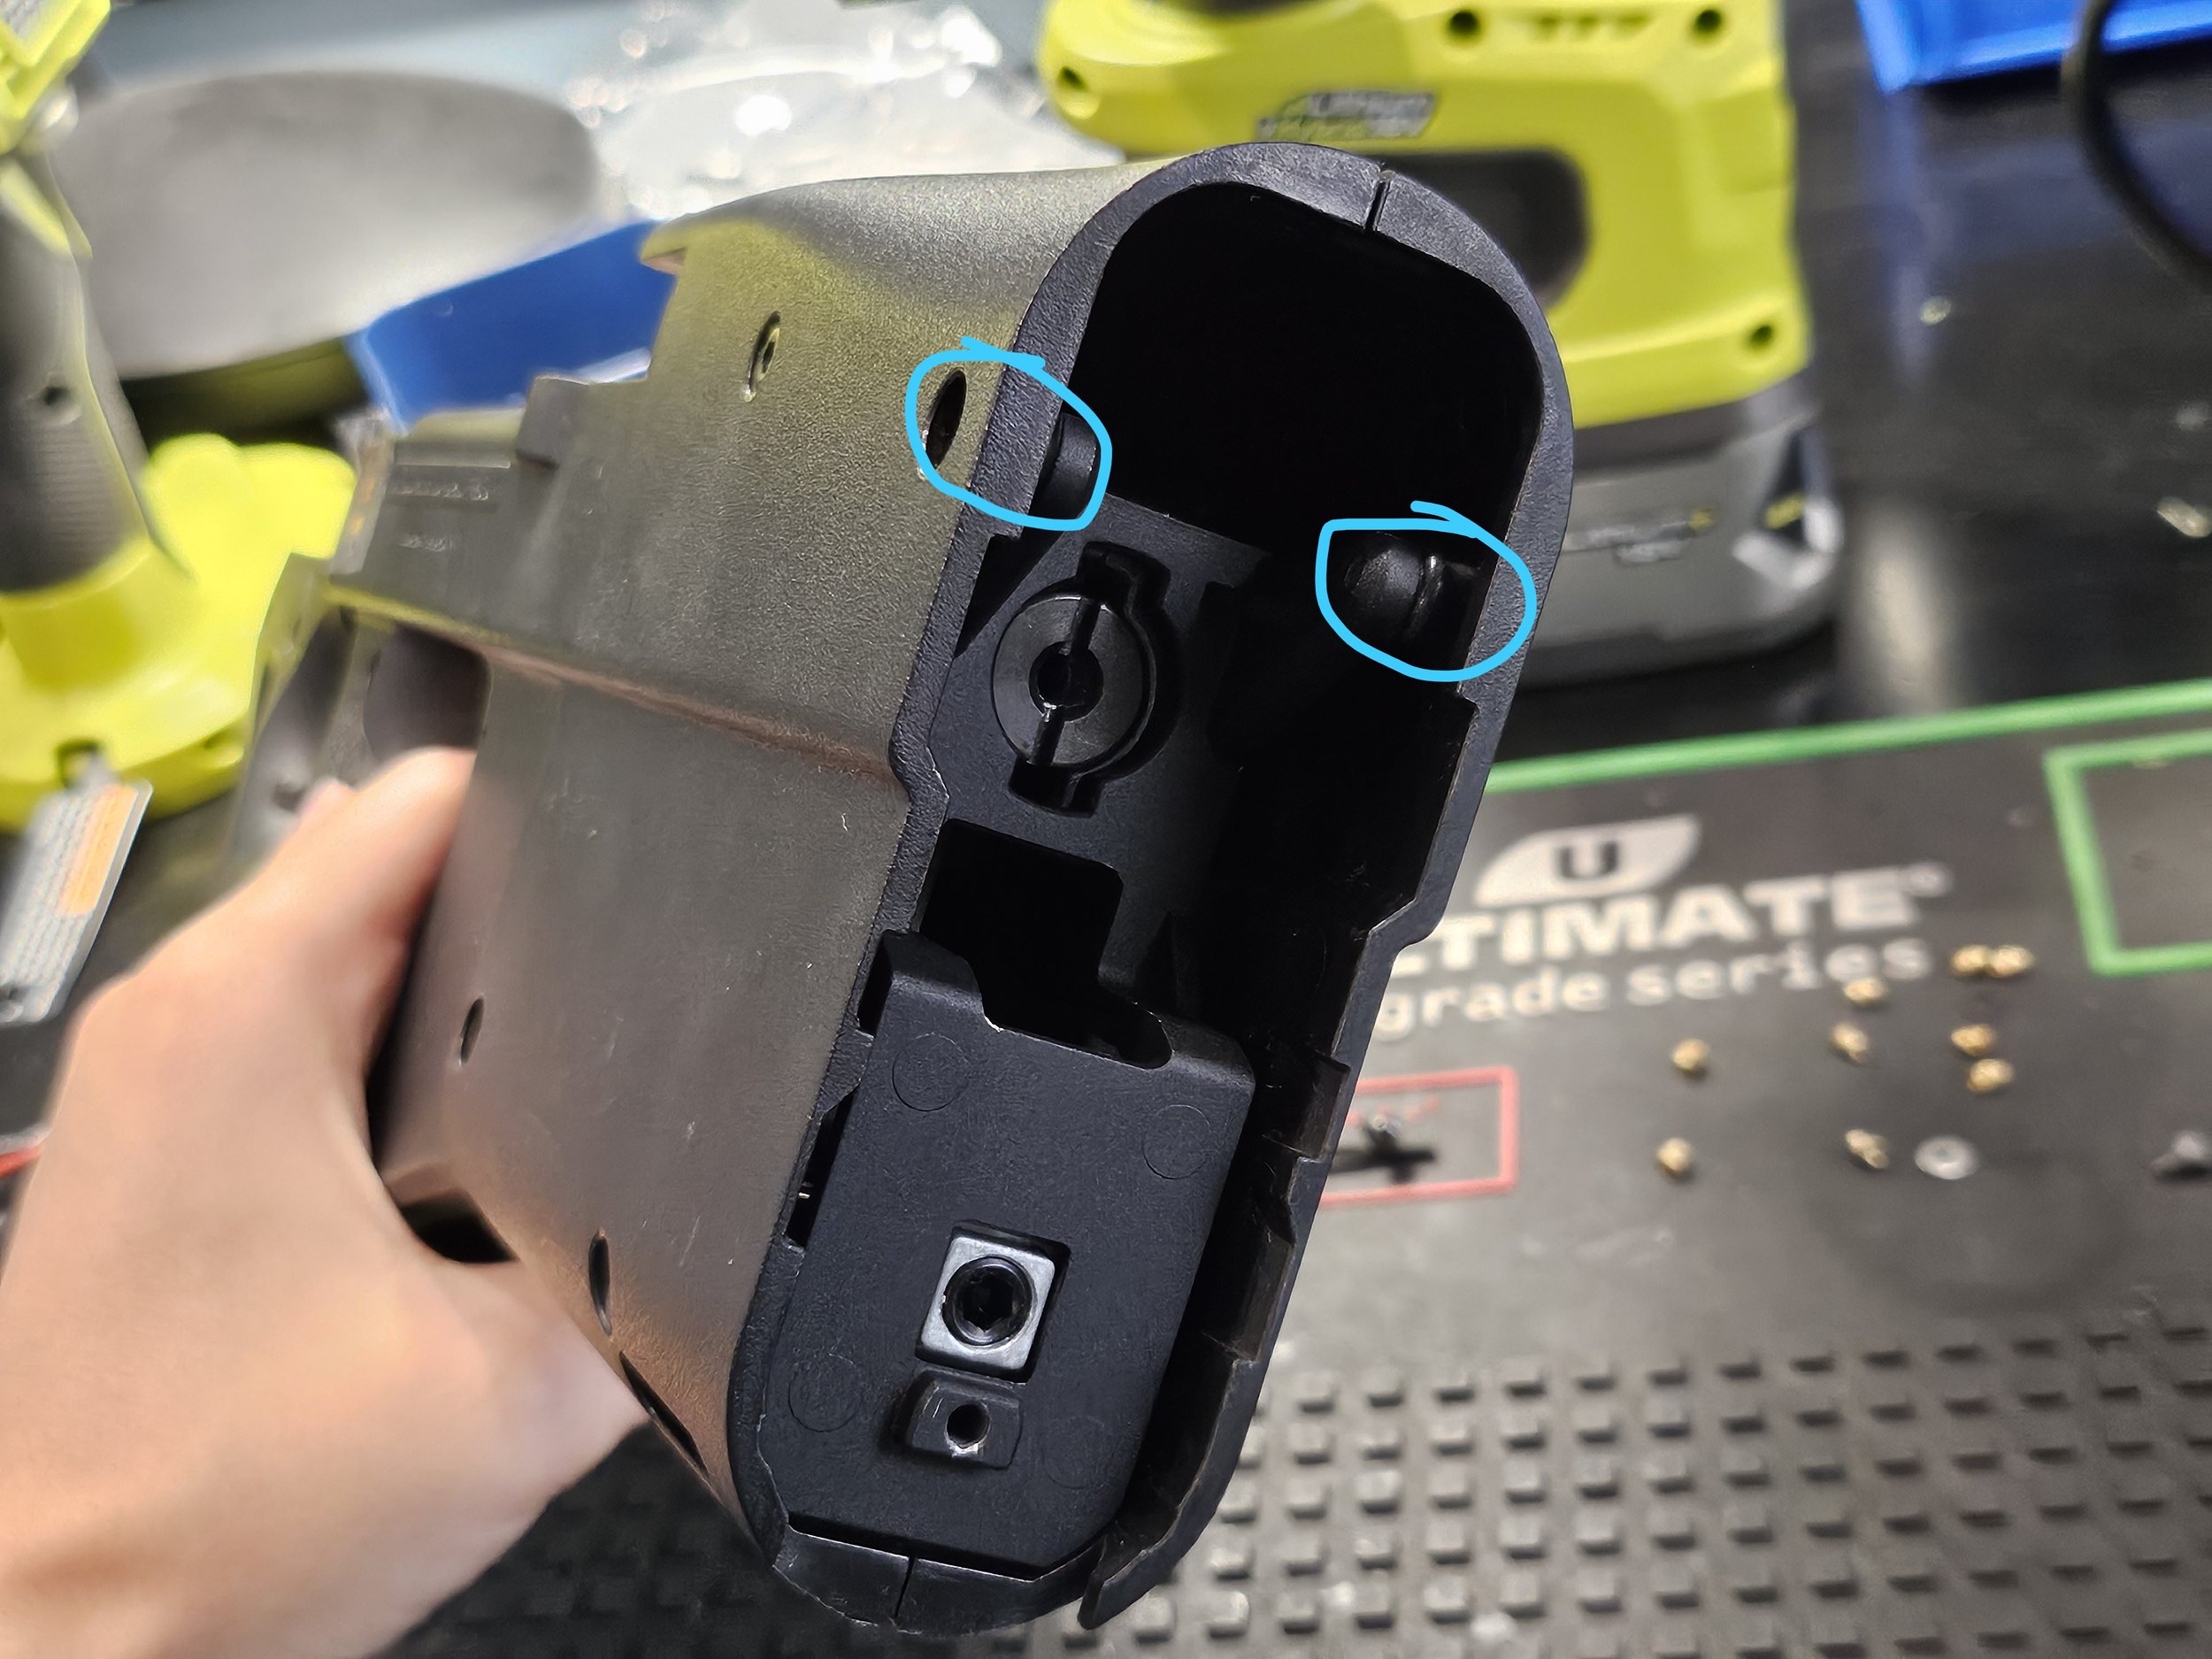
Disconnect the trigger bar and let it fall out the back of the gun.
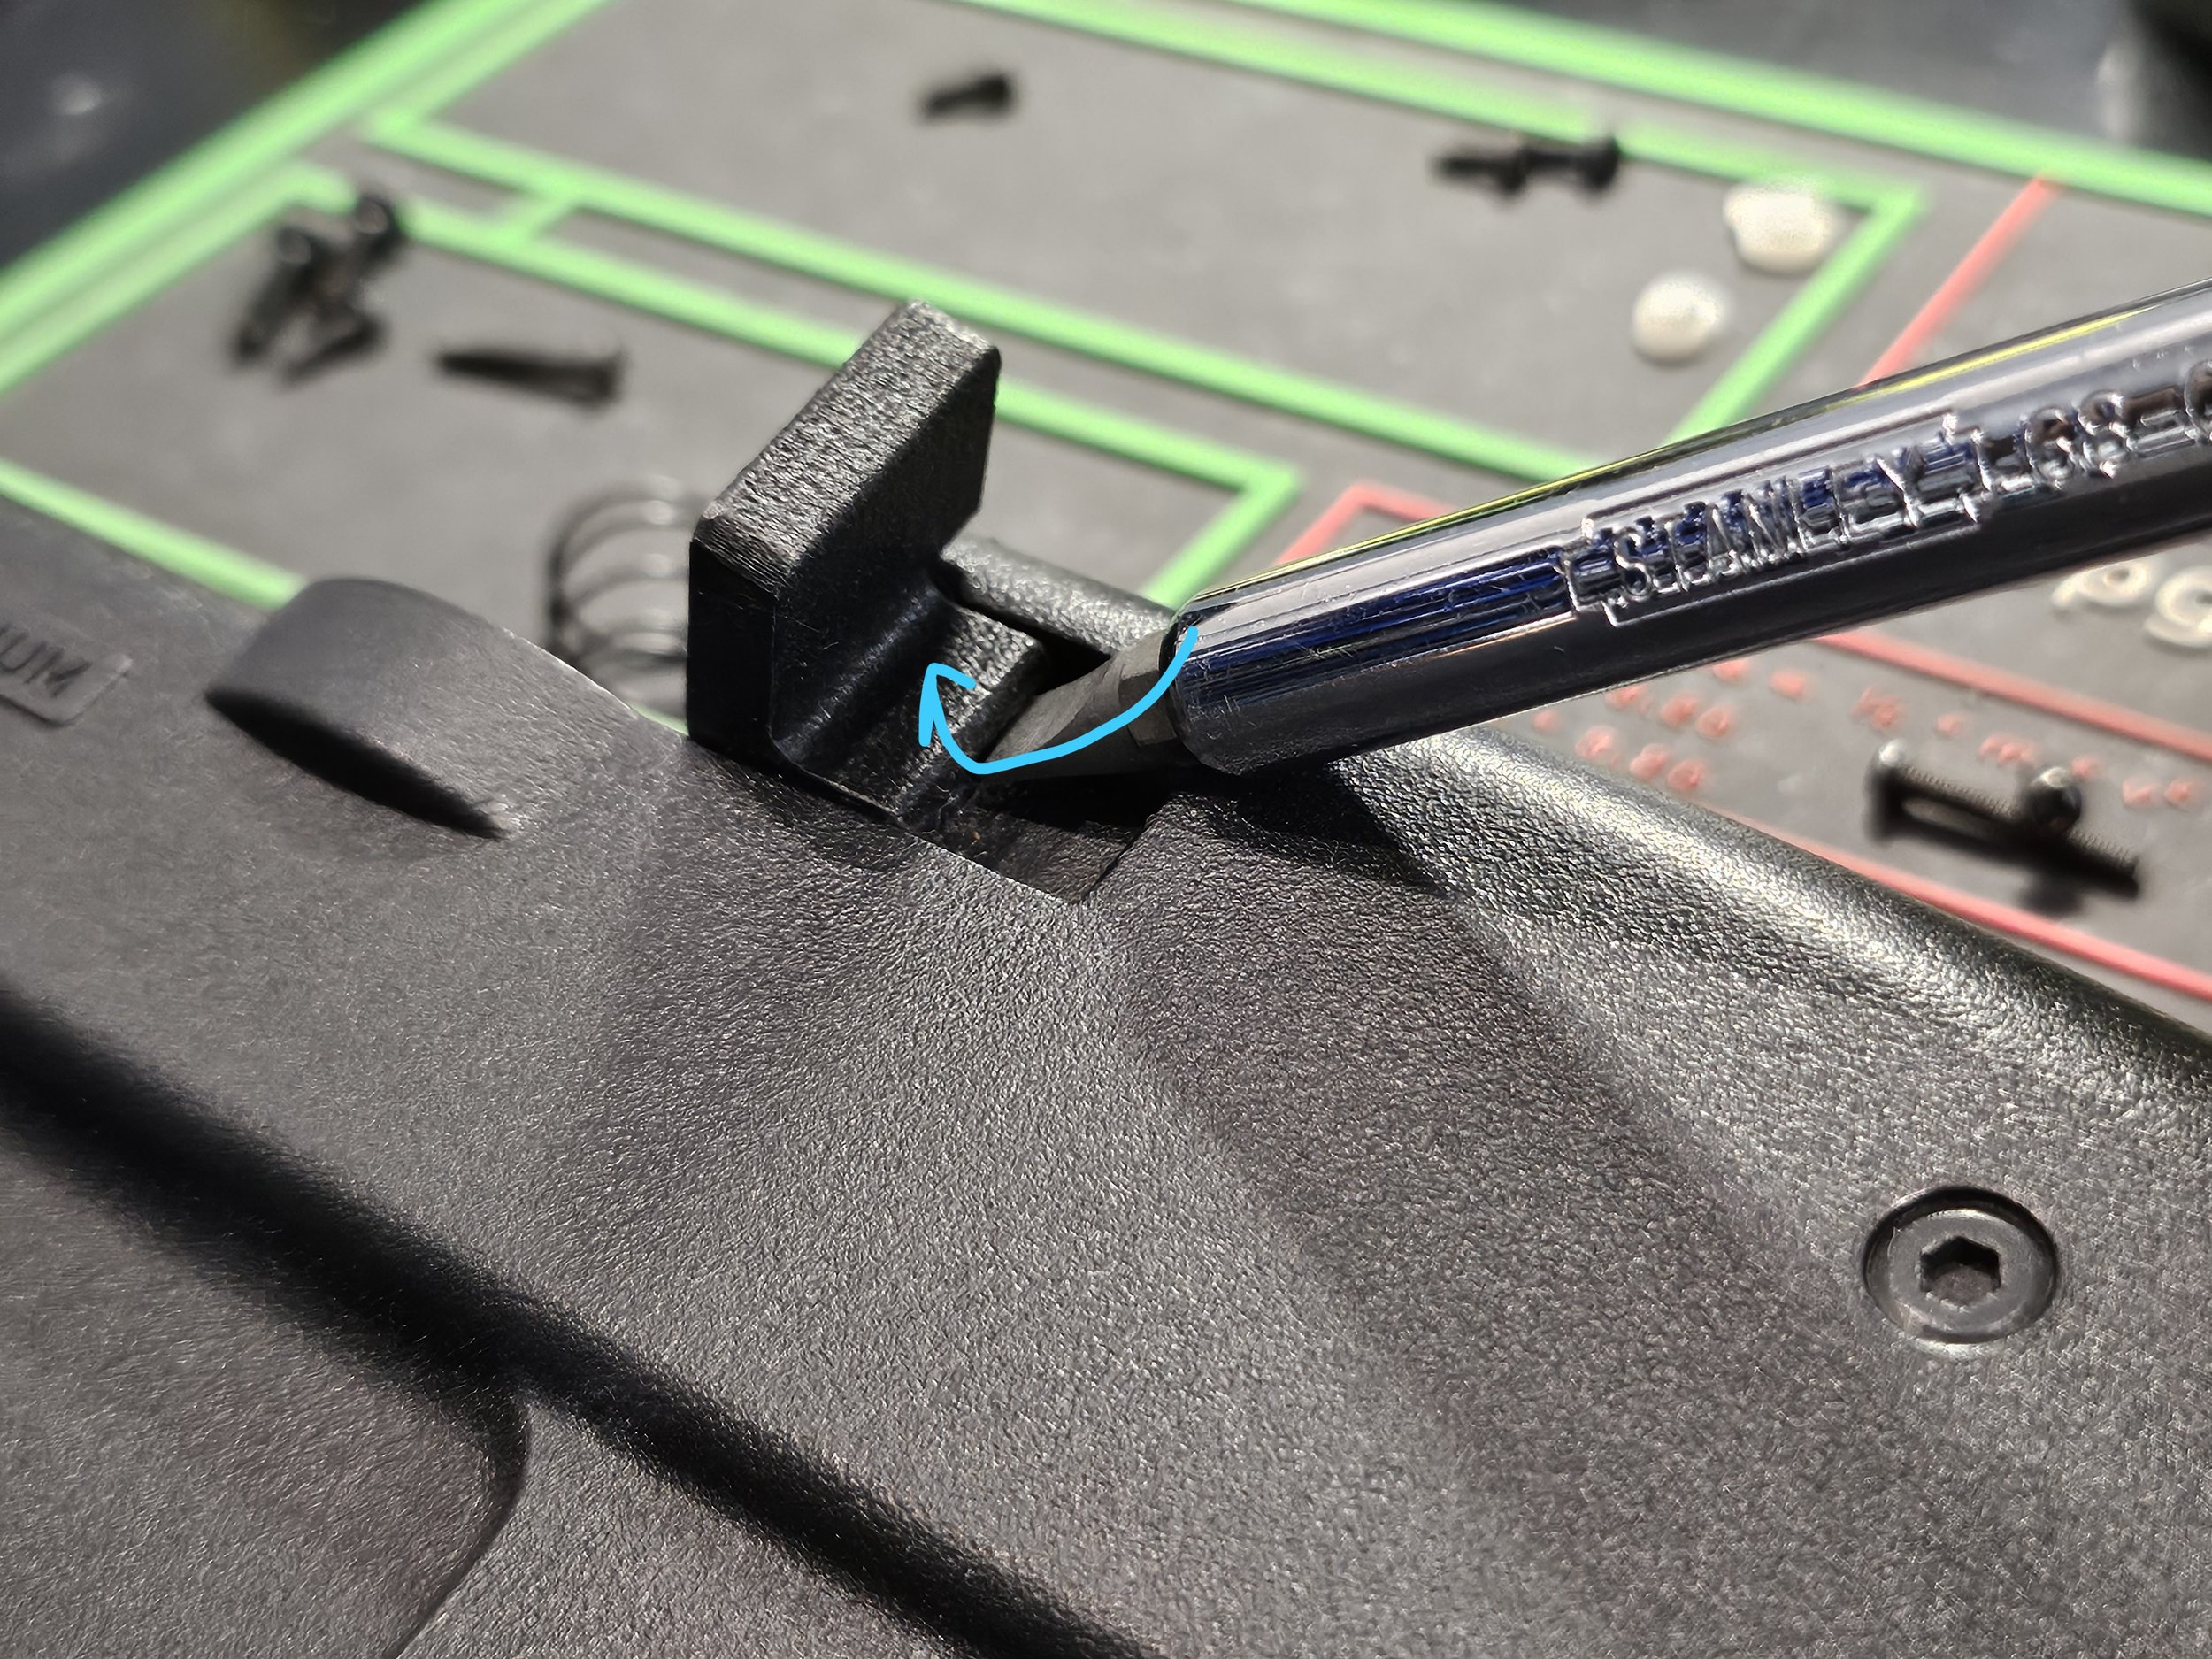
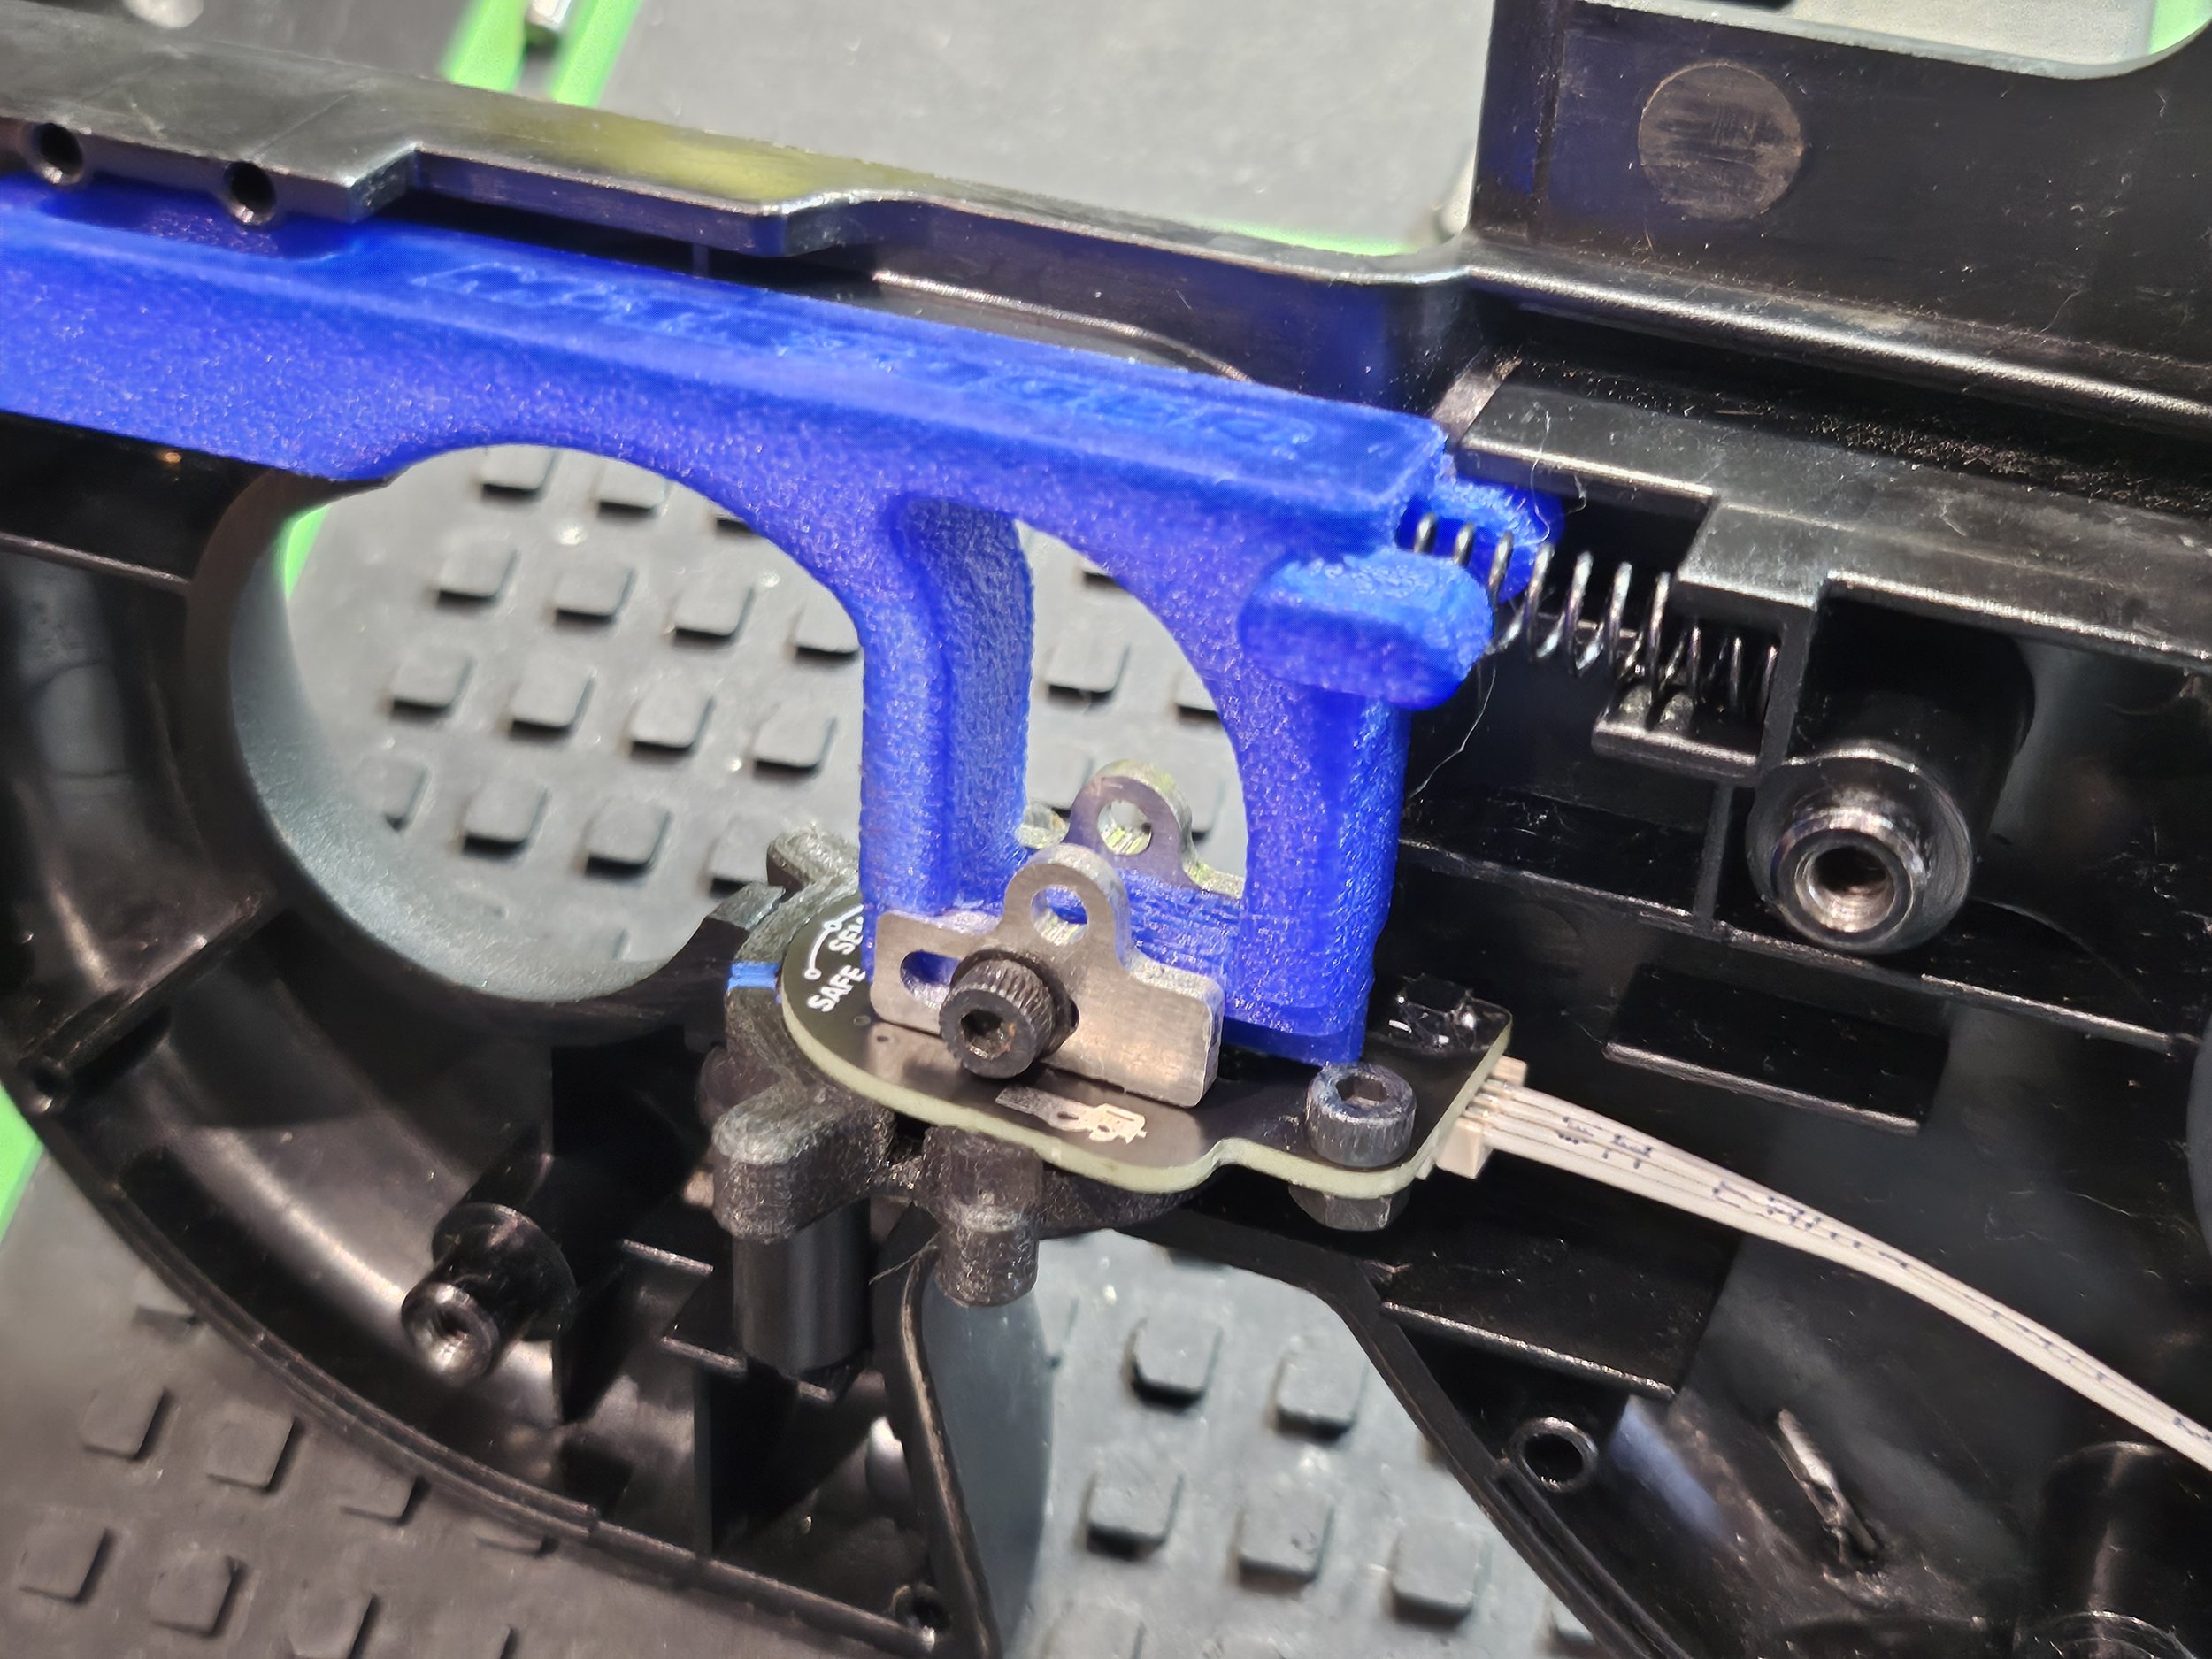
Remove the little square piece screwed into the front top of the trigger. Set the selector switch to Auto. Pull back the trigger all the way and lift up to completely remove the trigger. Then remove the selector switch.
Install the M-Trigger ETU selector switch and trigger
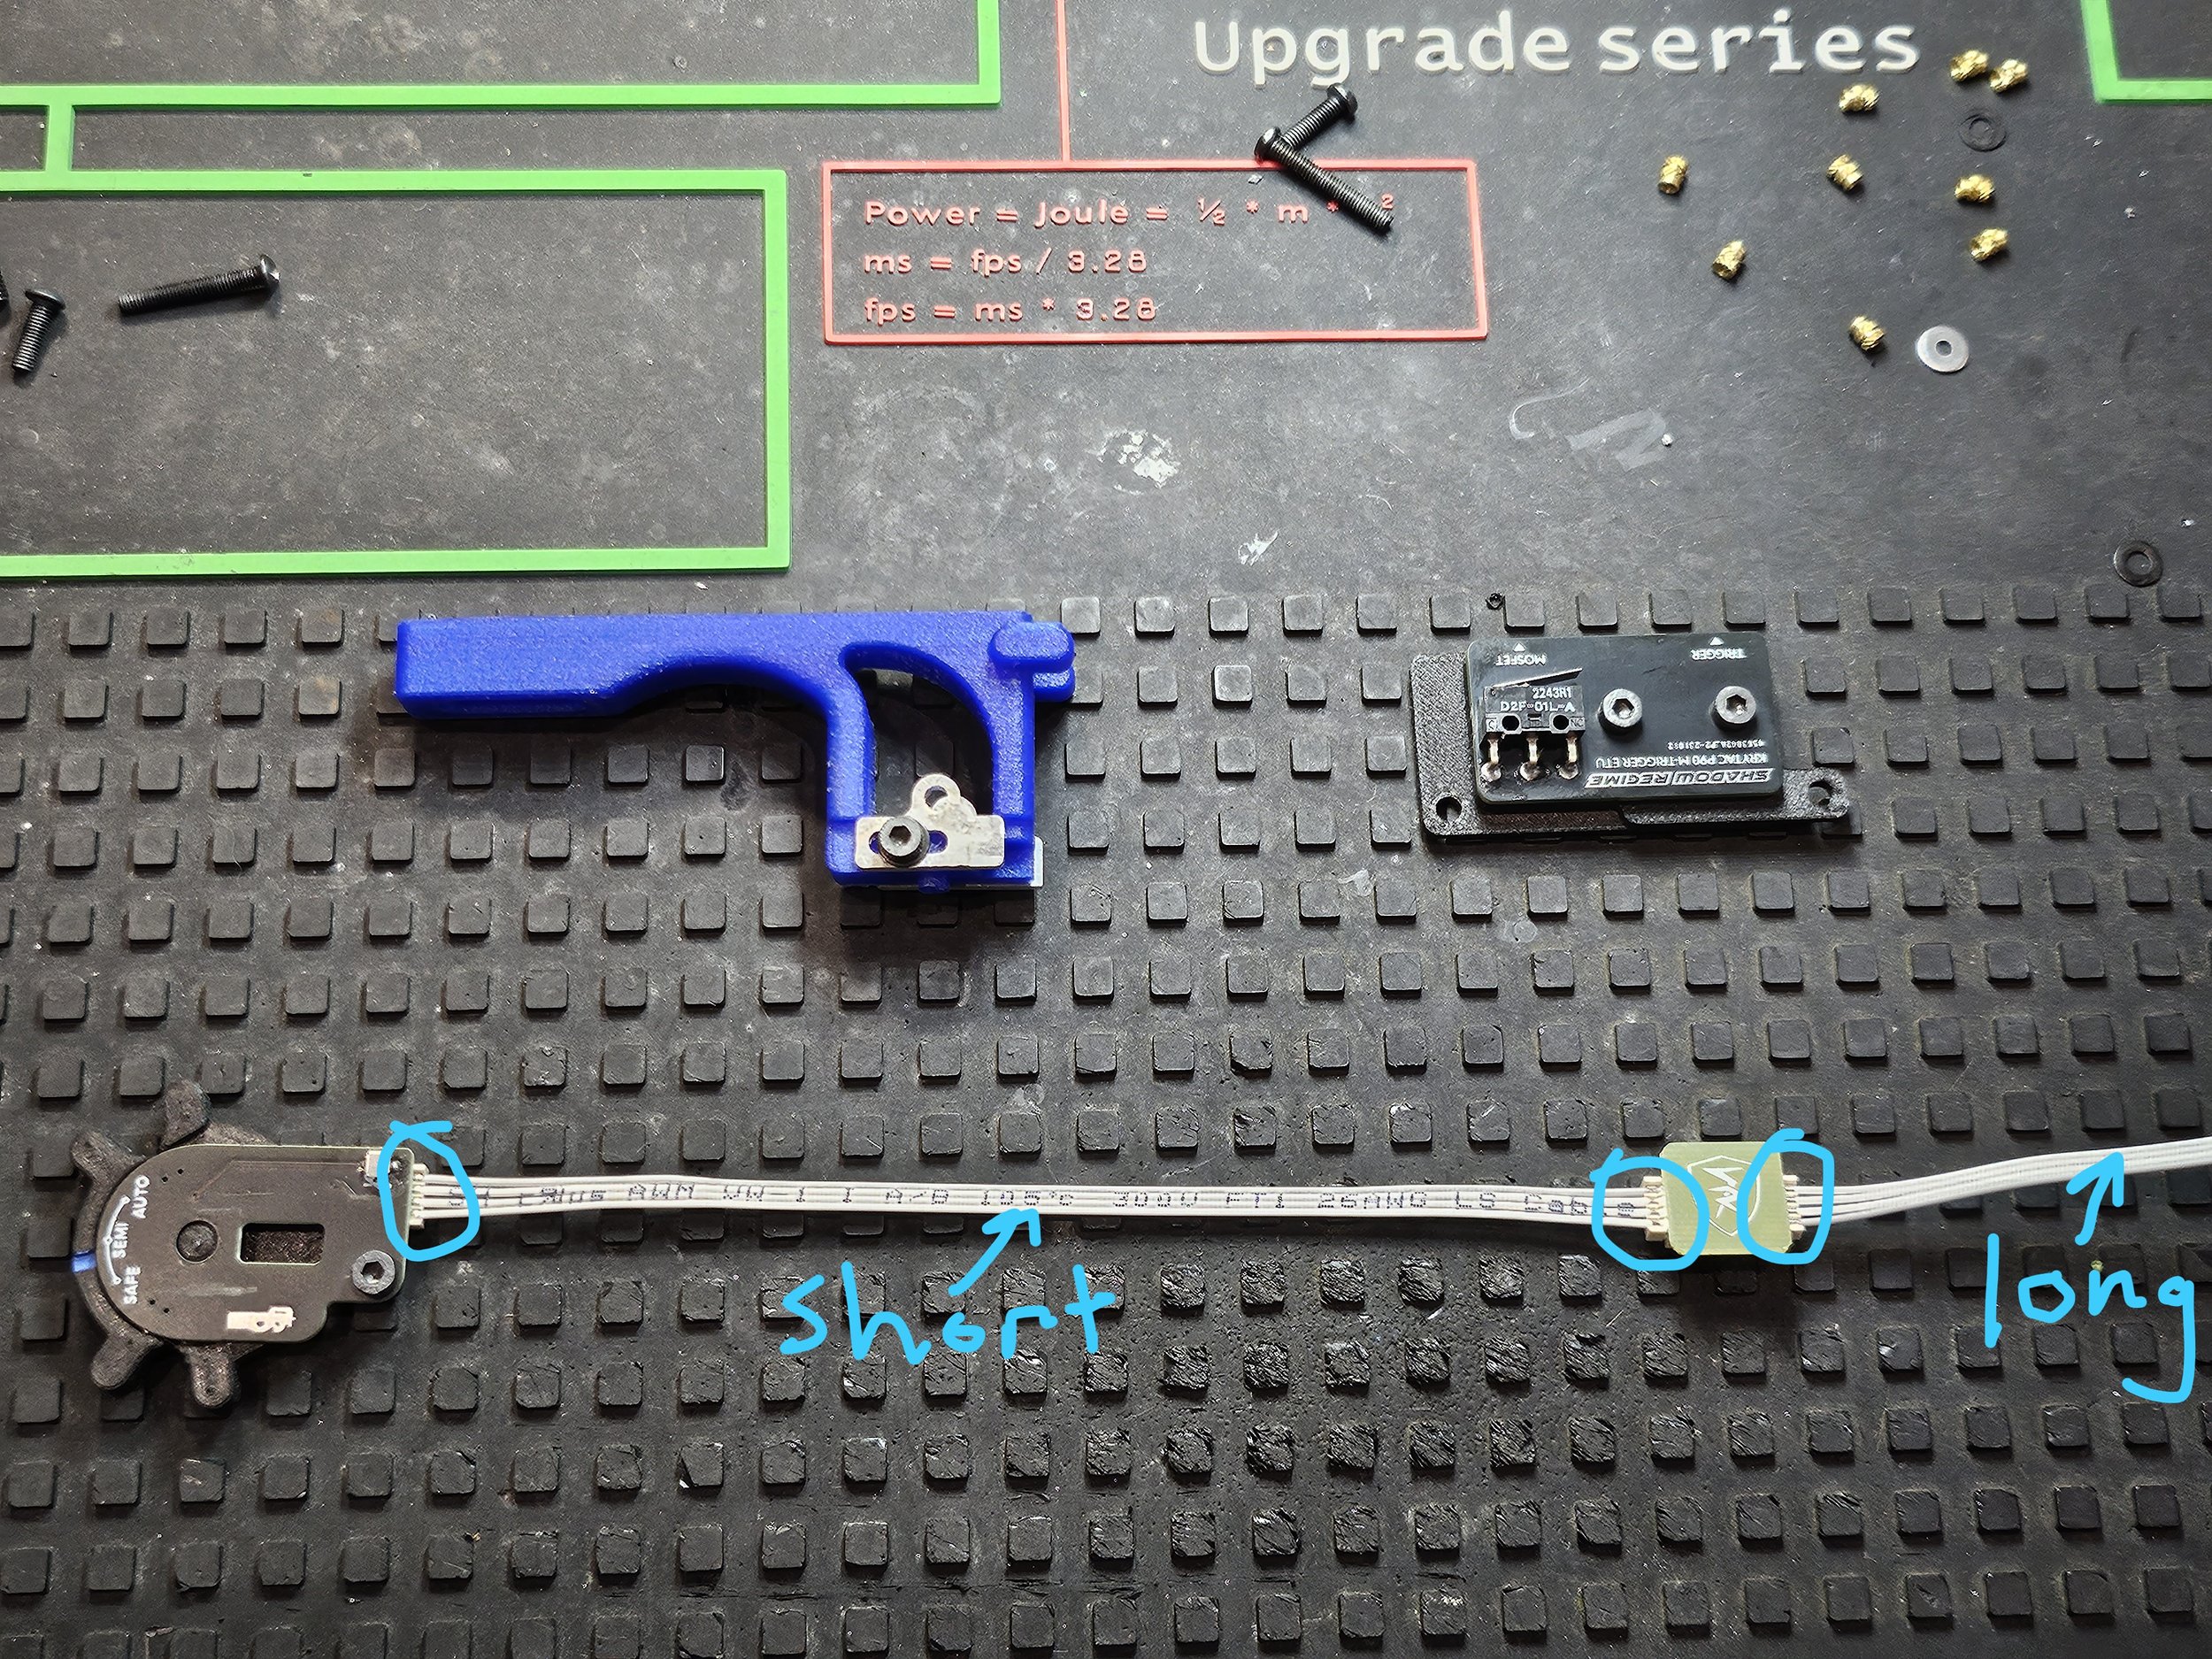
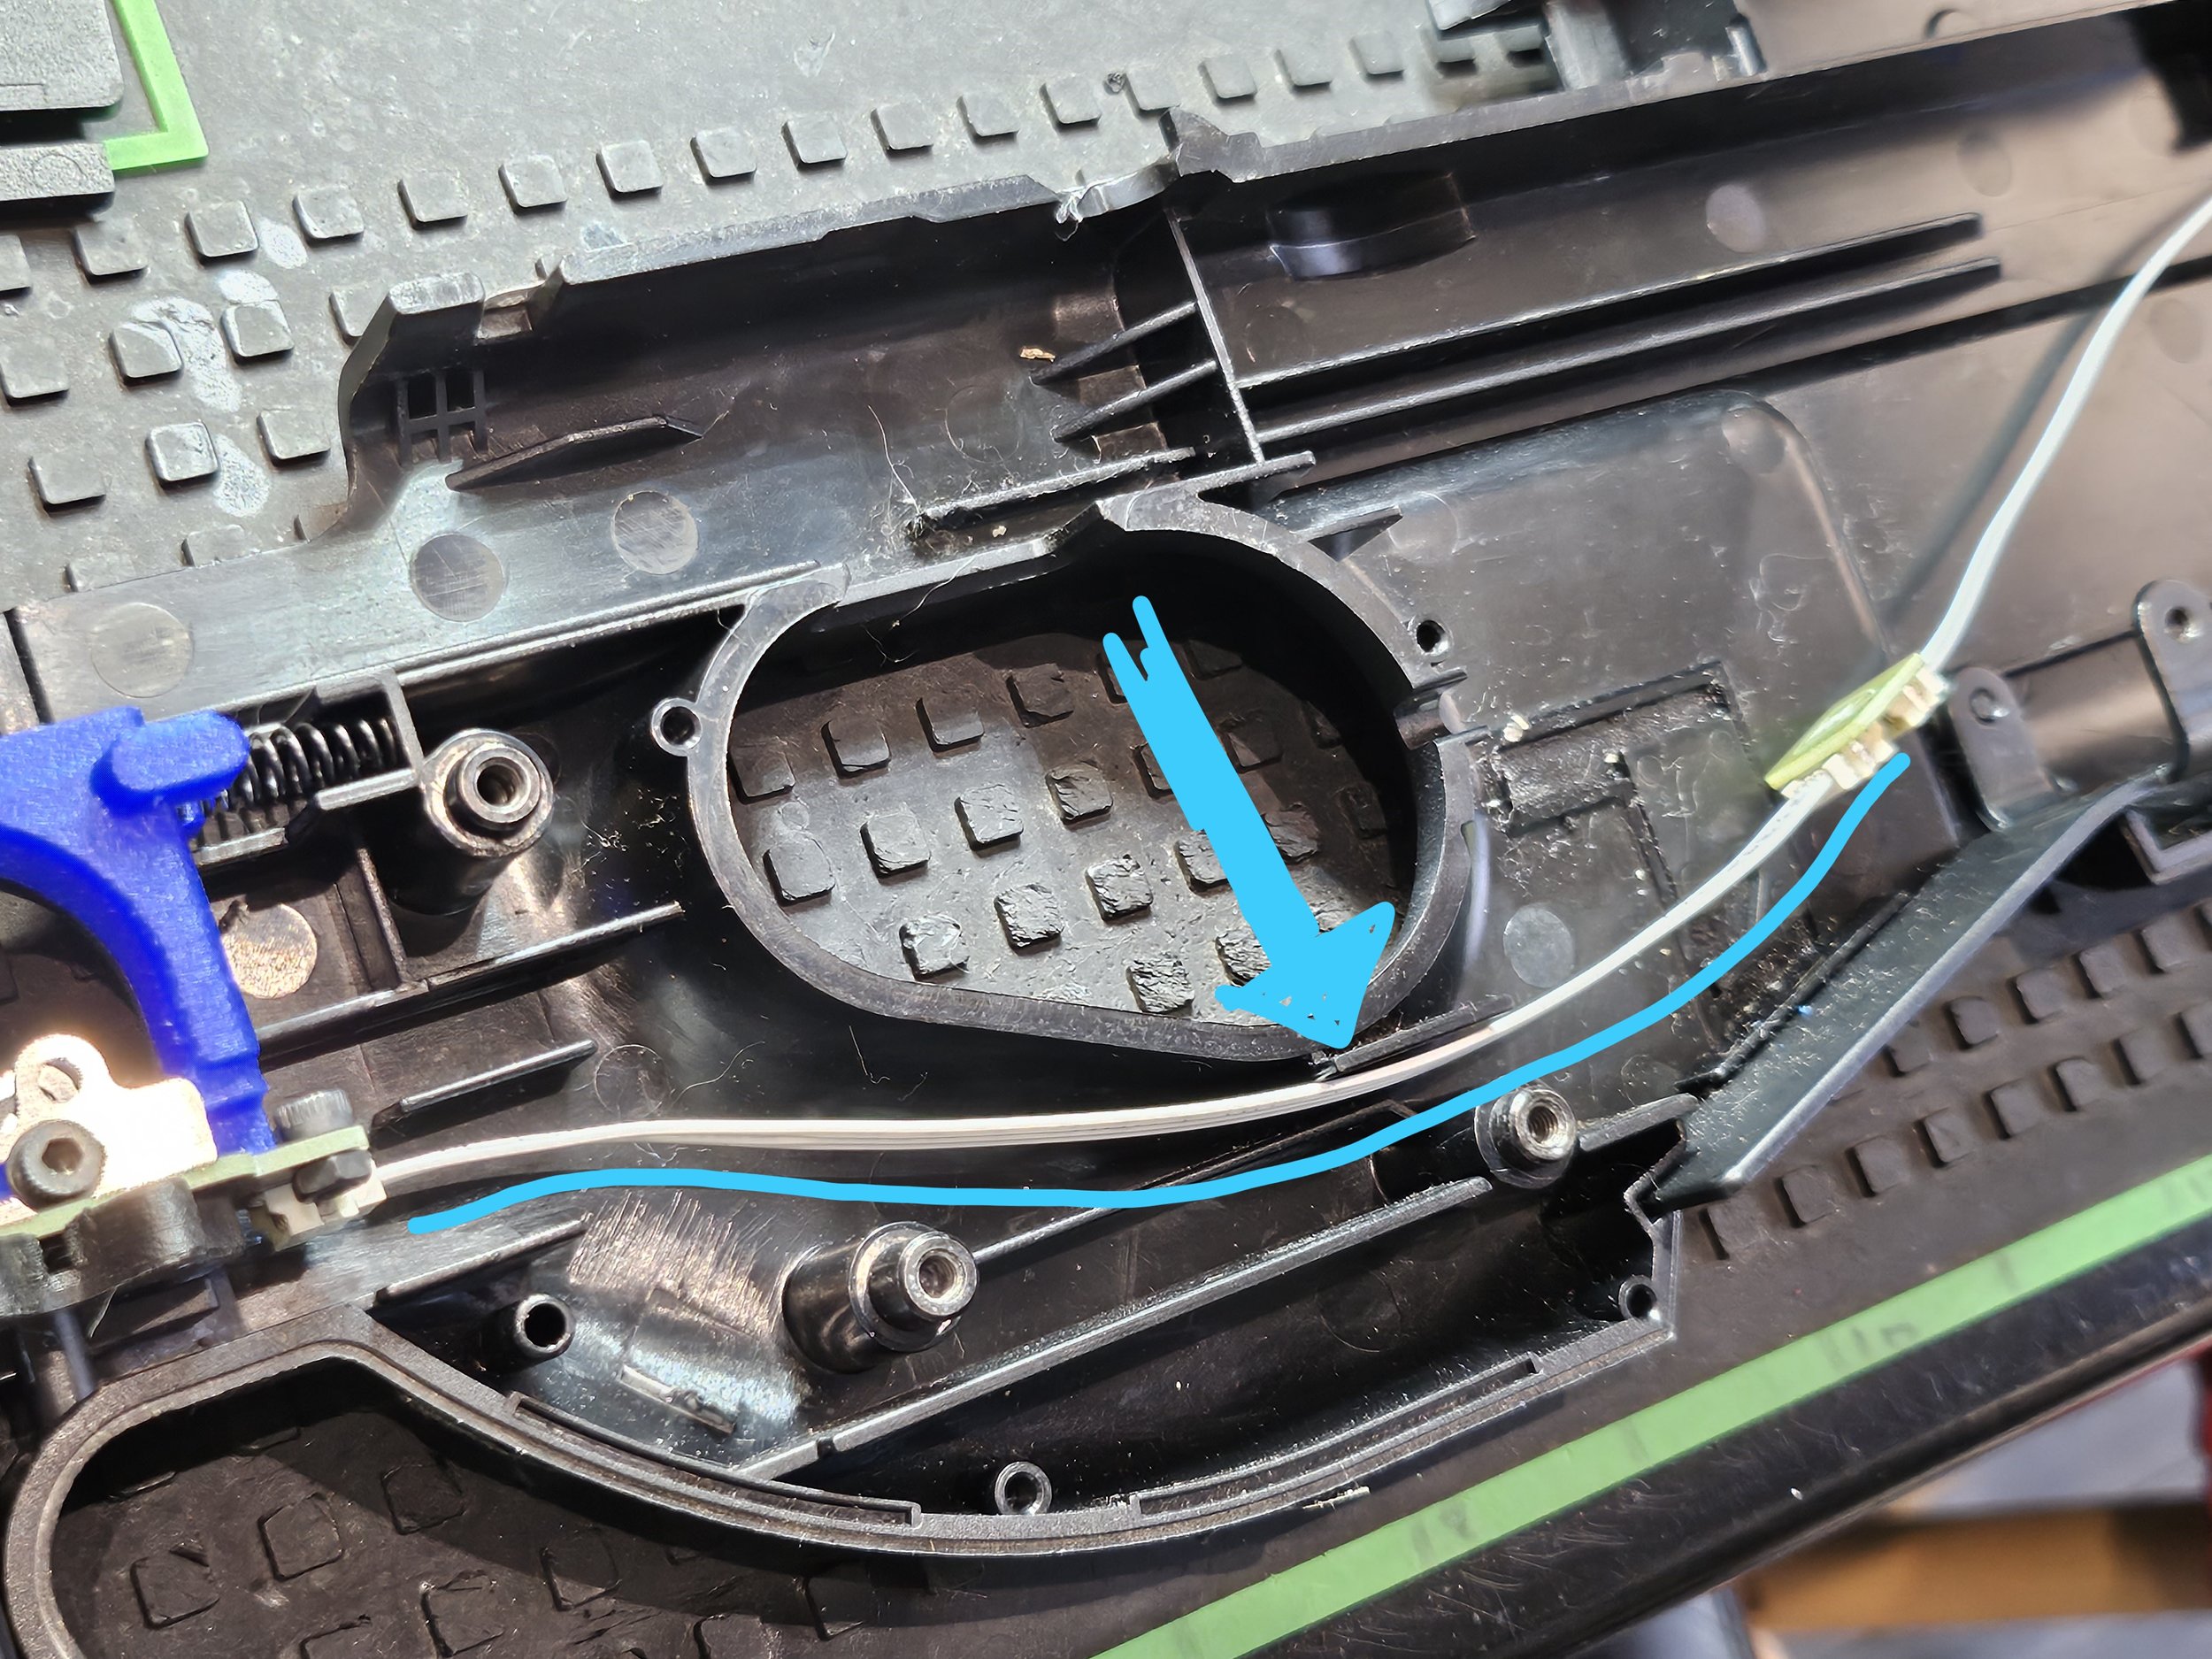
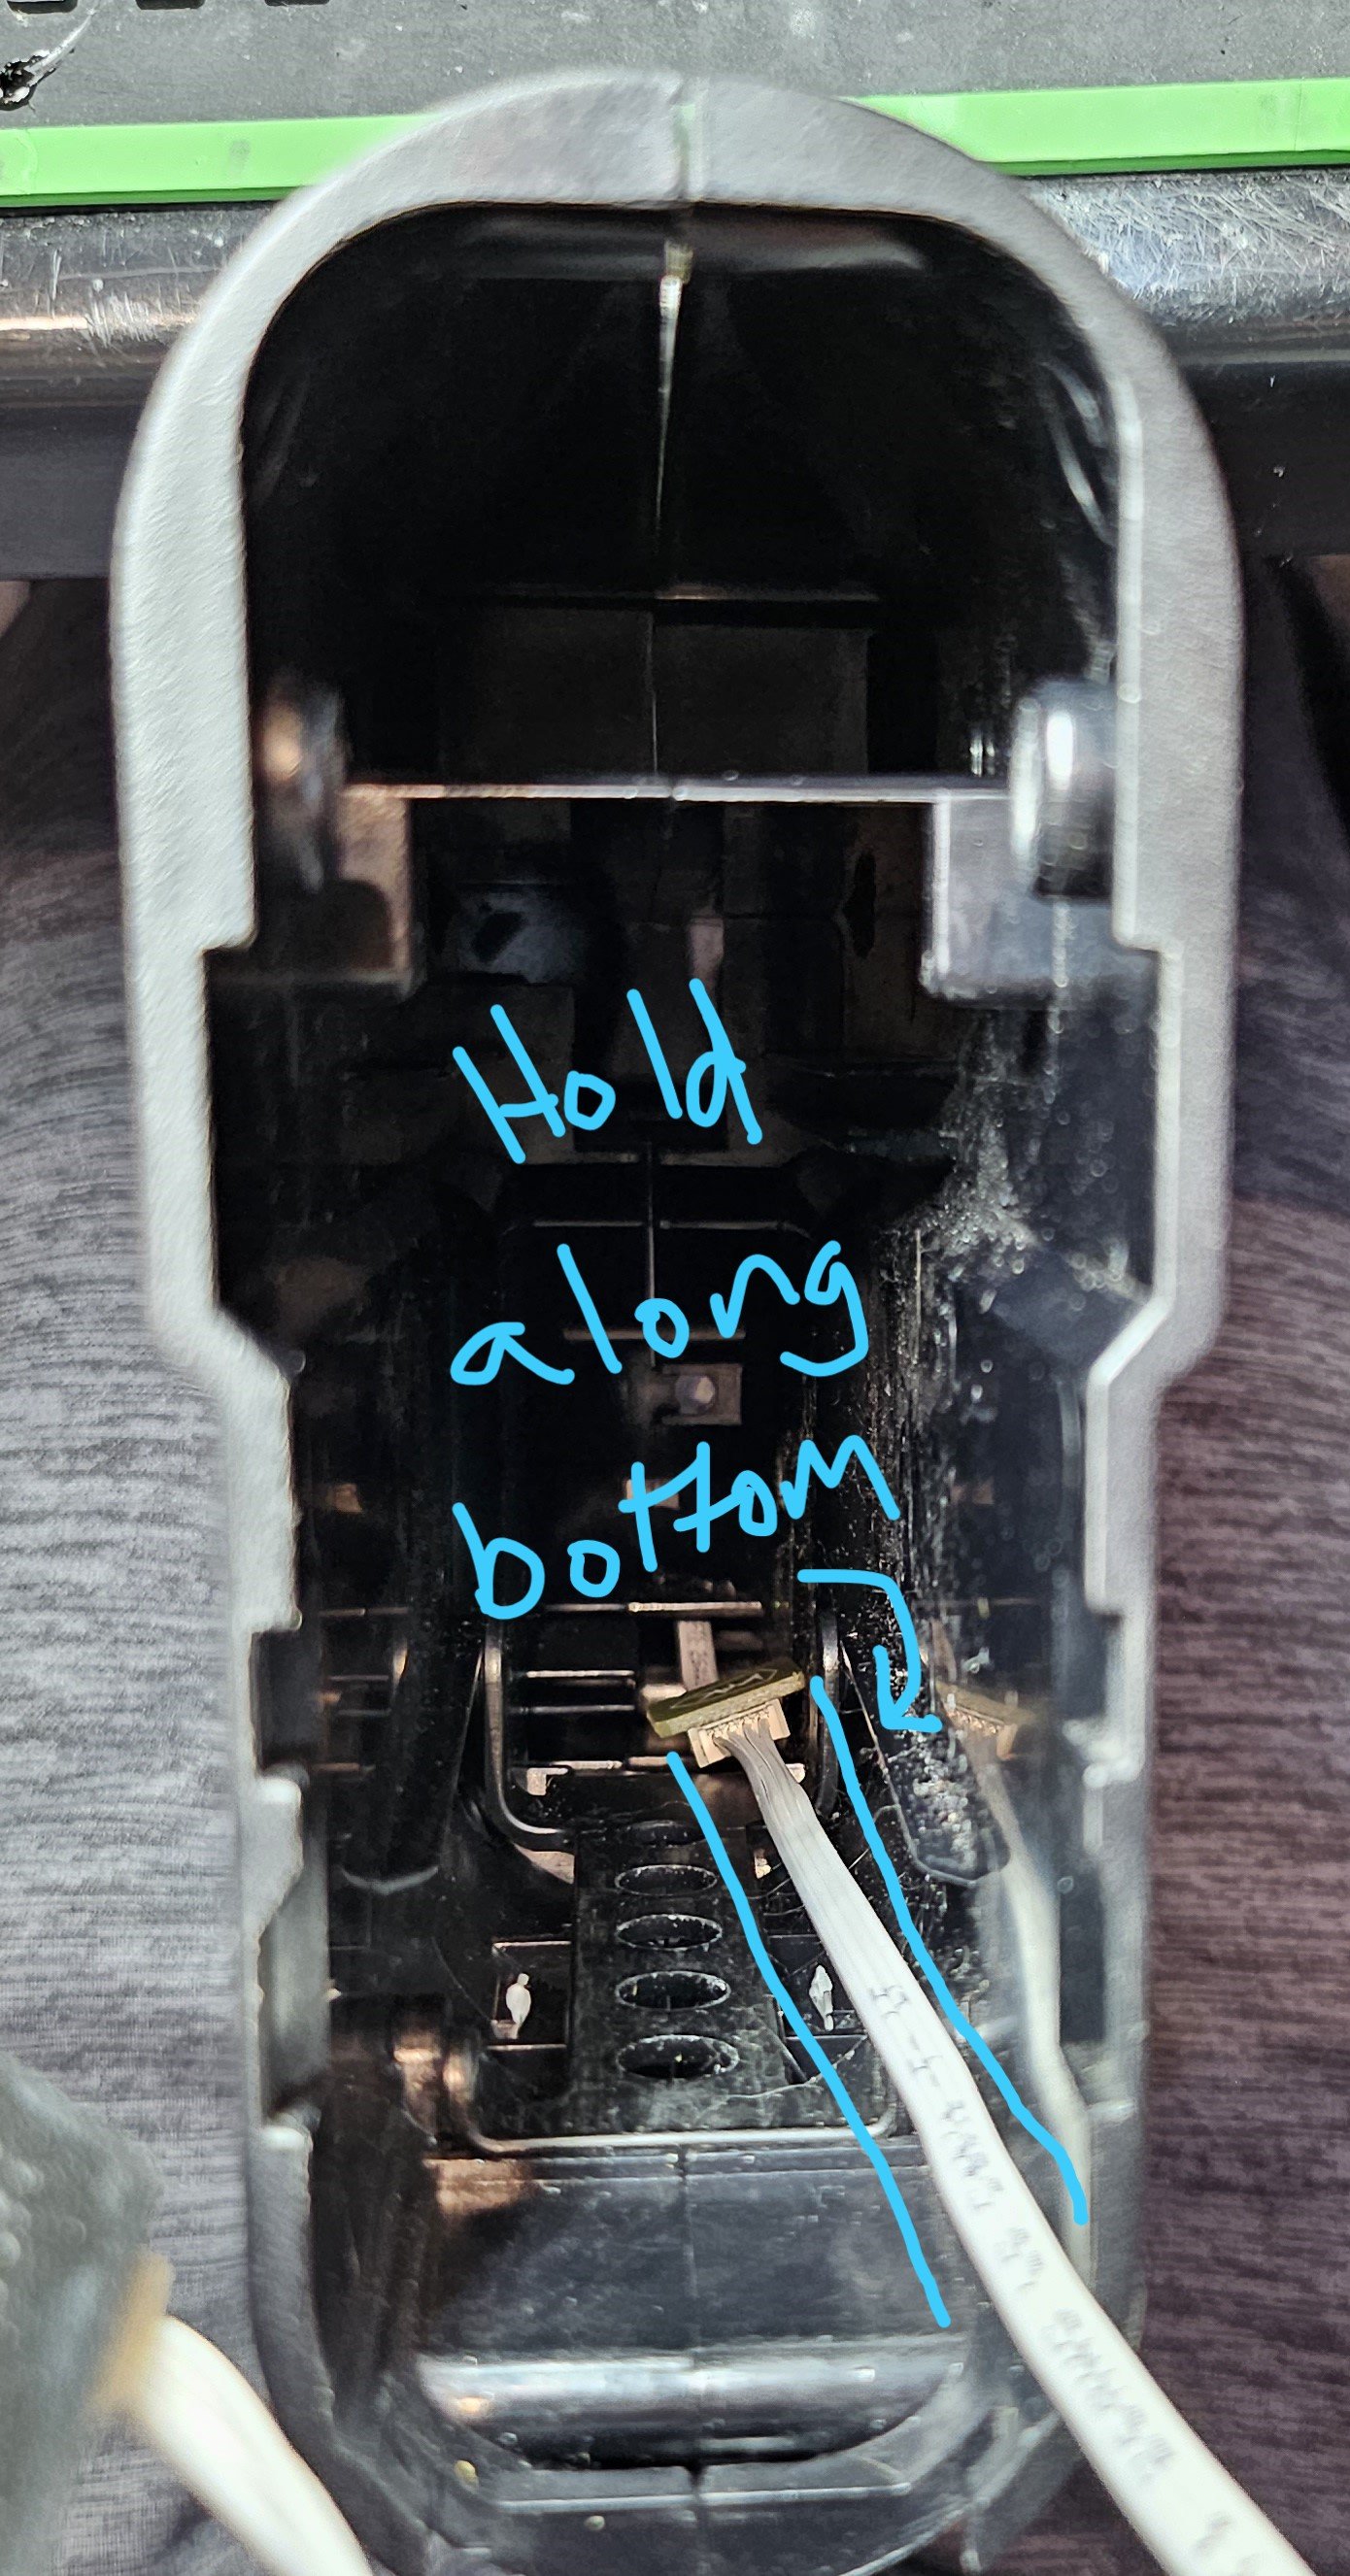
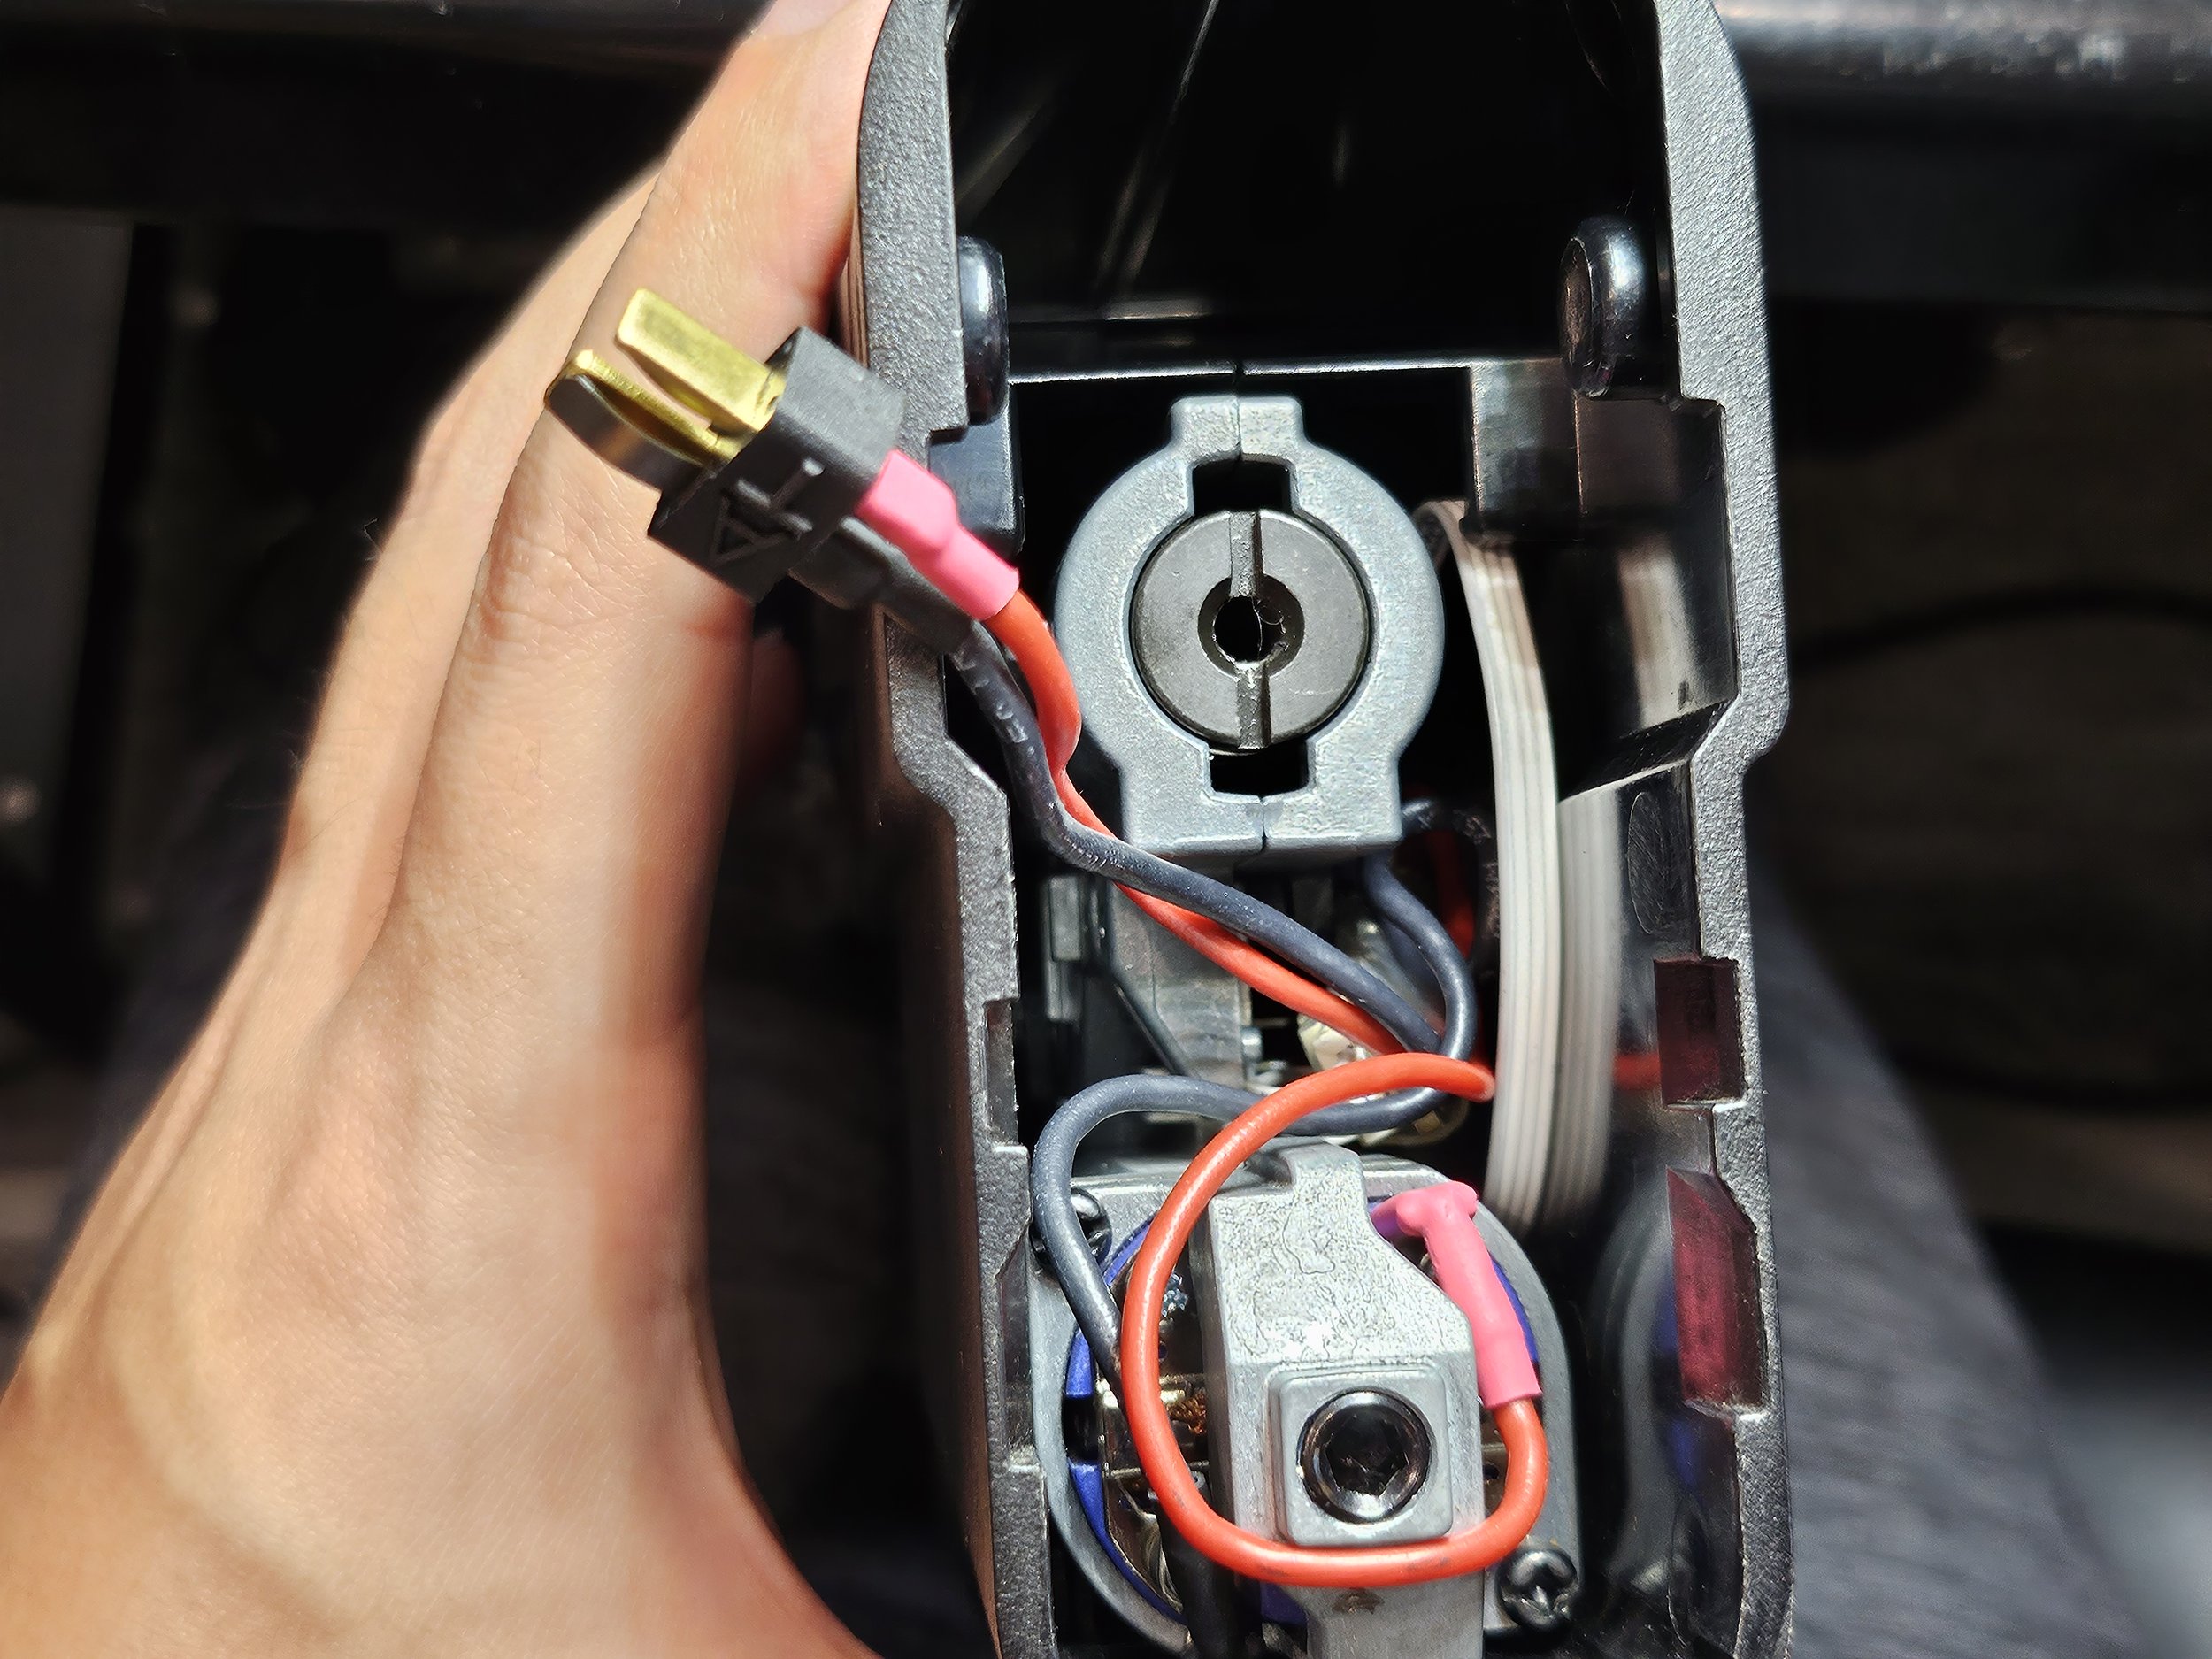
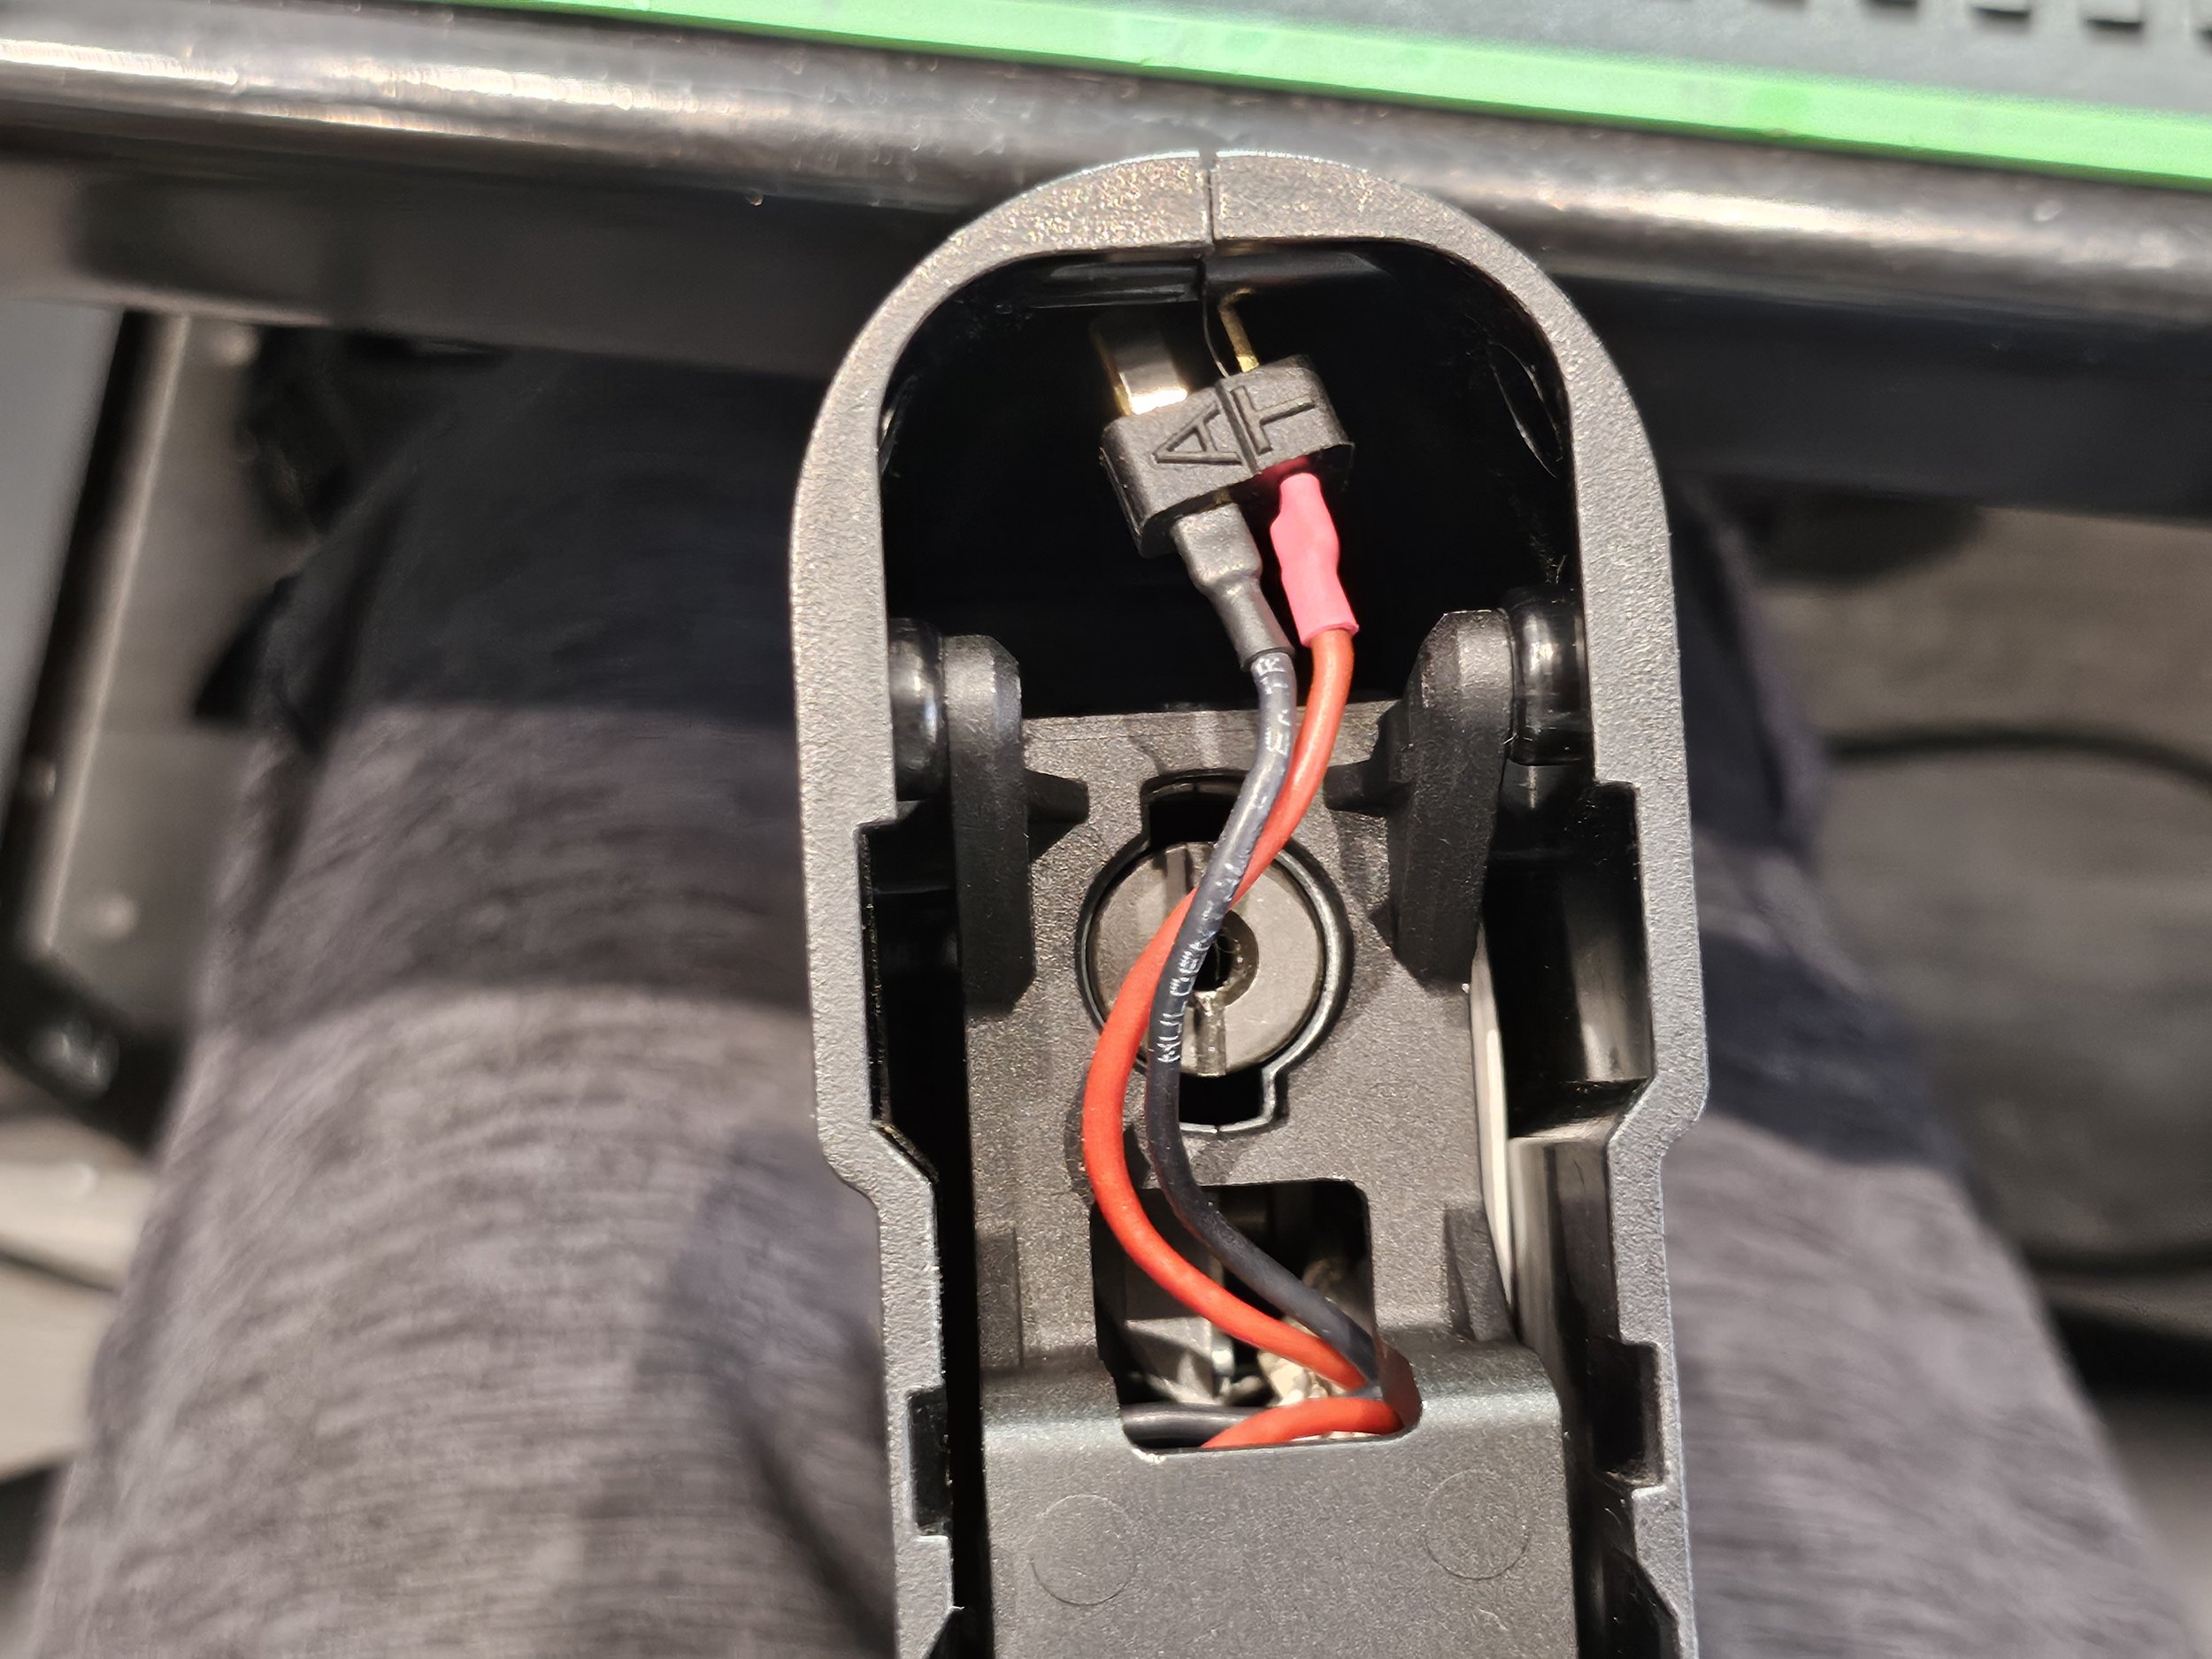
Take the selector switch circuit board and plug in a short cable, then the little double sided extension board, then the long cable in series. Feed the end of the cable from where the selector switch goes, then through the hollow hand grip, then all the way out the back of the gun. Alternatively, you can feed the cable through the top of the gun along the channel where the trigger bar used to be, but there is a greater risk of pinching the cables when you put the front assembly back on. Then you can place the selector board on your custom selector switch and fit it in the gun where the selector switch goes.
Remove the metal sliders from your M-Trigger ETU trigger, and remove the small rectangular piece on top. Install your trigger into the gun by sliding the trigger guide pin into the slots, just like the original trigger. Reattach the small rectangular piece to secure the trigger.
Reinstall the metal trigger sliders. The short one goes on the left, the long one on the right. The thick end of each goes towards the back.
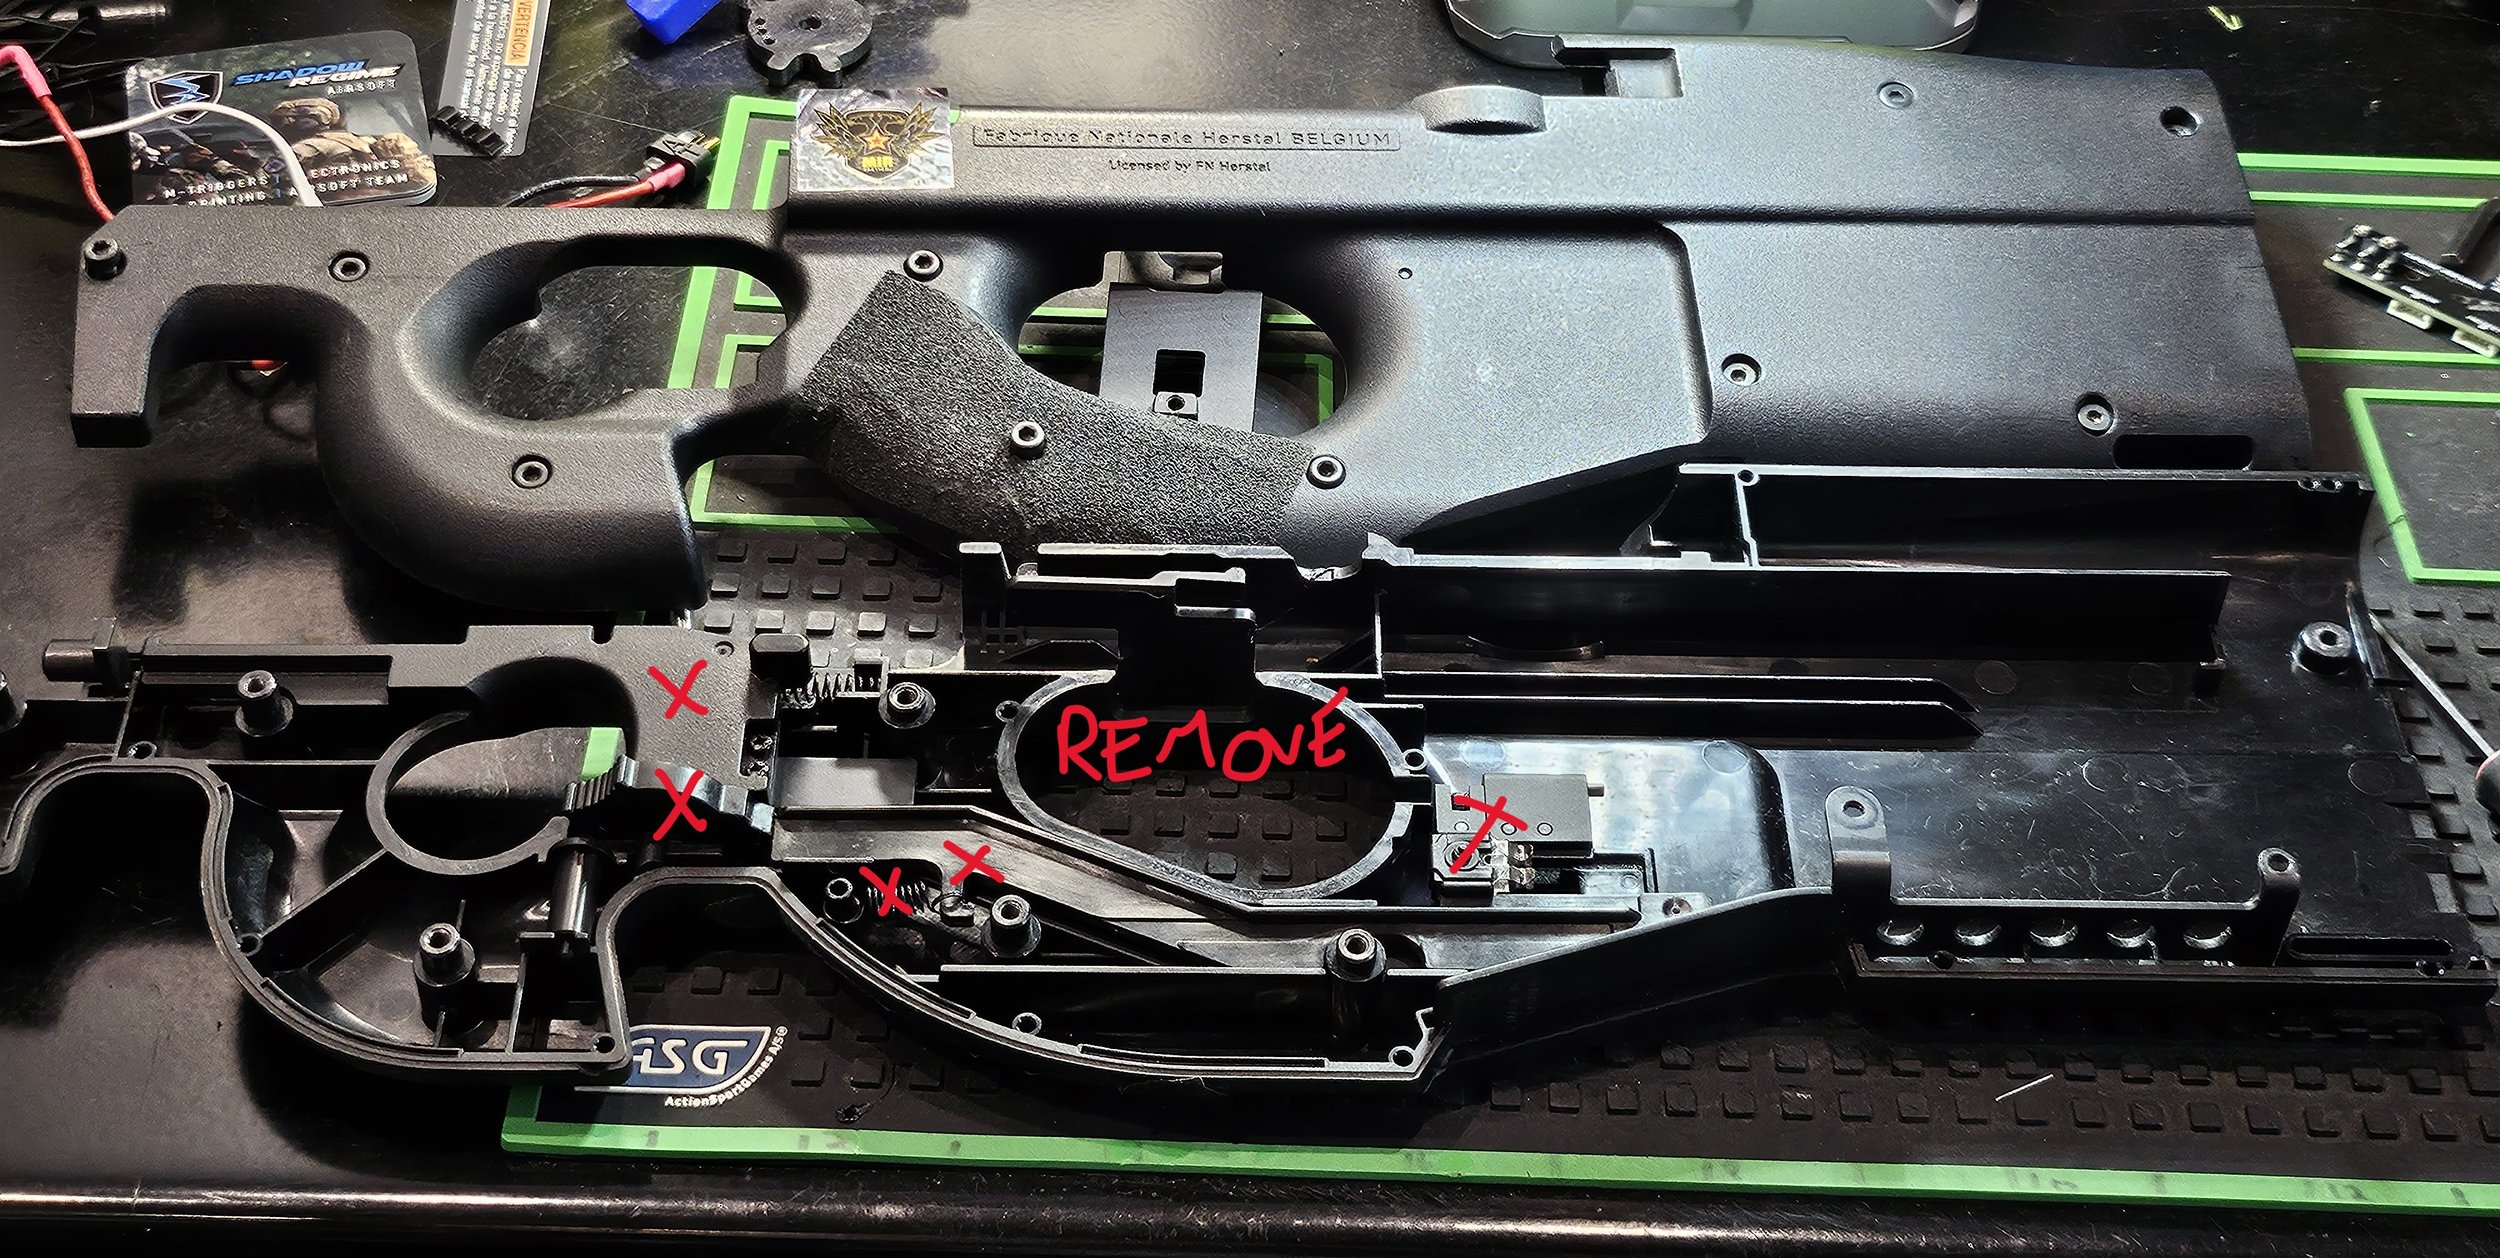
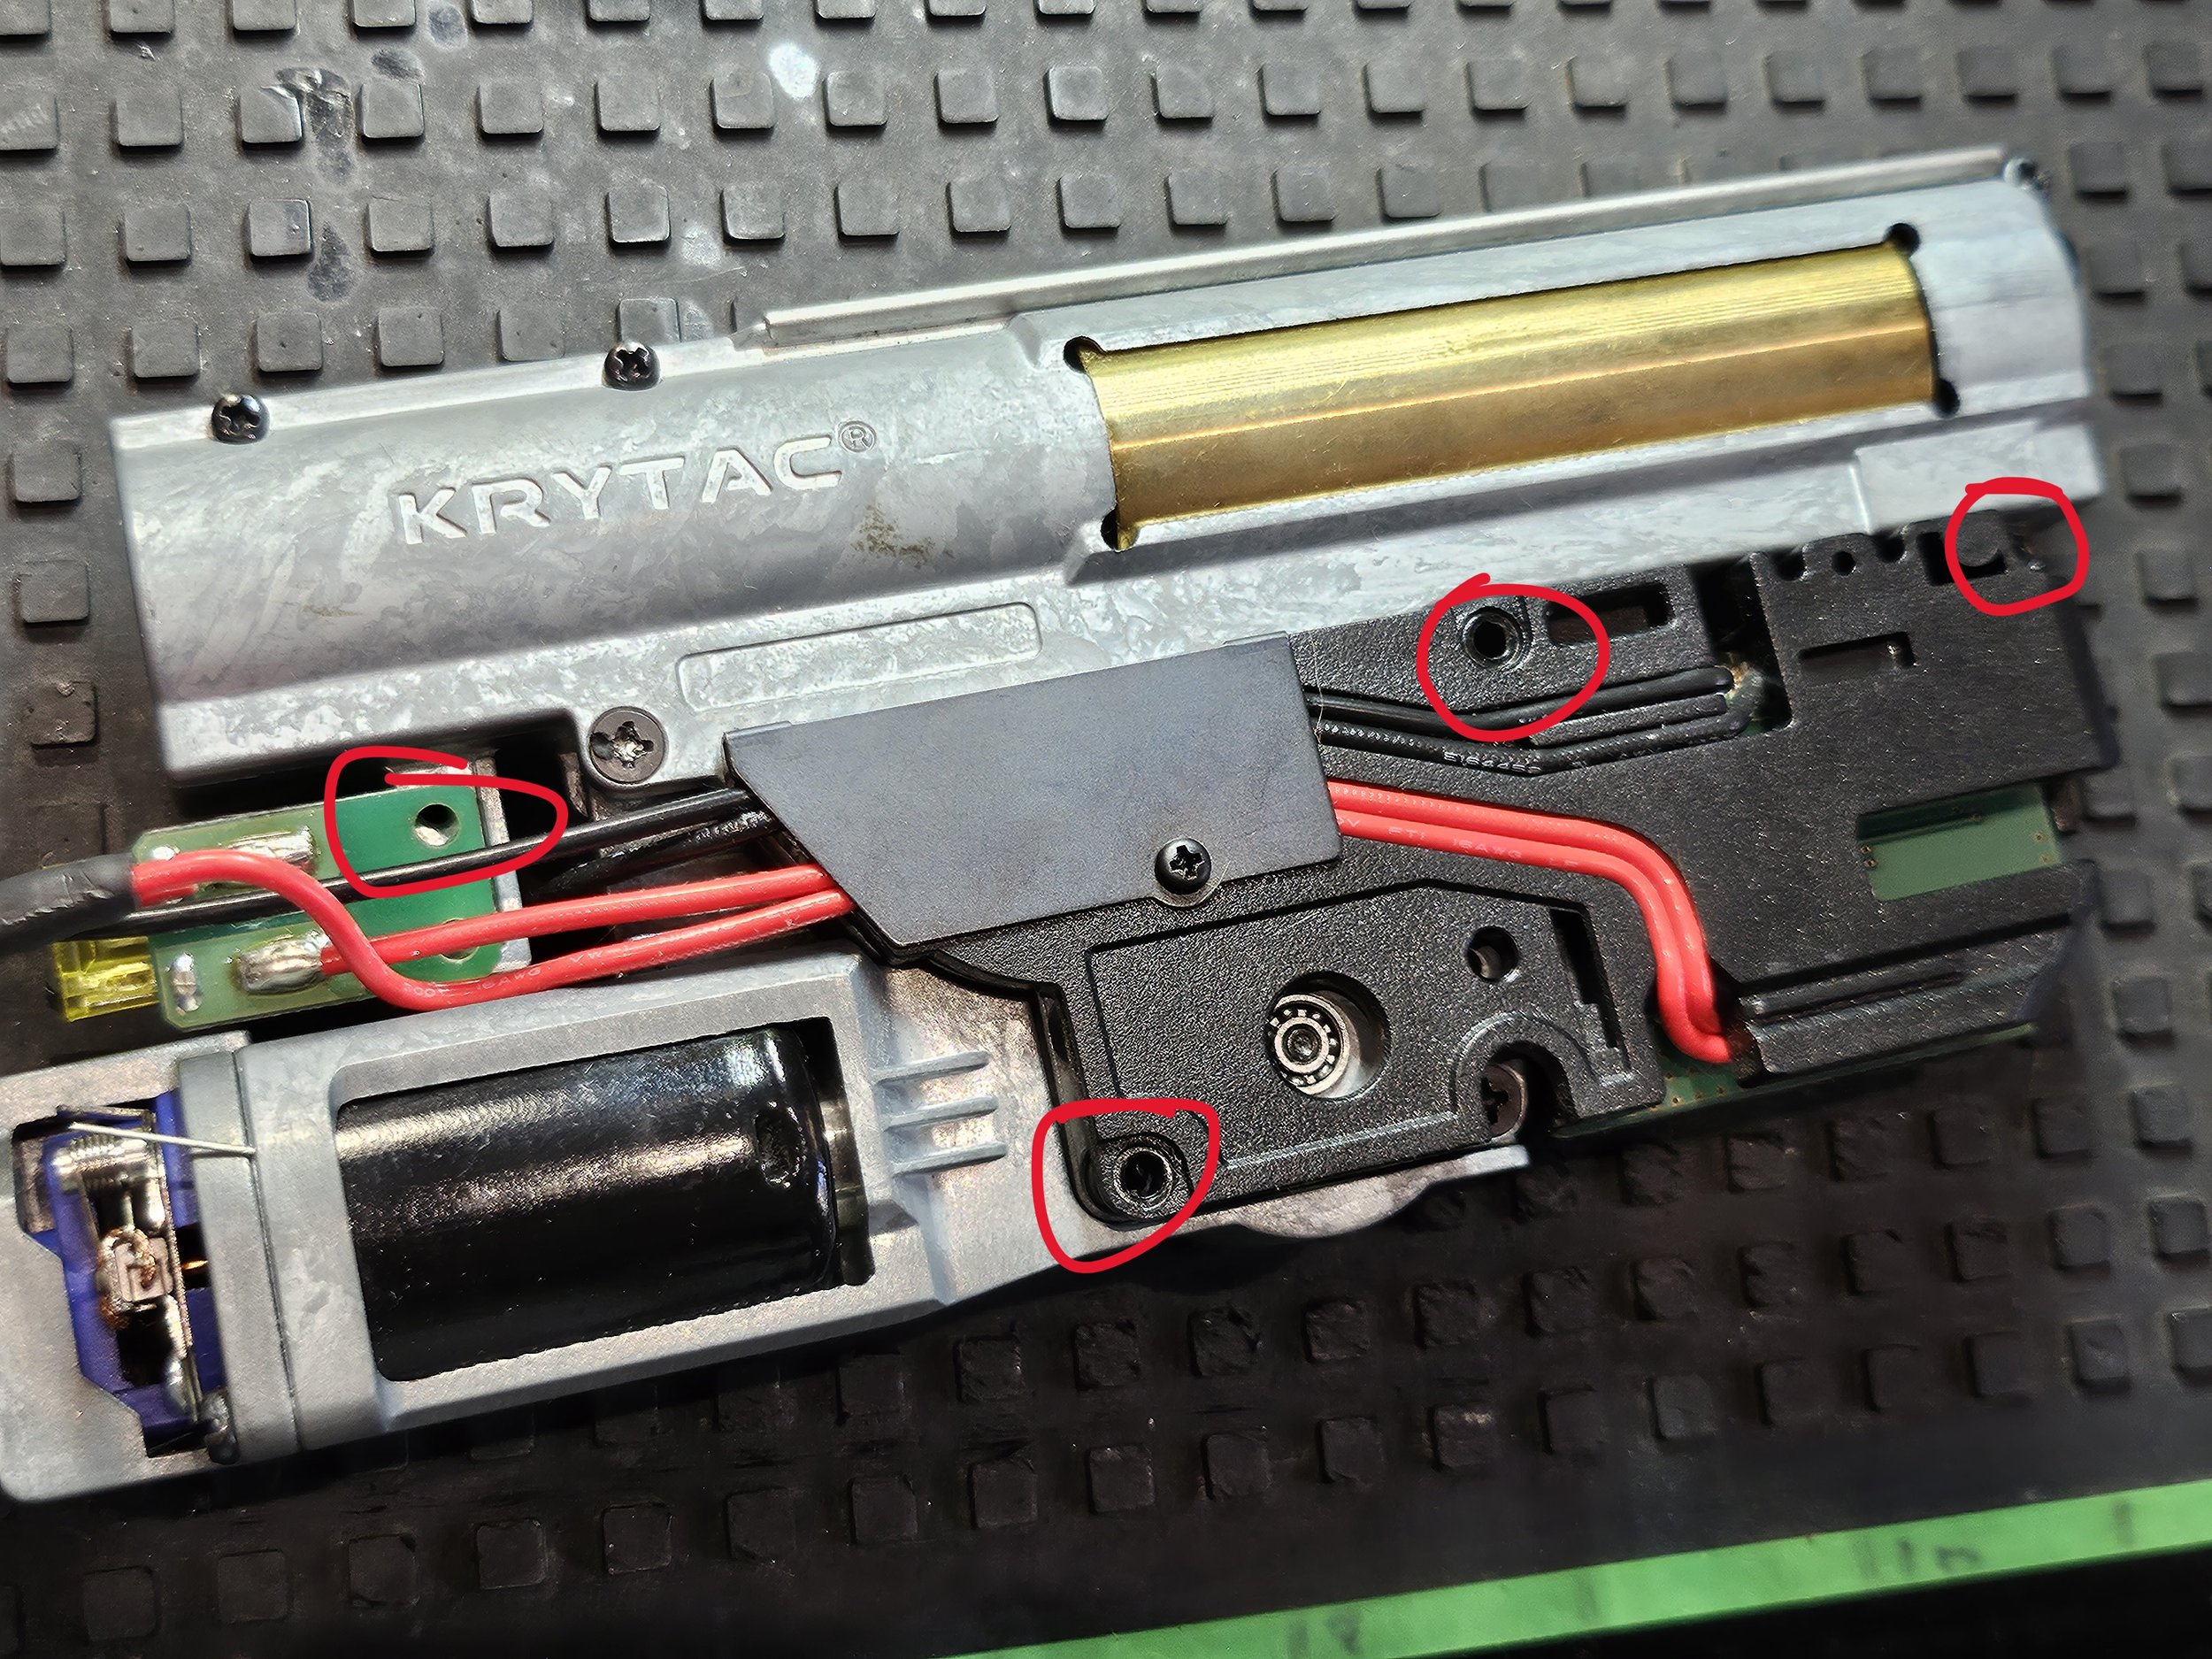
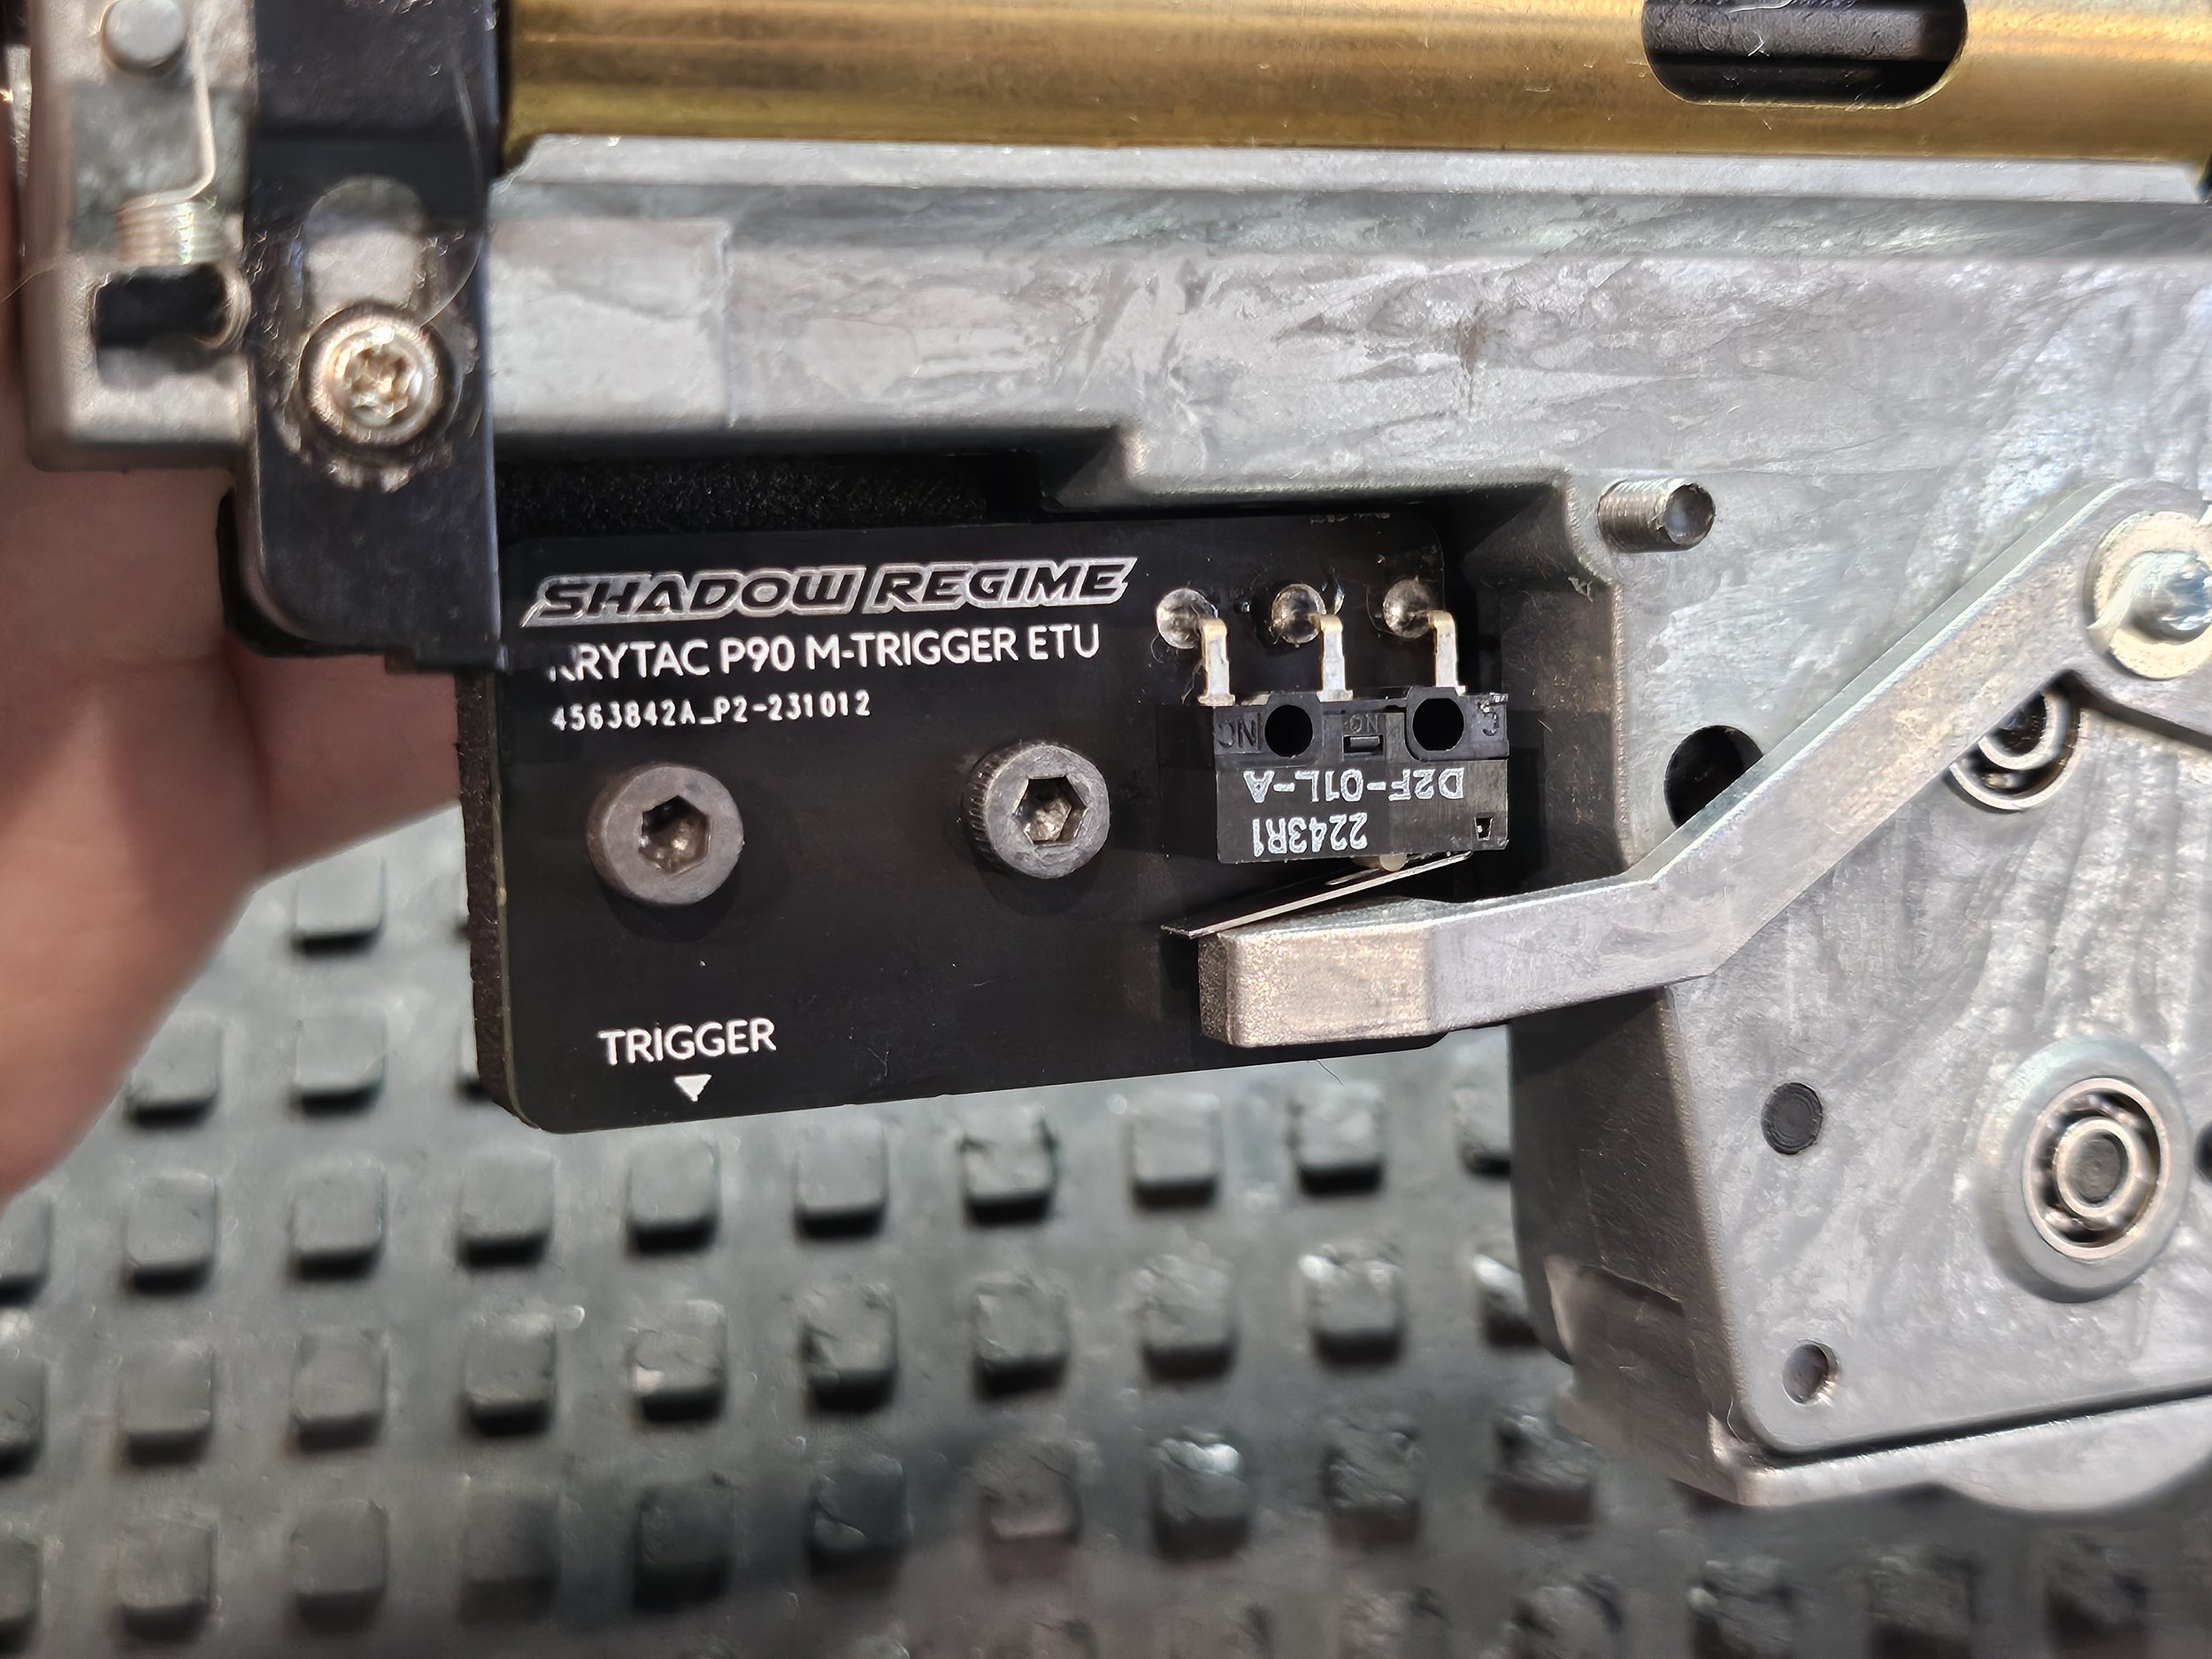
Install the cutoff board.
On the gearbox, completely remove the old trigger unit. Mount the M-Trigger ETU cutoff board in the same location using two screws. If you removed a third screw near the motor, reinstall that, too.
The cutoff lever should be pressing down on the switch. When the cutoff lever gets activated, it should lift up and release the switch.
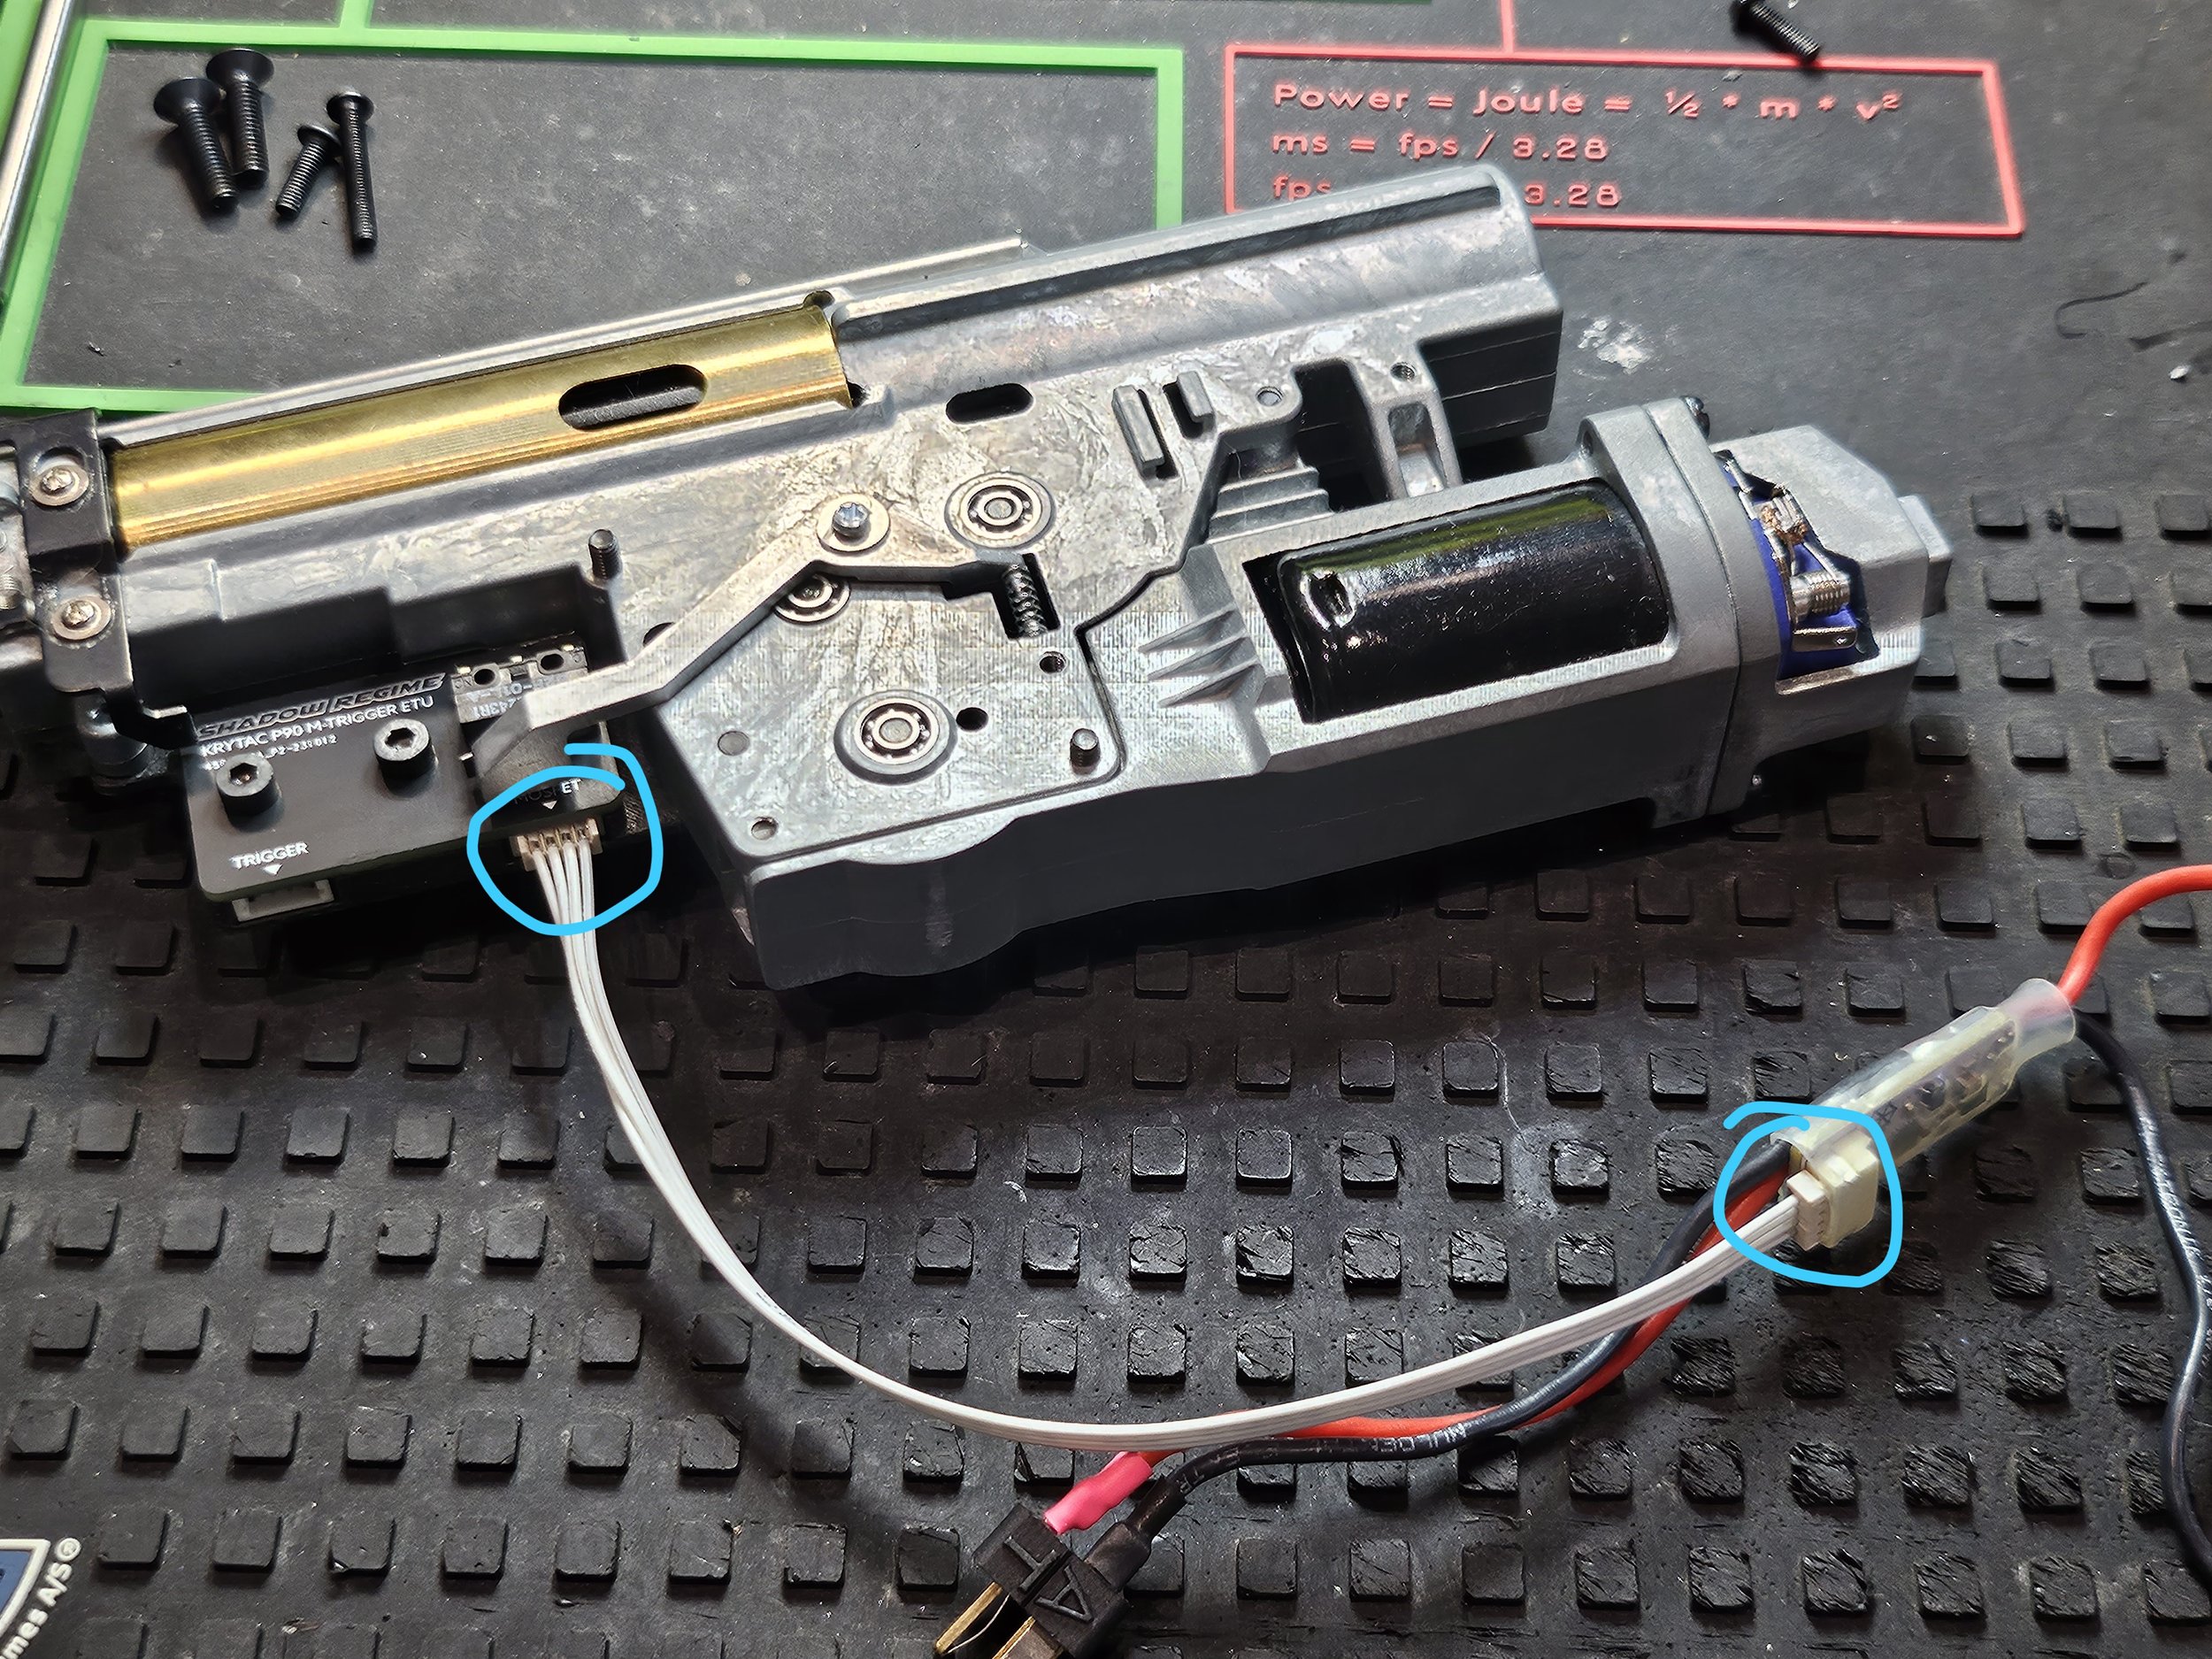
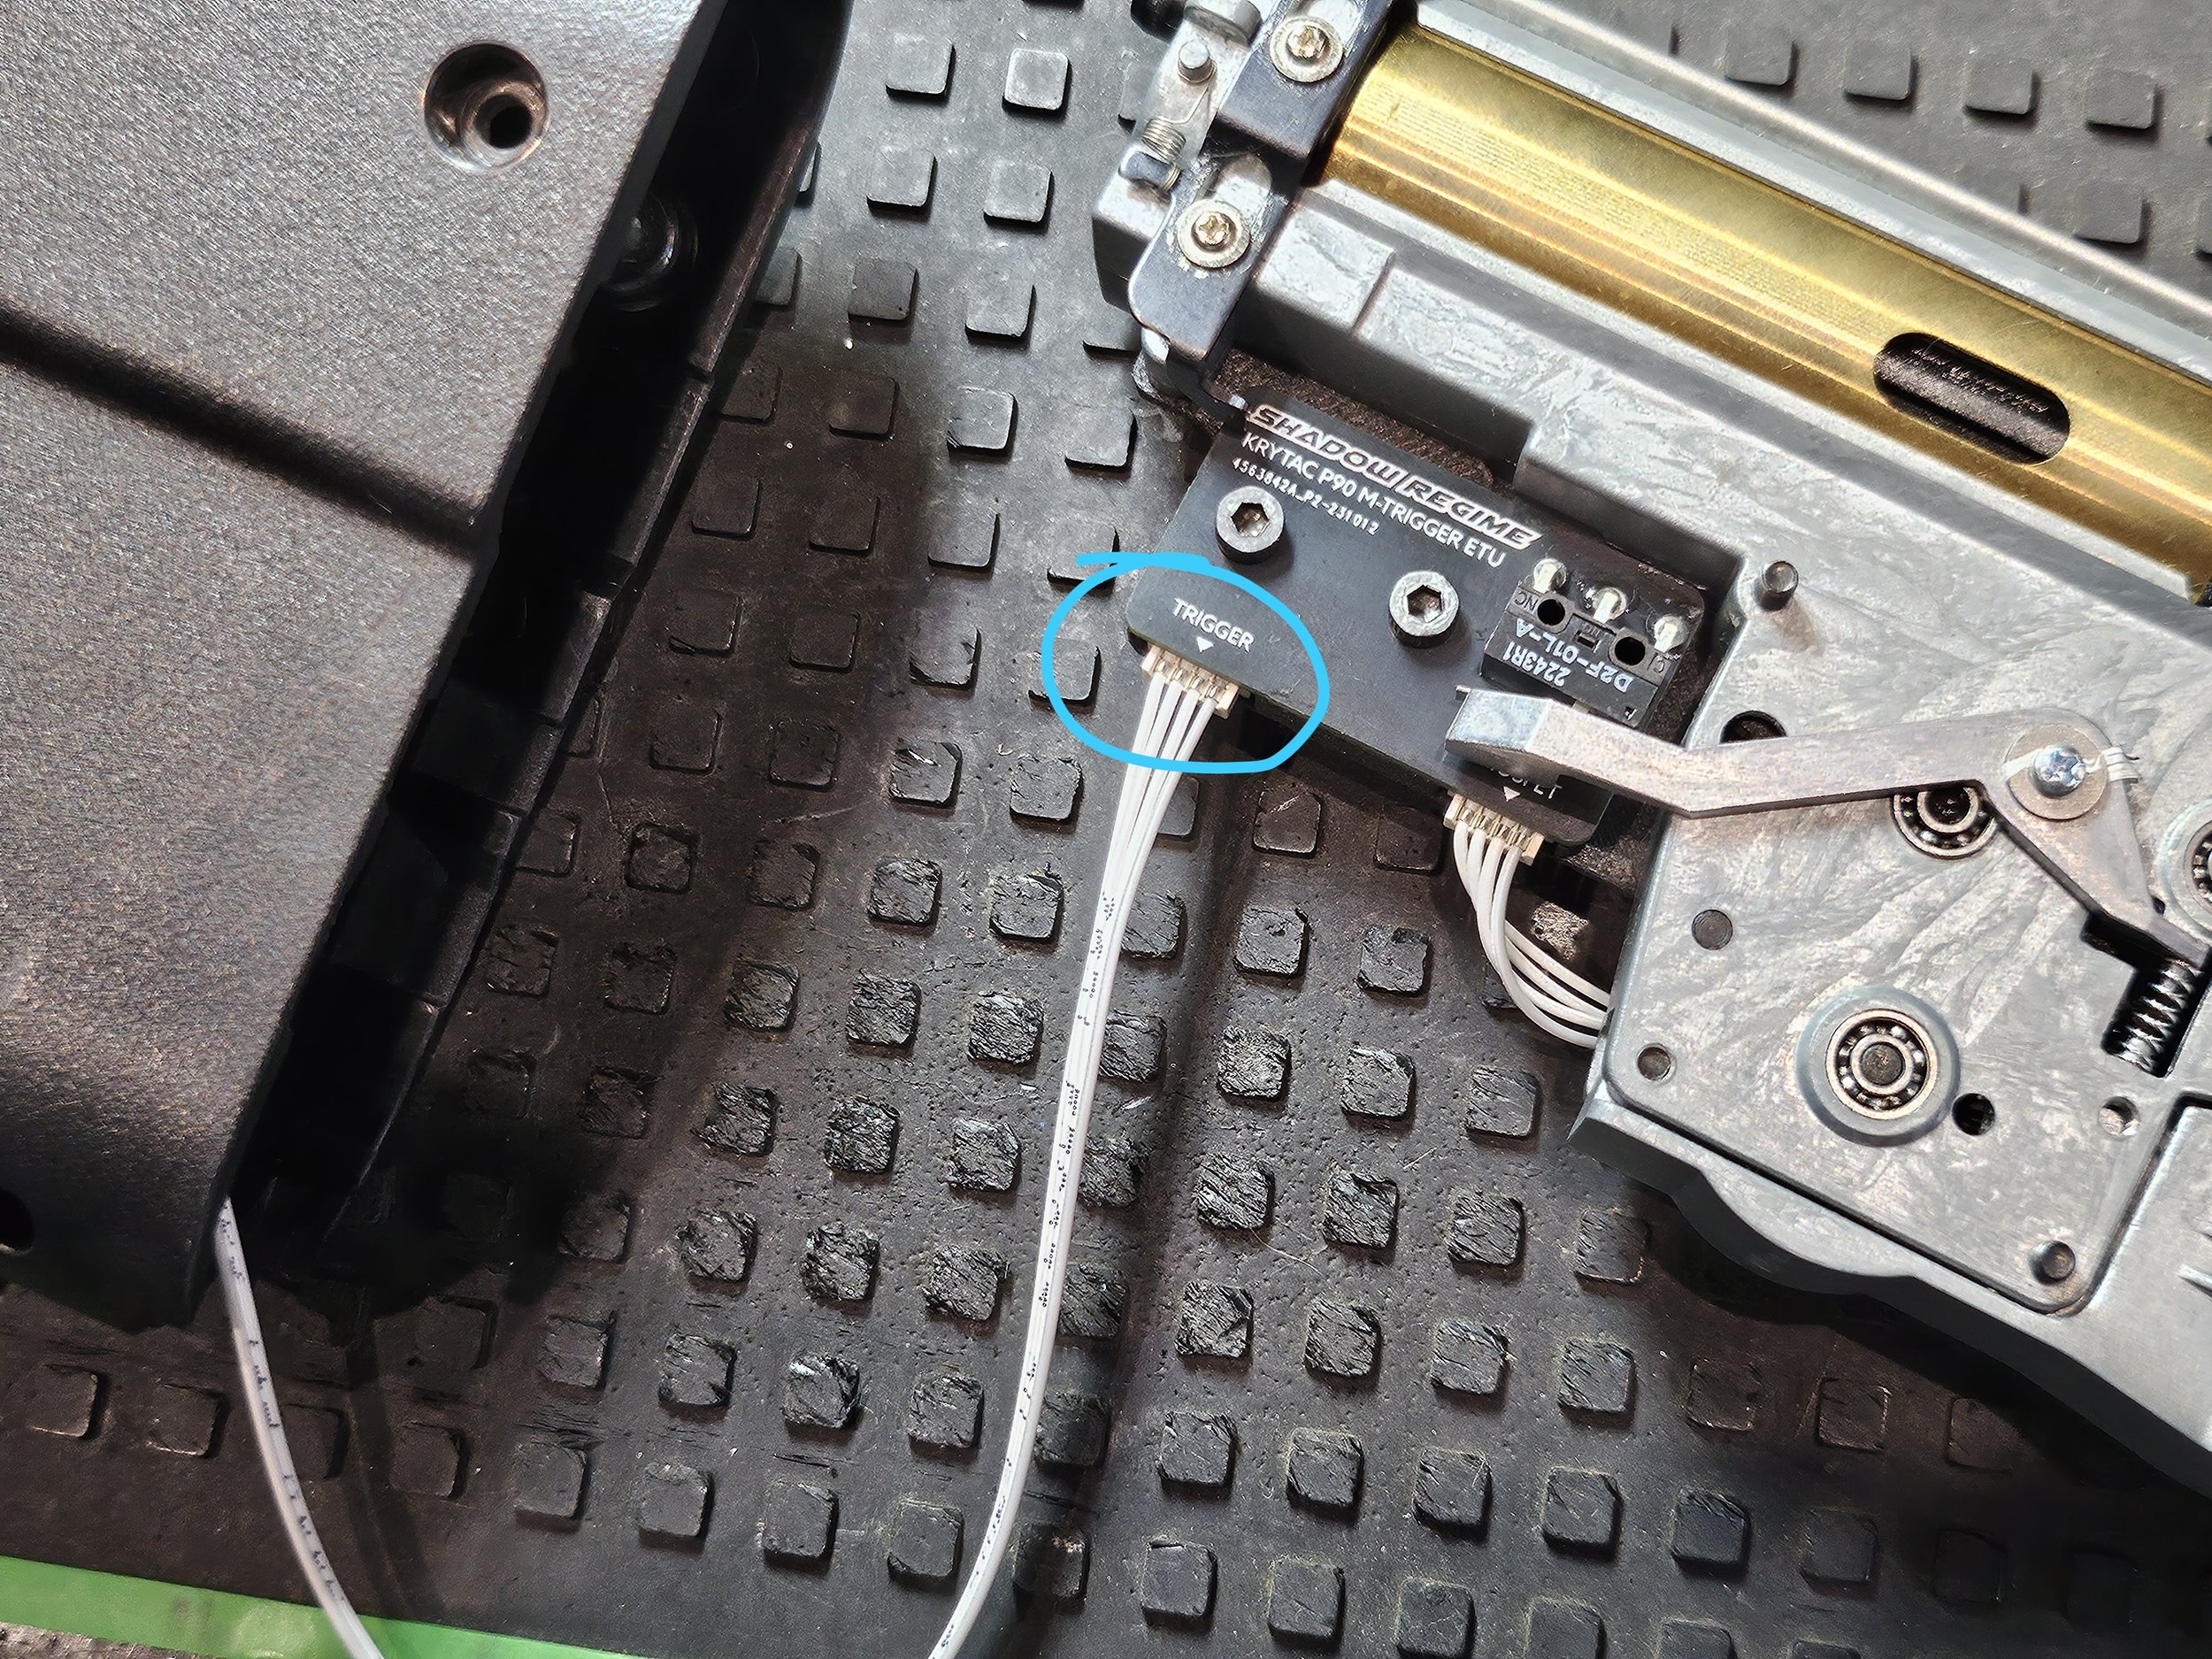
Plug the long cable coming from the trigger into the front of the cutoff board.
Plug the remaining short cable into the “Mosfet” port on the cutoff board, and plug the other end into your Perun ETU++ mosfet. Do not attach the motor wires yet.
Switch check.
With the motor wires disconnected, plug in your battery. The mosfet should be blinking yellow, that means you’re in switch check mode. Check to make sure everything is working.
Trigger pull = purple/pink light. Test that Safe does not cause a purple/pink light.
Auto fire mode = red light. Semi fire mode = blue light.
Push up on the cutoff lever. Cutoff lever detection = green light.
Any problems -> check everything is plugged in correctly and there are no pinched wires. Still problems -> contact us.
Disconnect the battery and attach the motor wires.
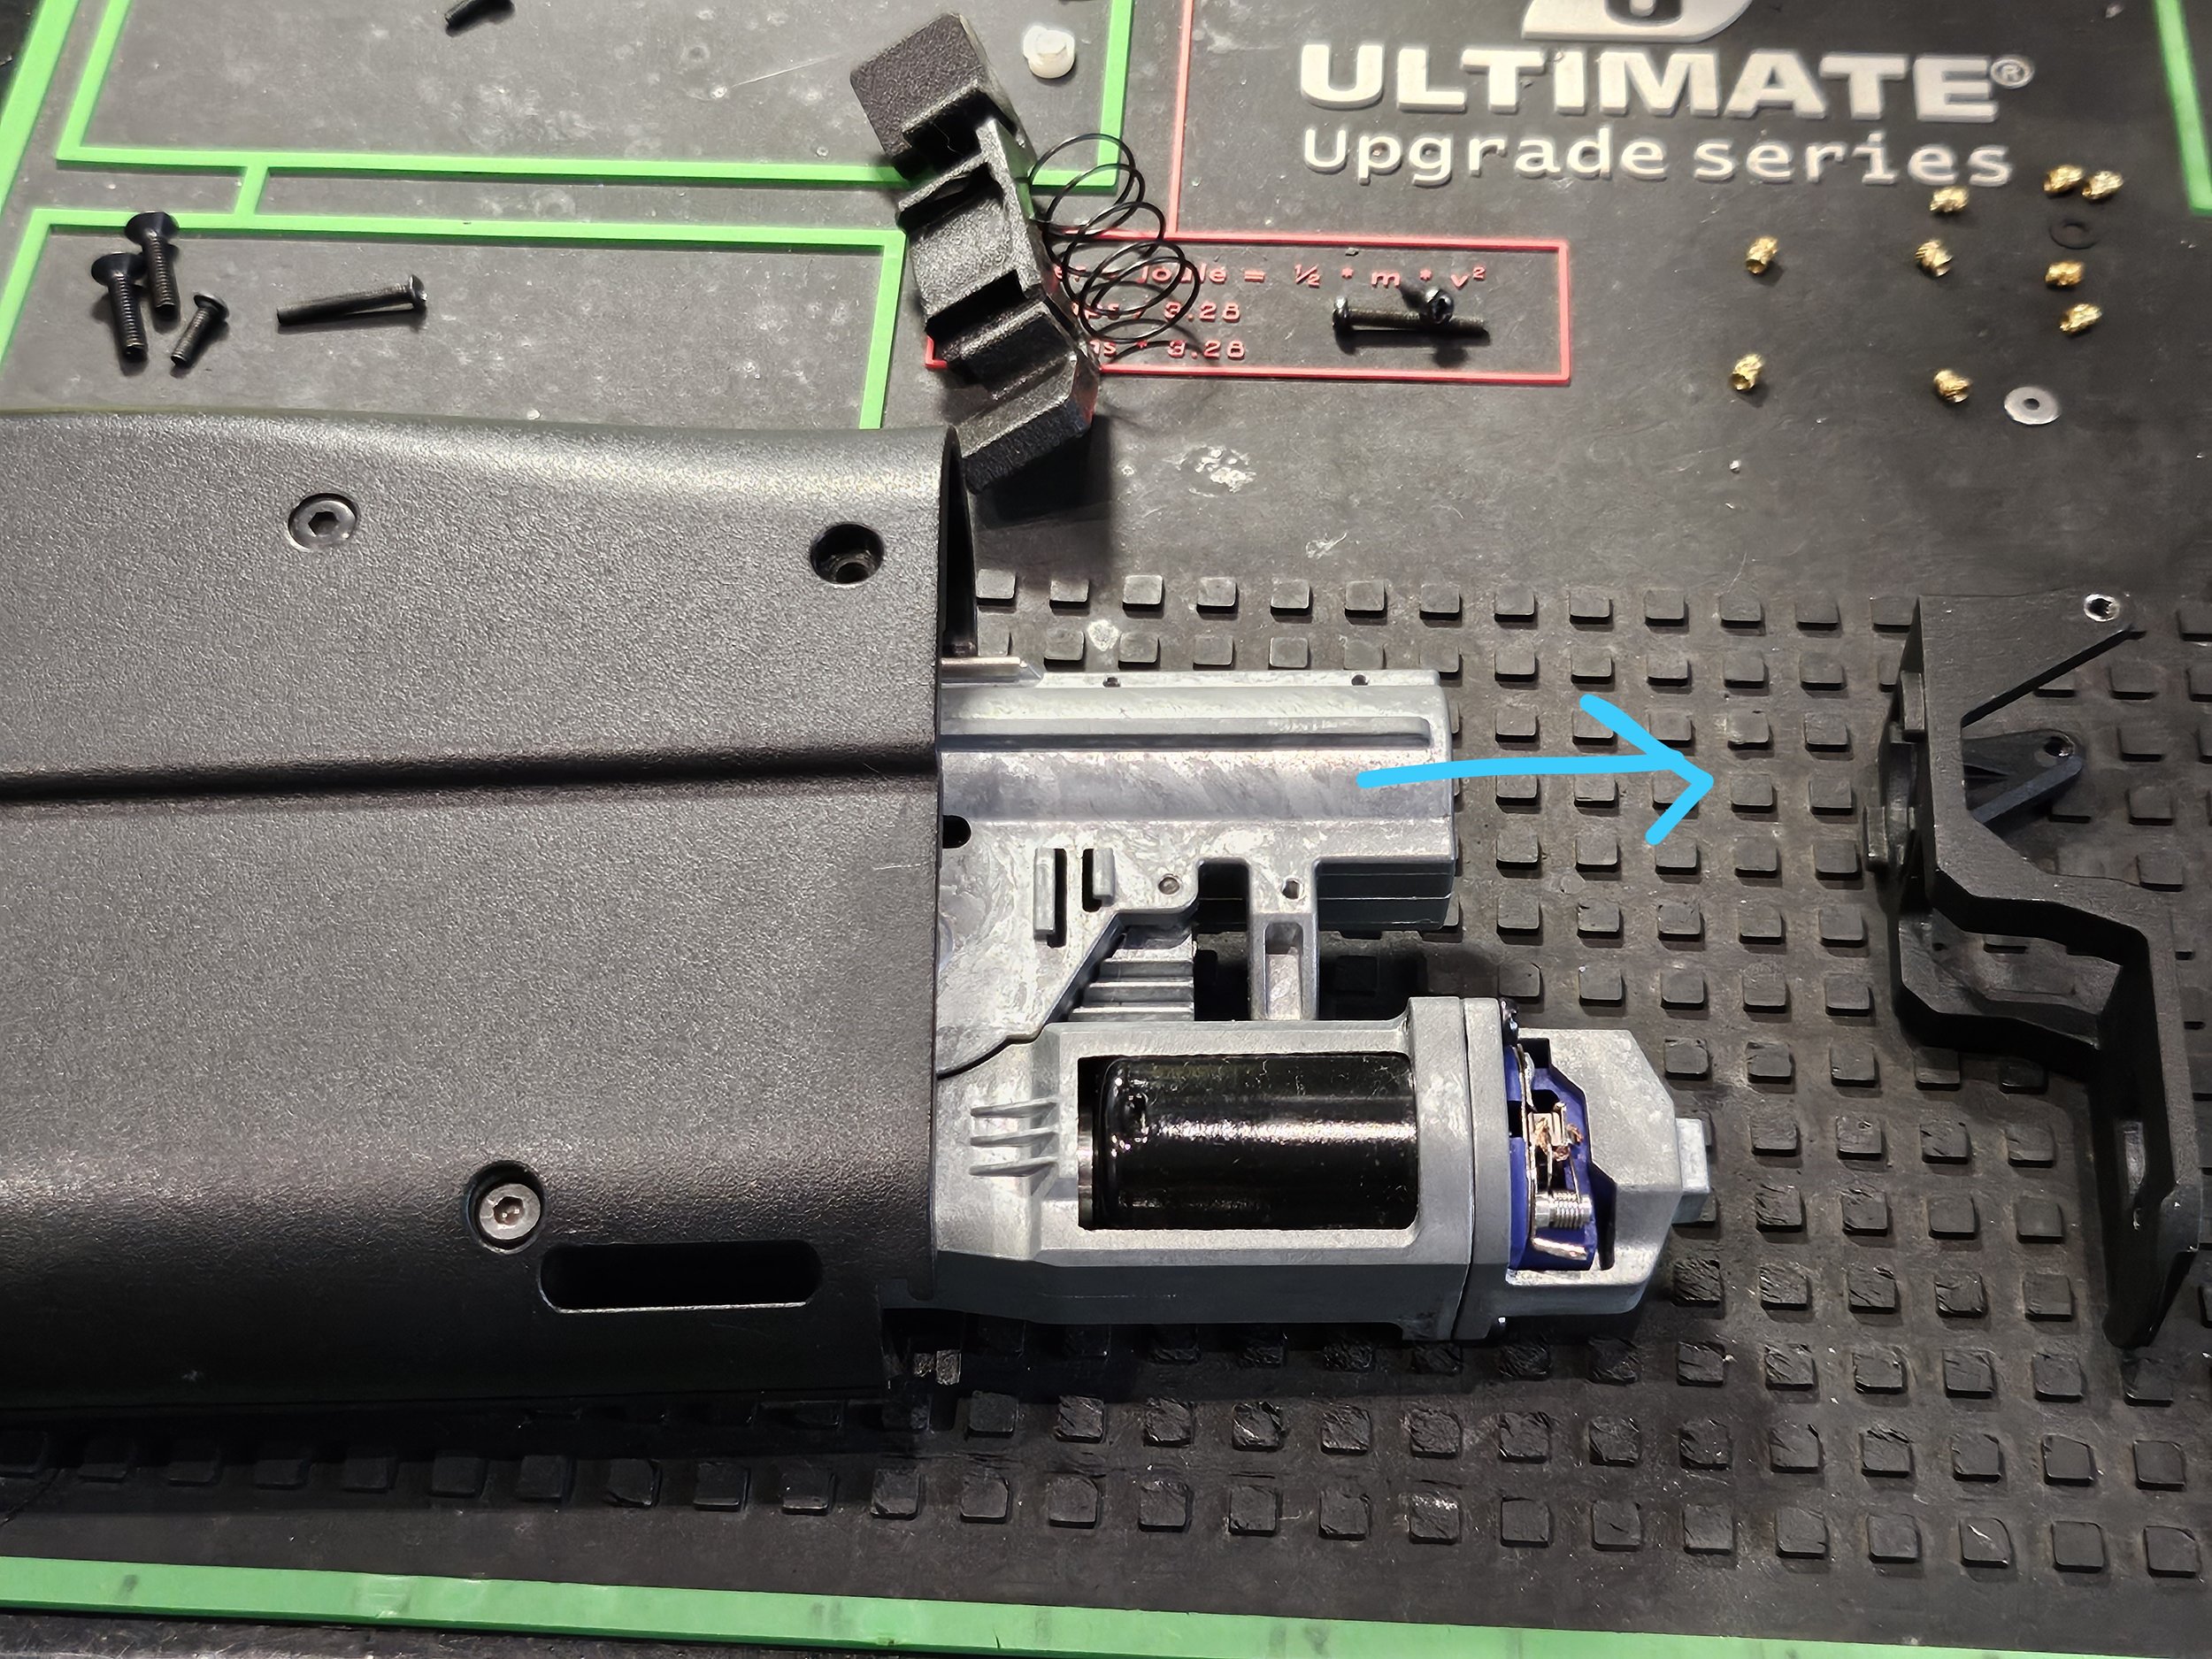
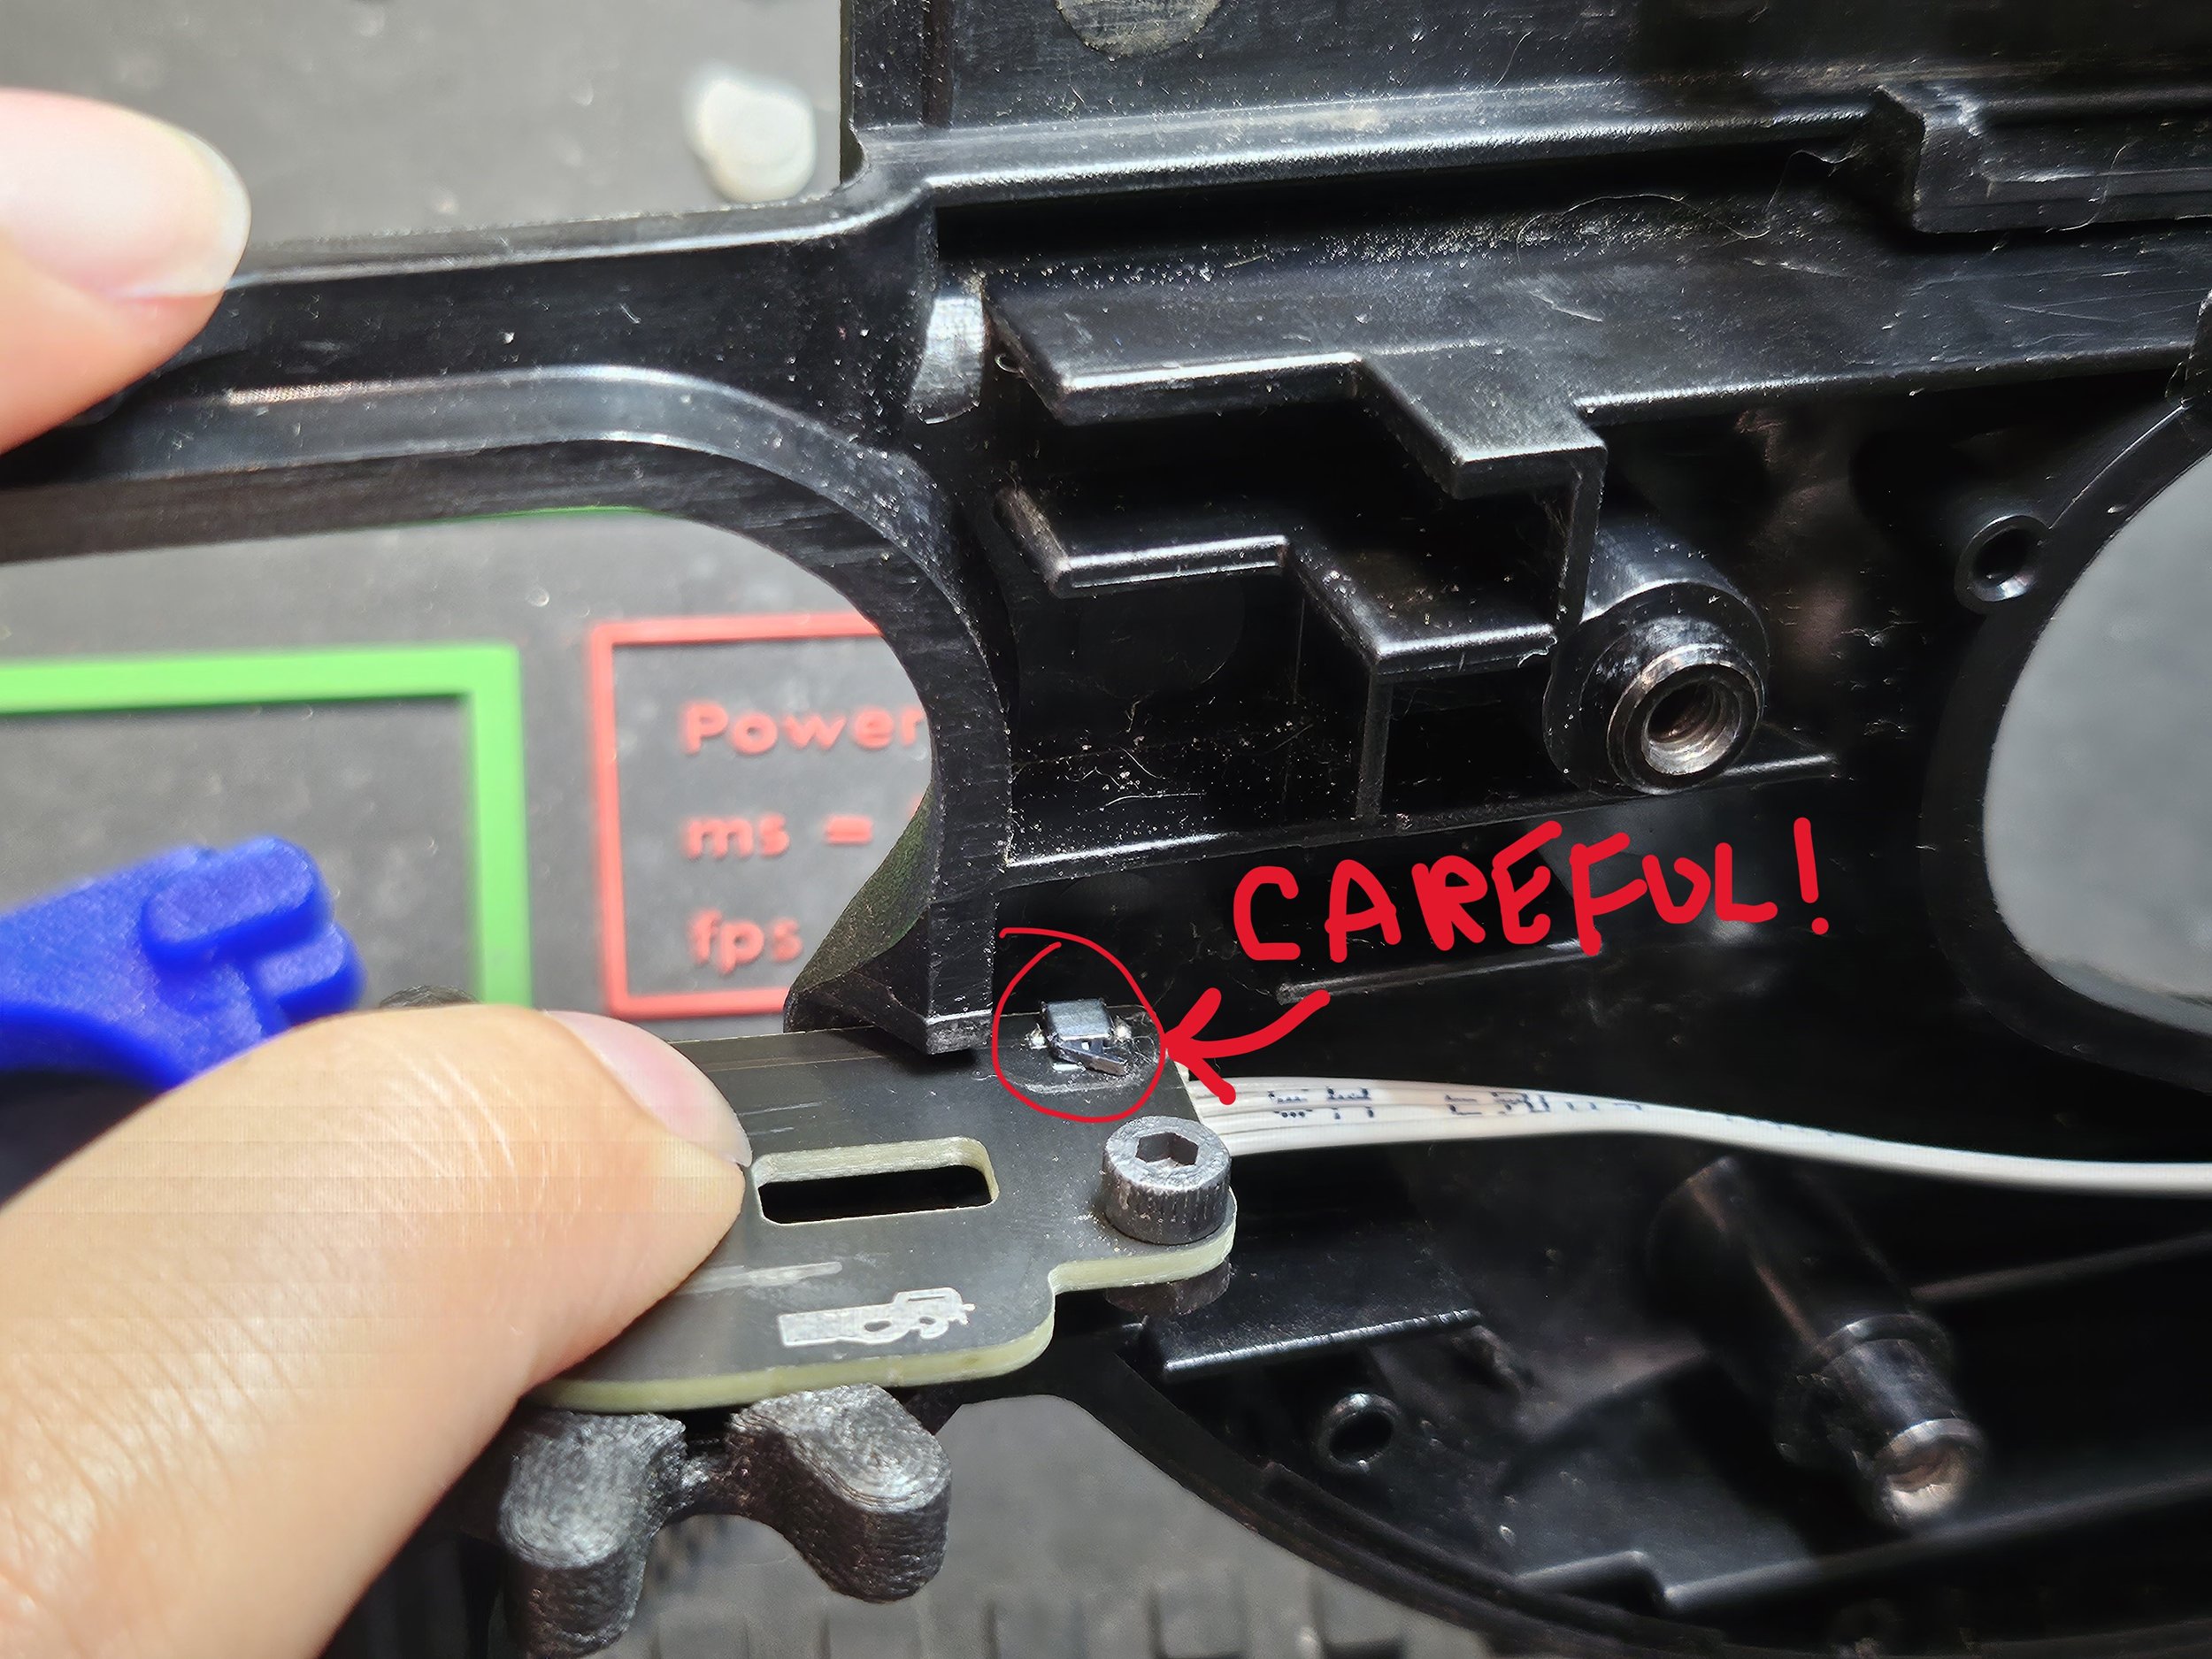
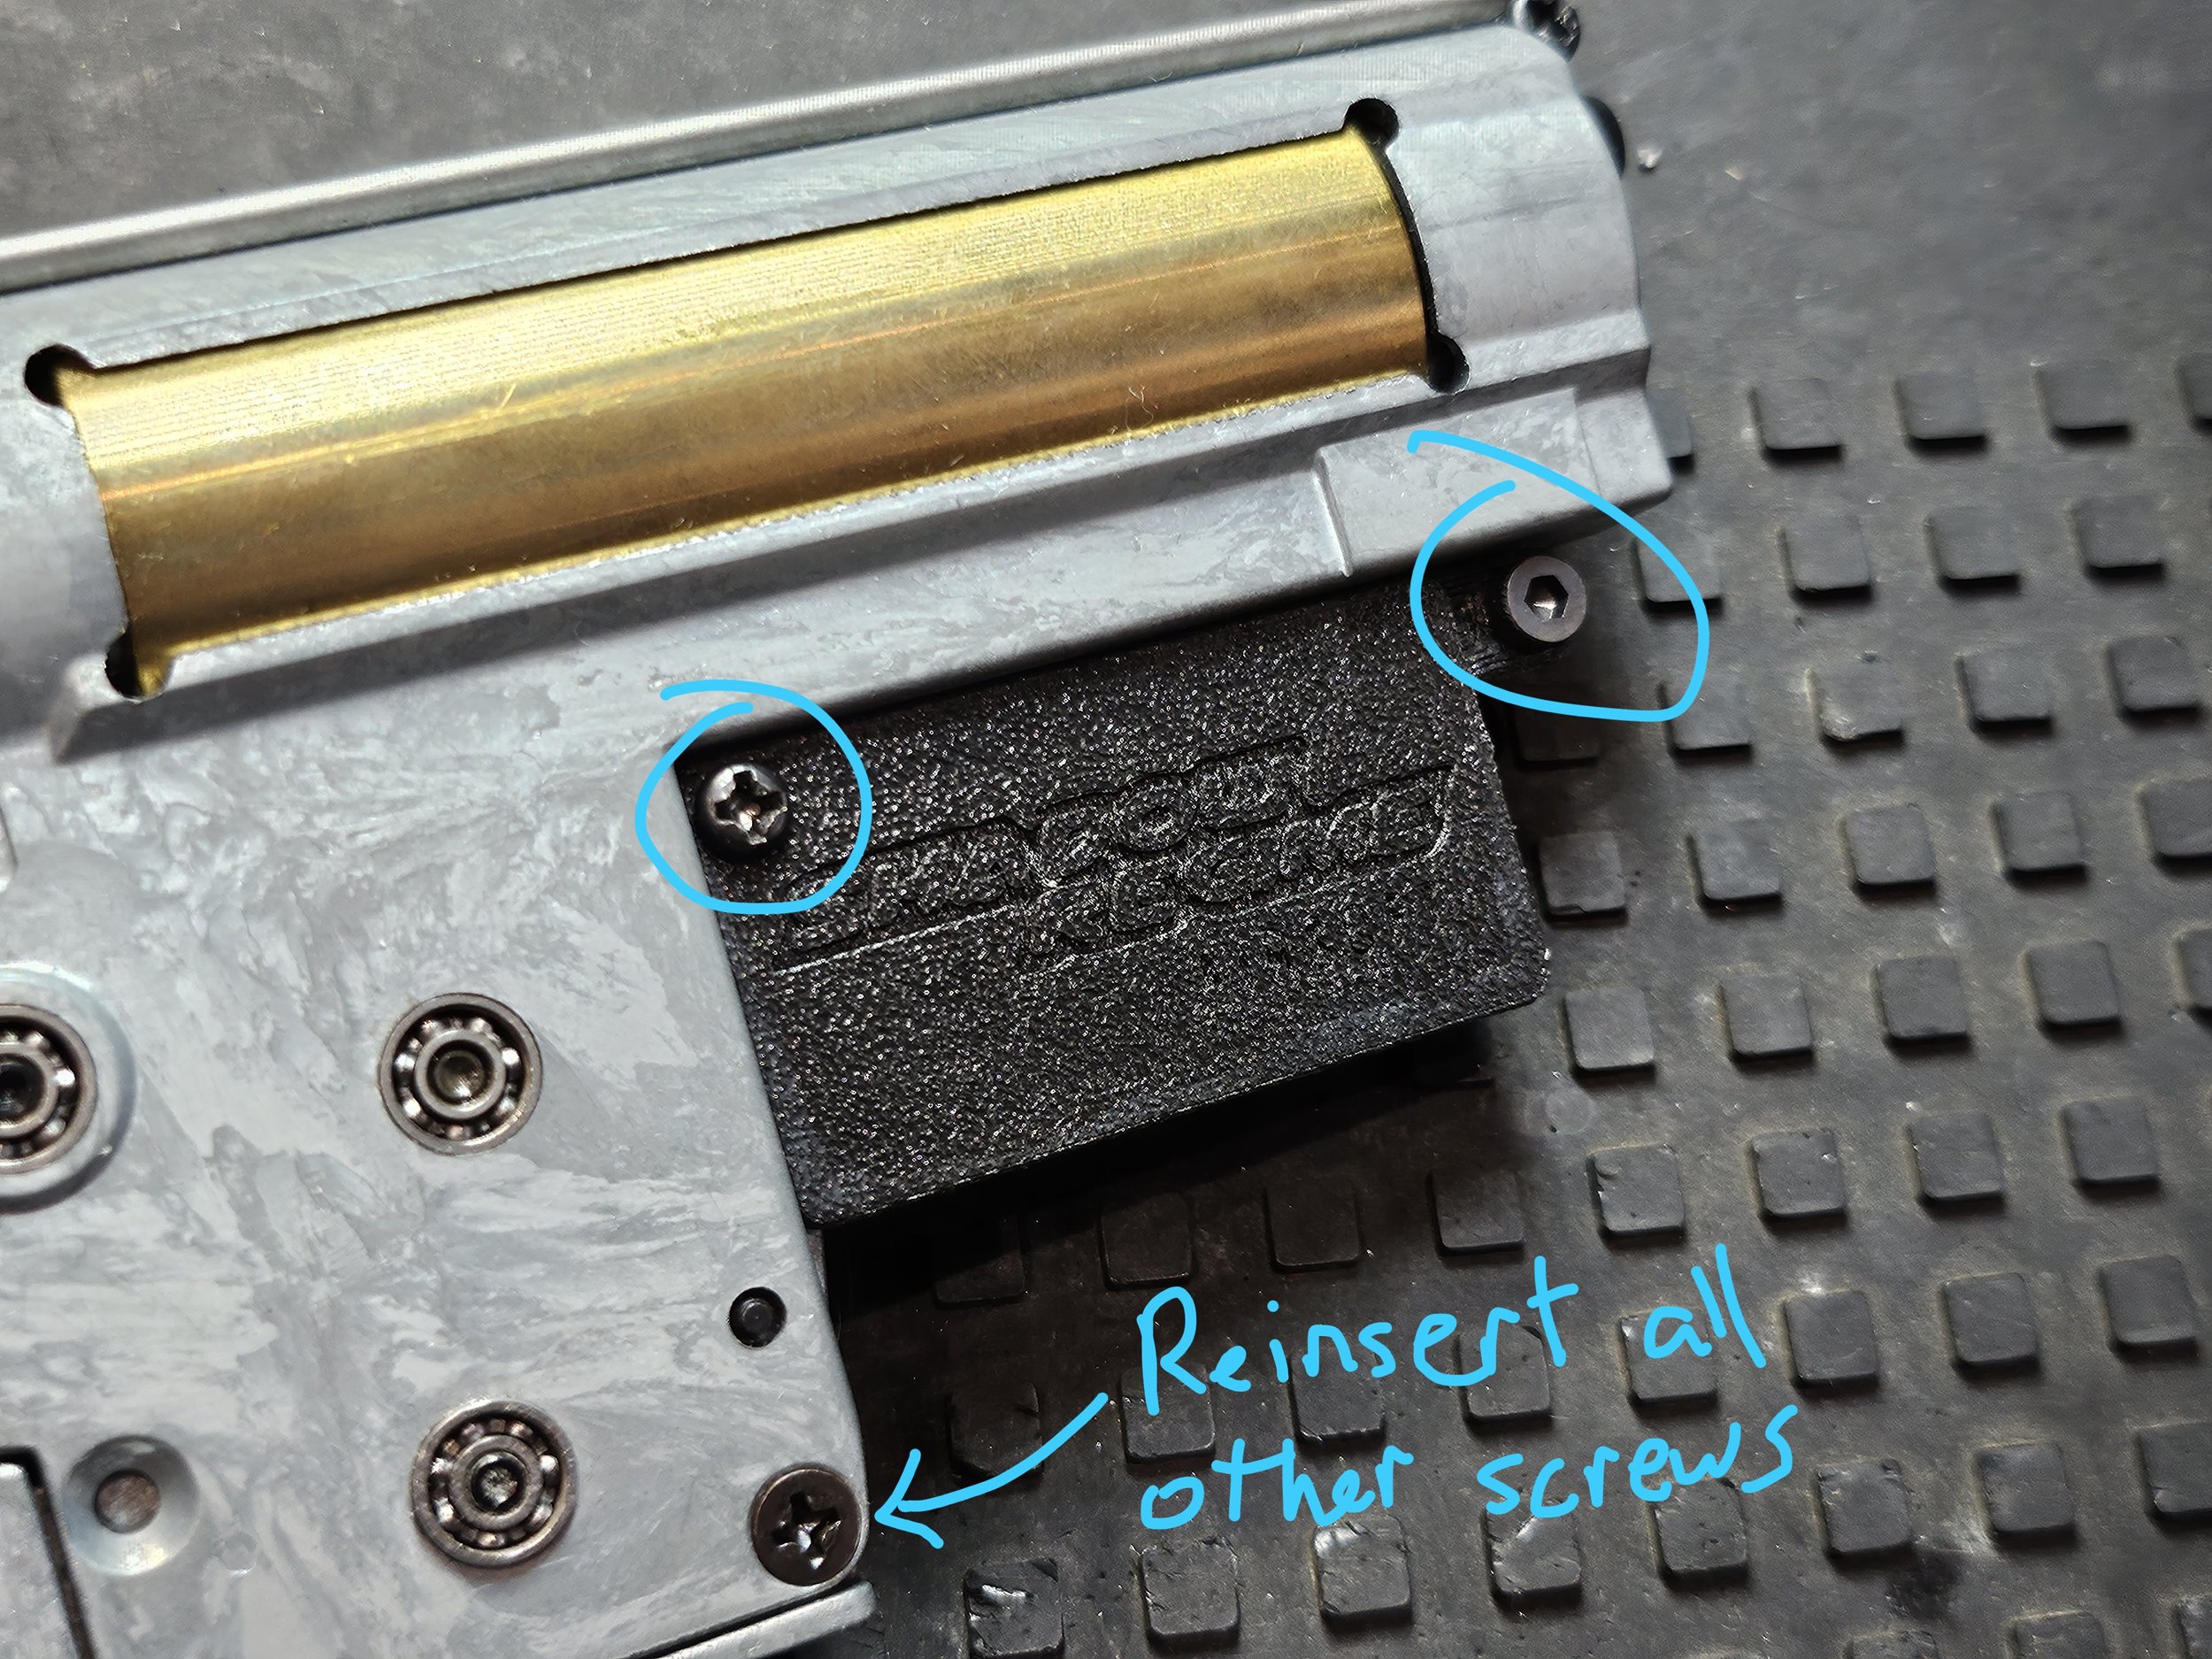
Install the gearbox.
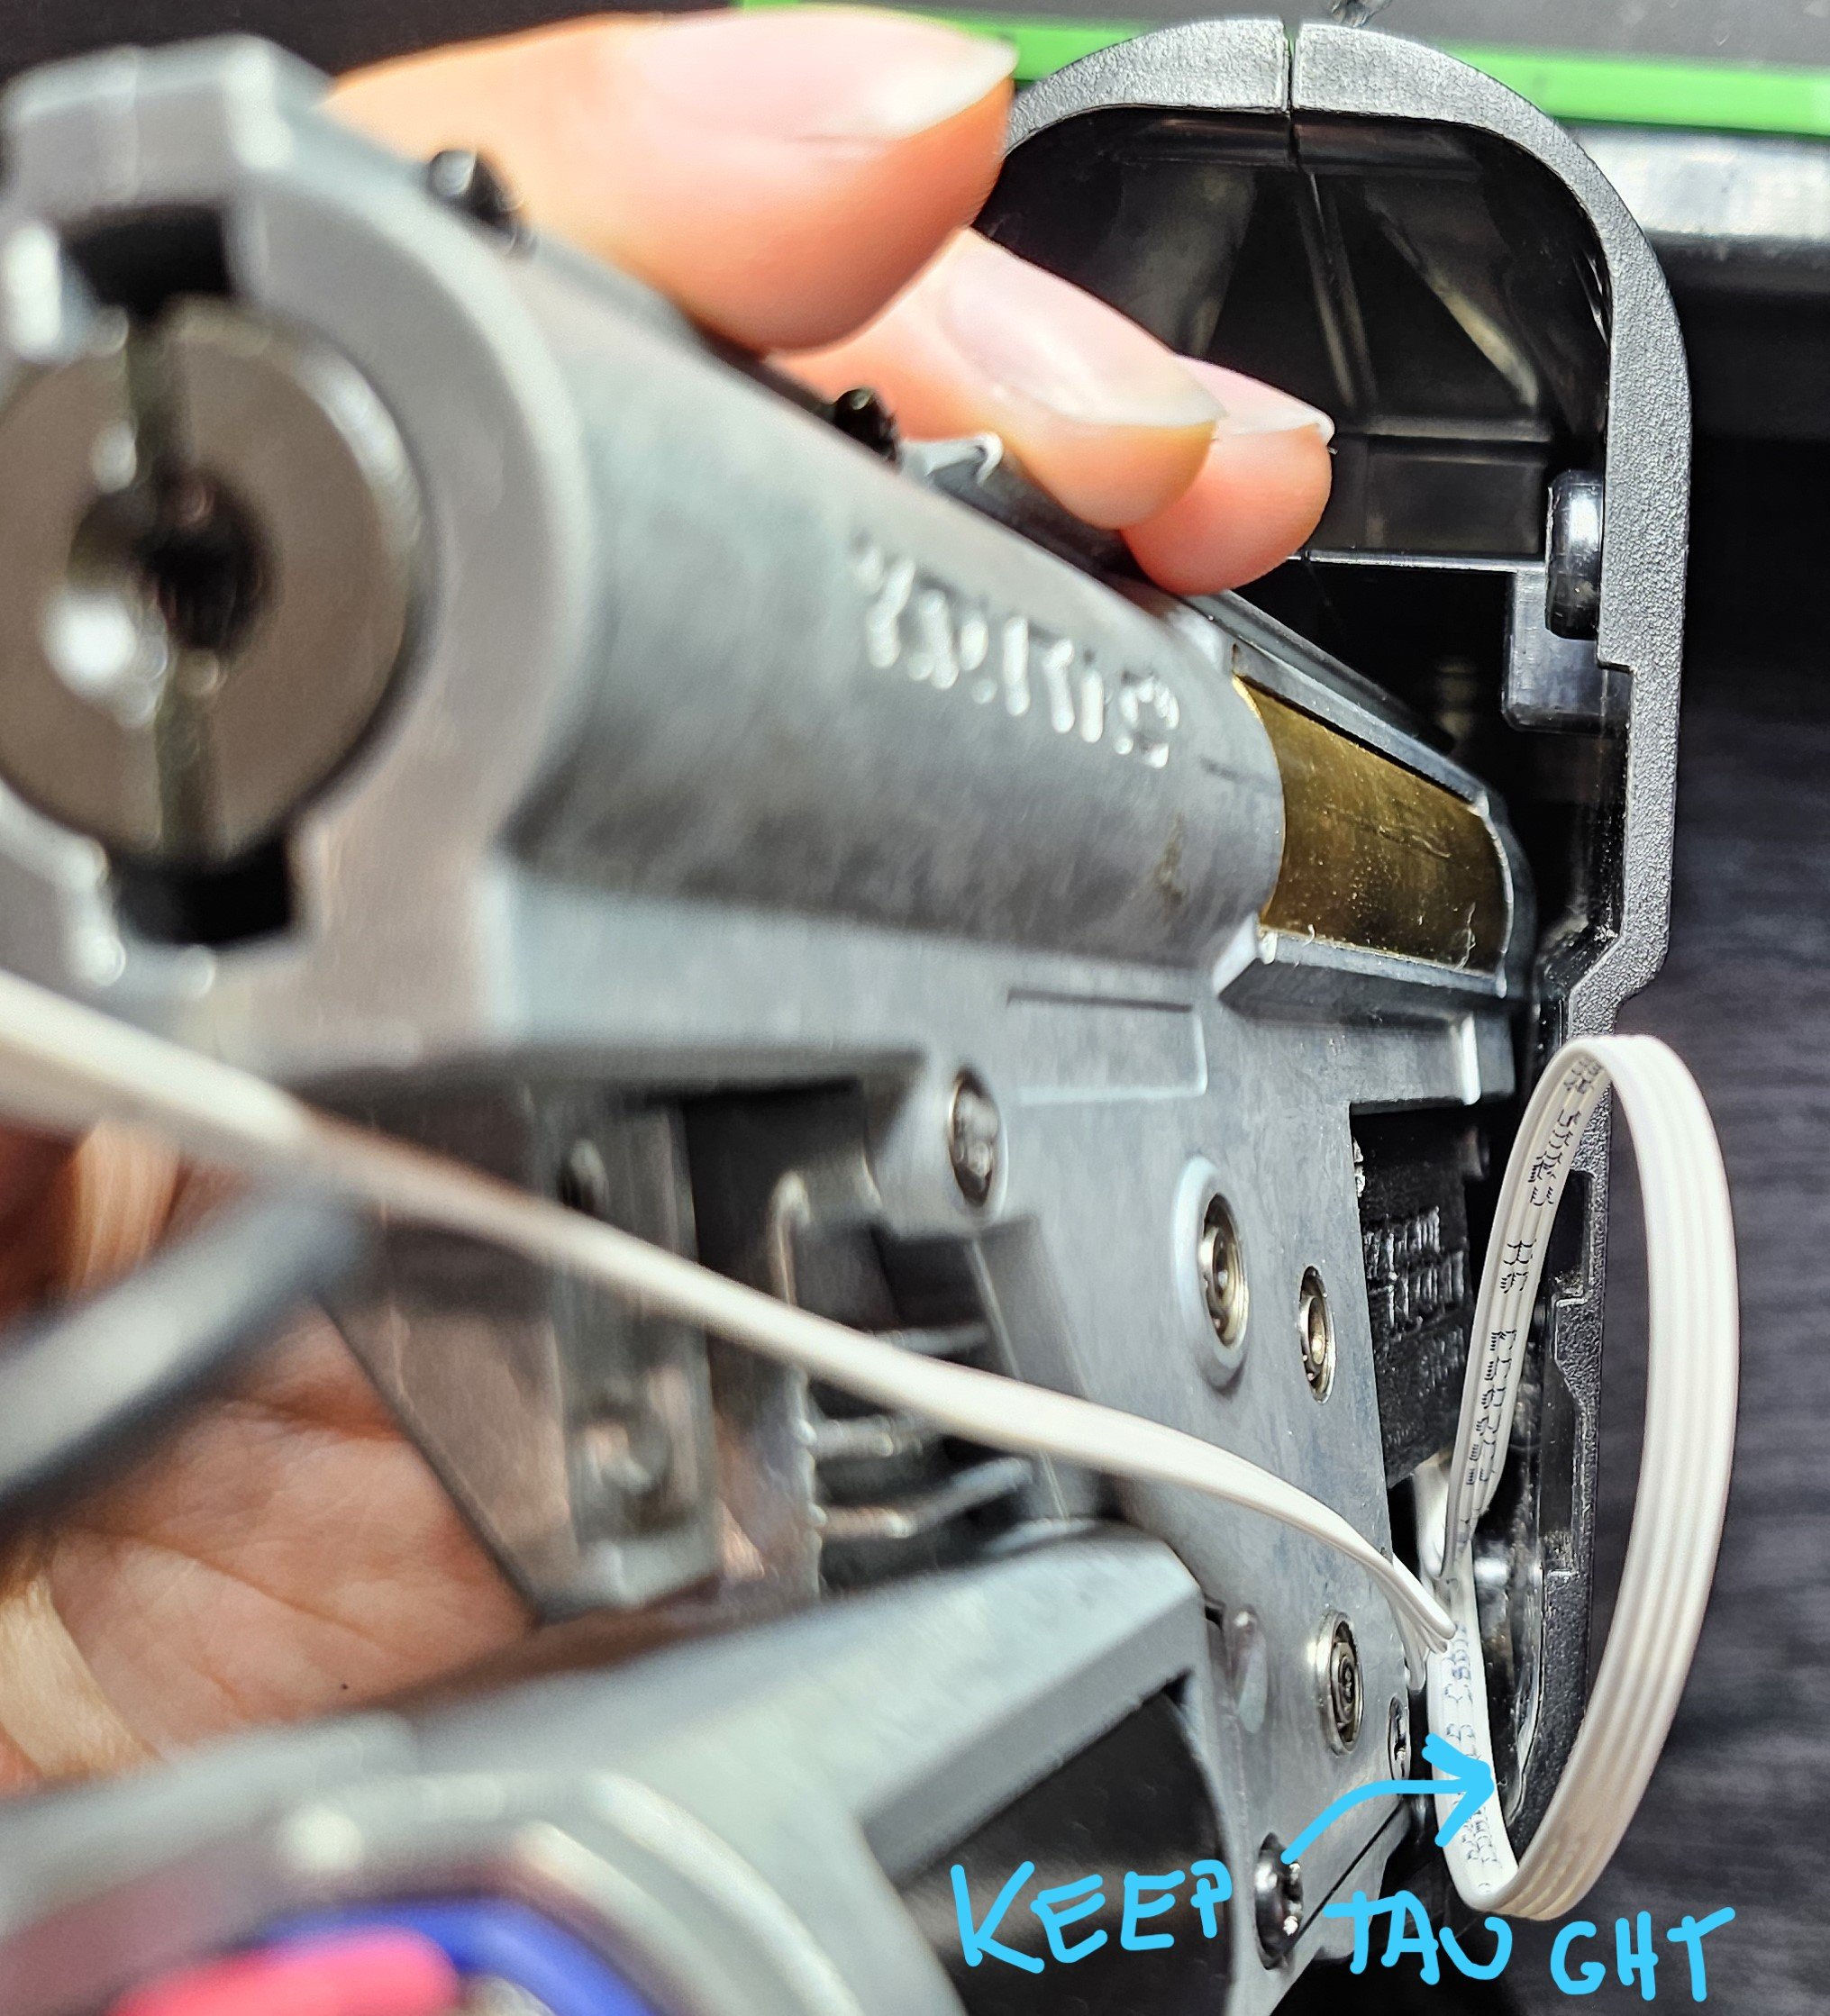
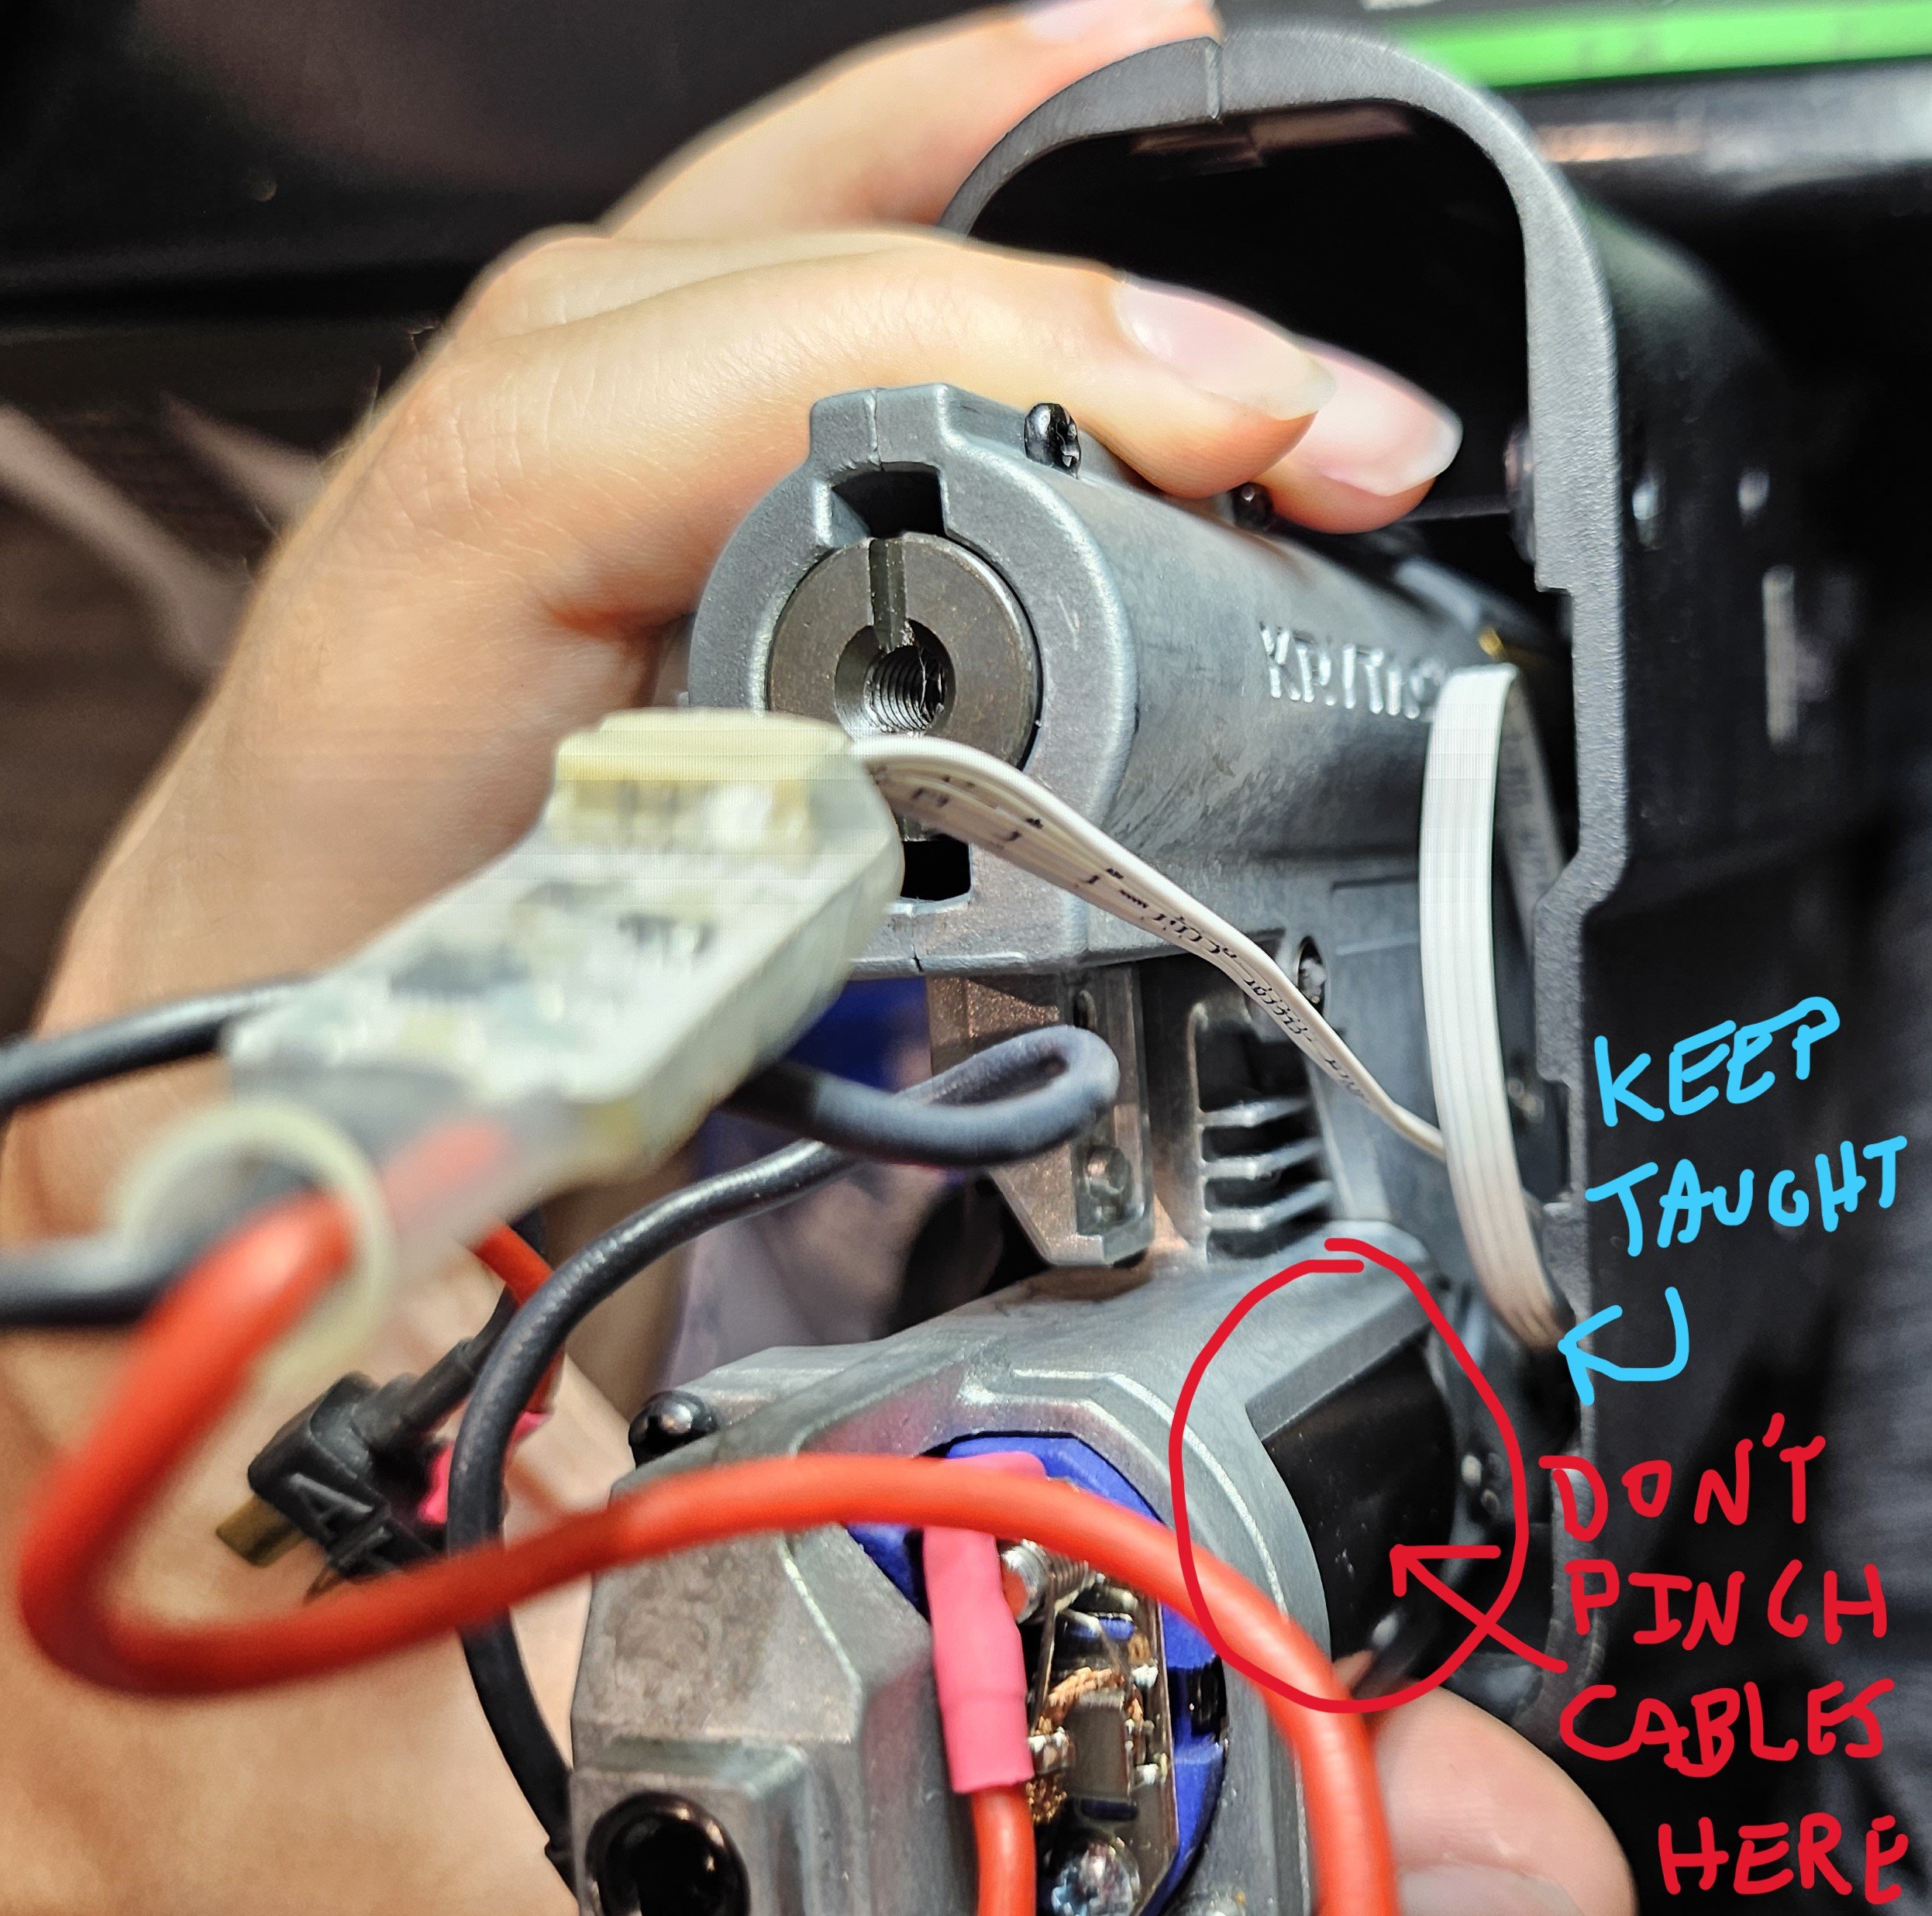
Slide the gearbox back into the gun. Be careful not the pinch any wires. Try to keep the trigger cable taught so it doesn’t bunch up in front of the gearbox. I like to keep all the cables on the right side of the gearbox and keep the mosfet in the space right above the motor.
Installation complete!
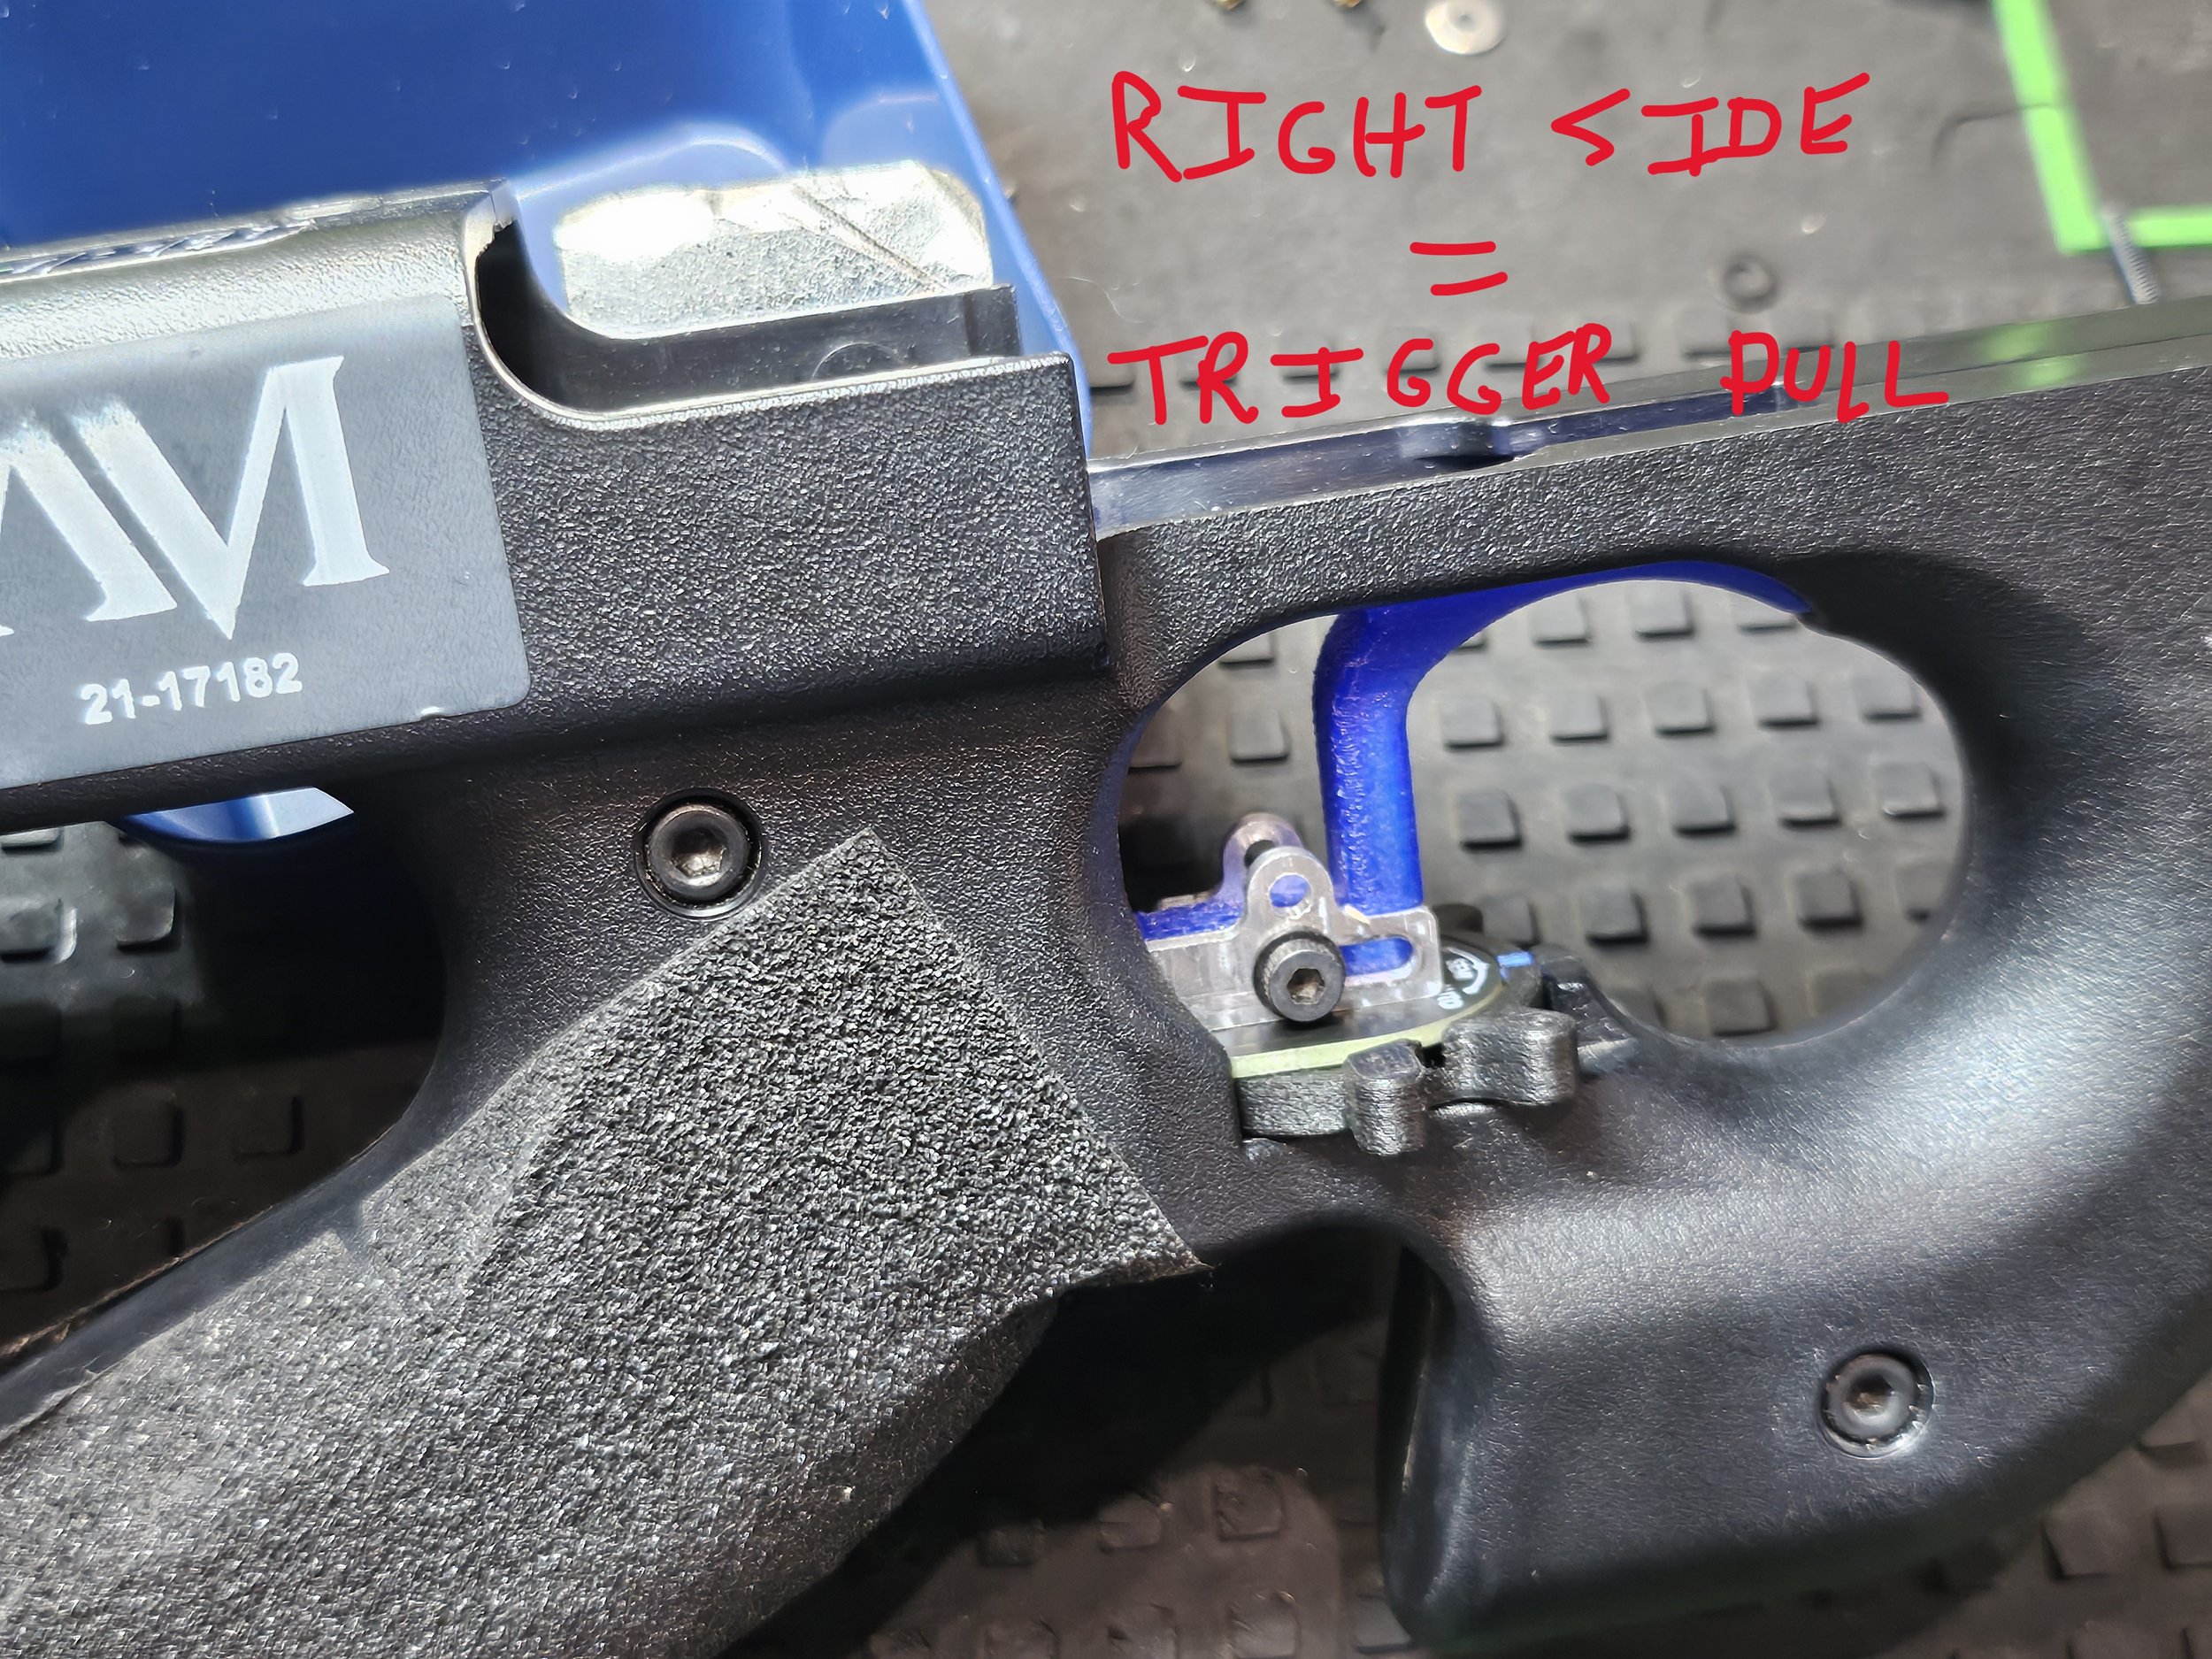
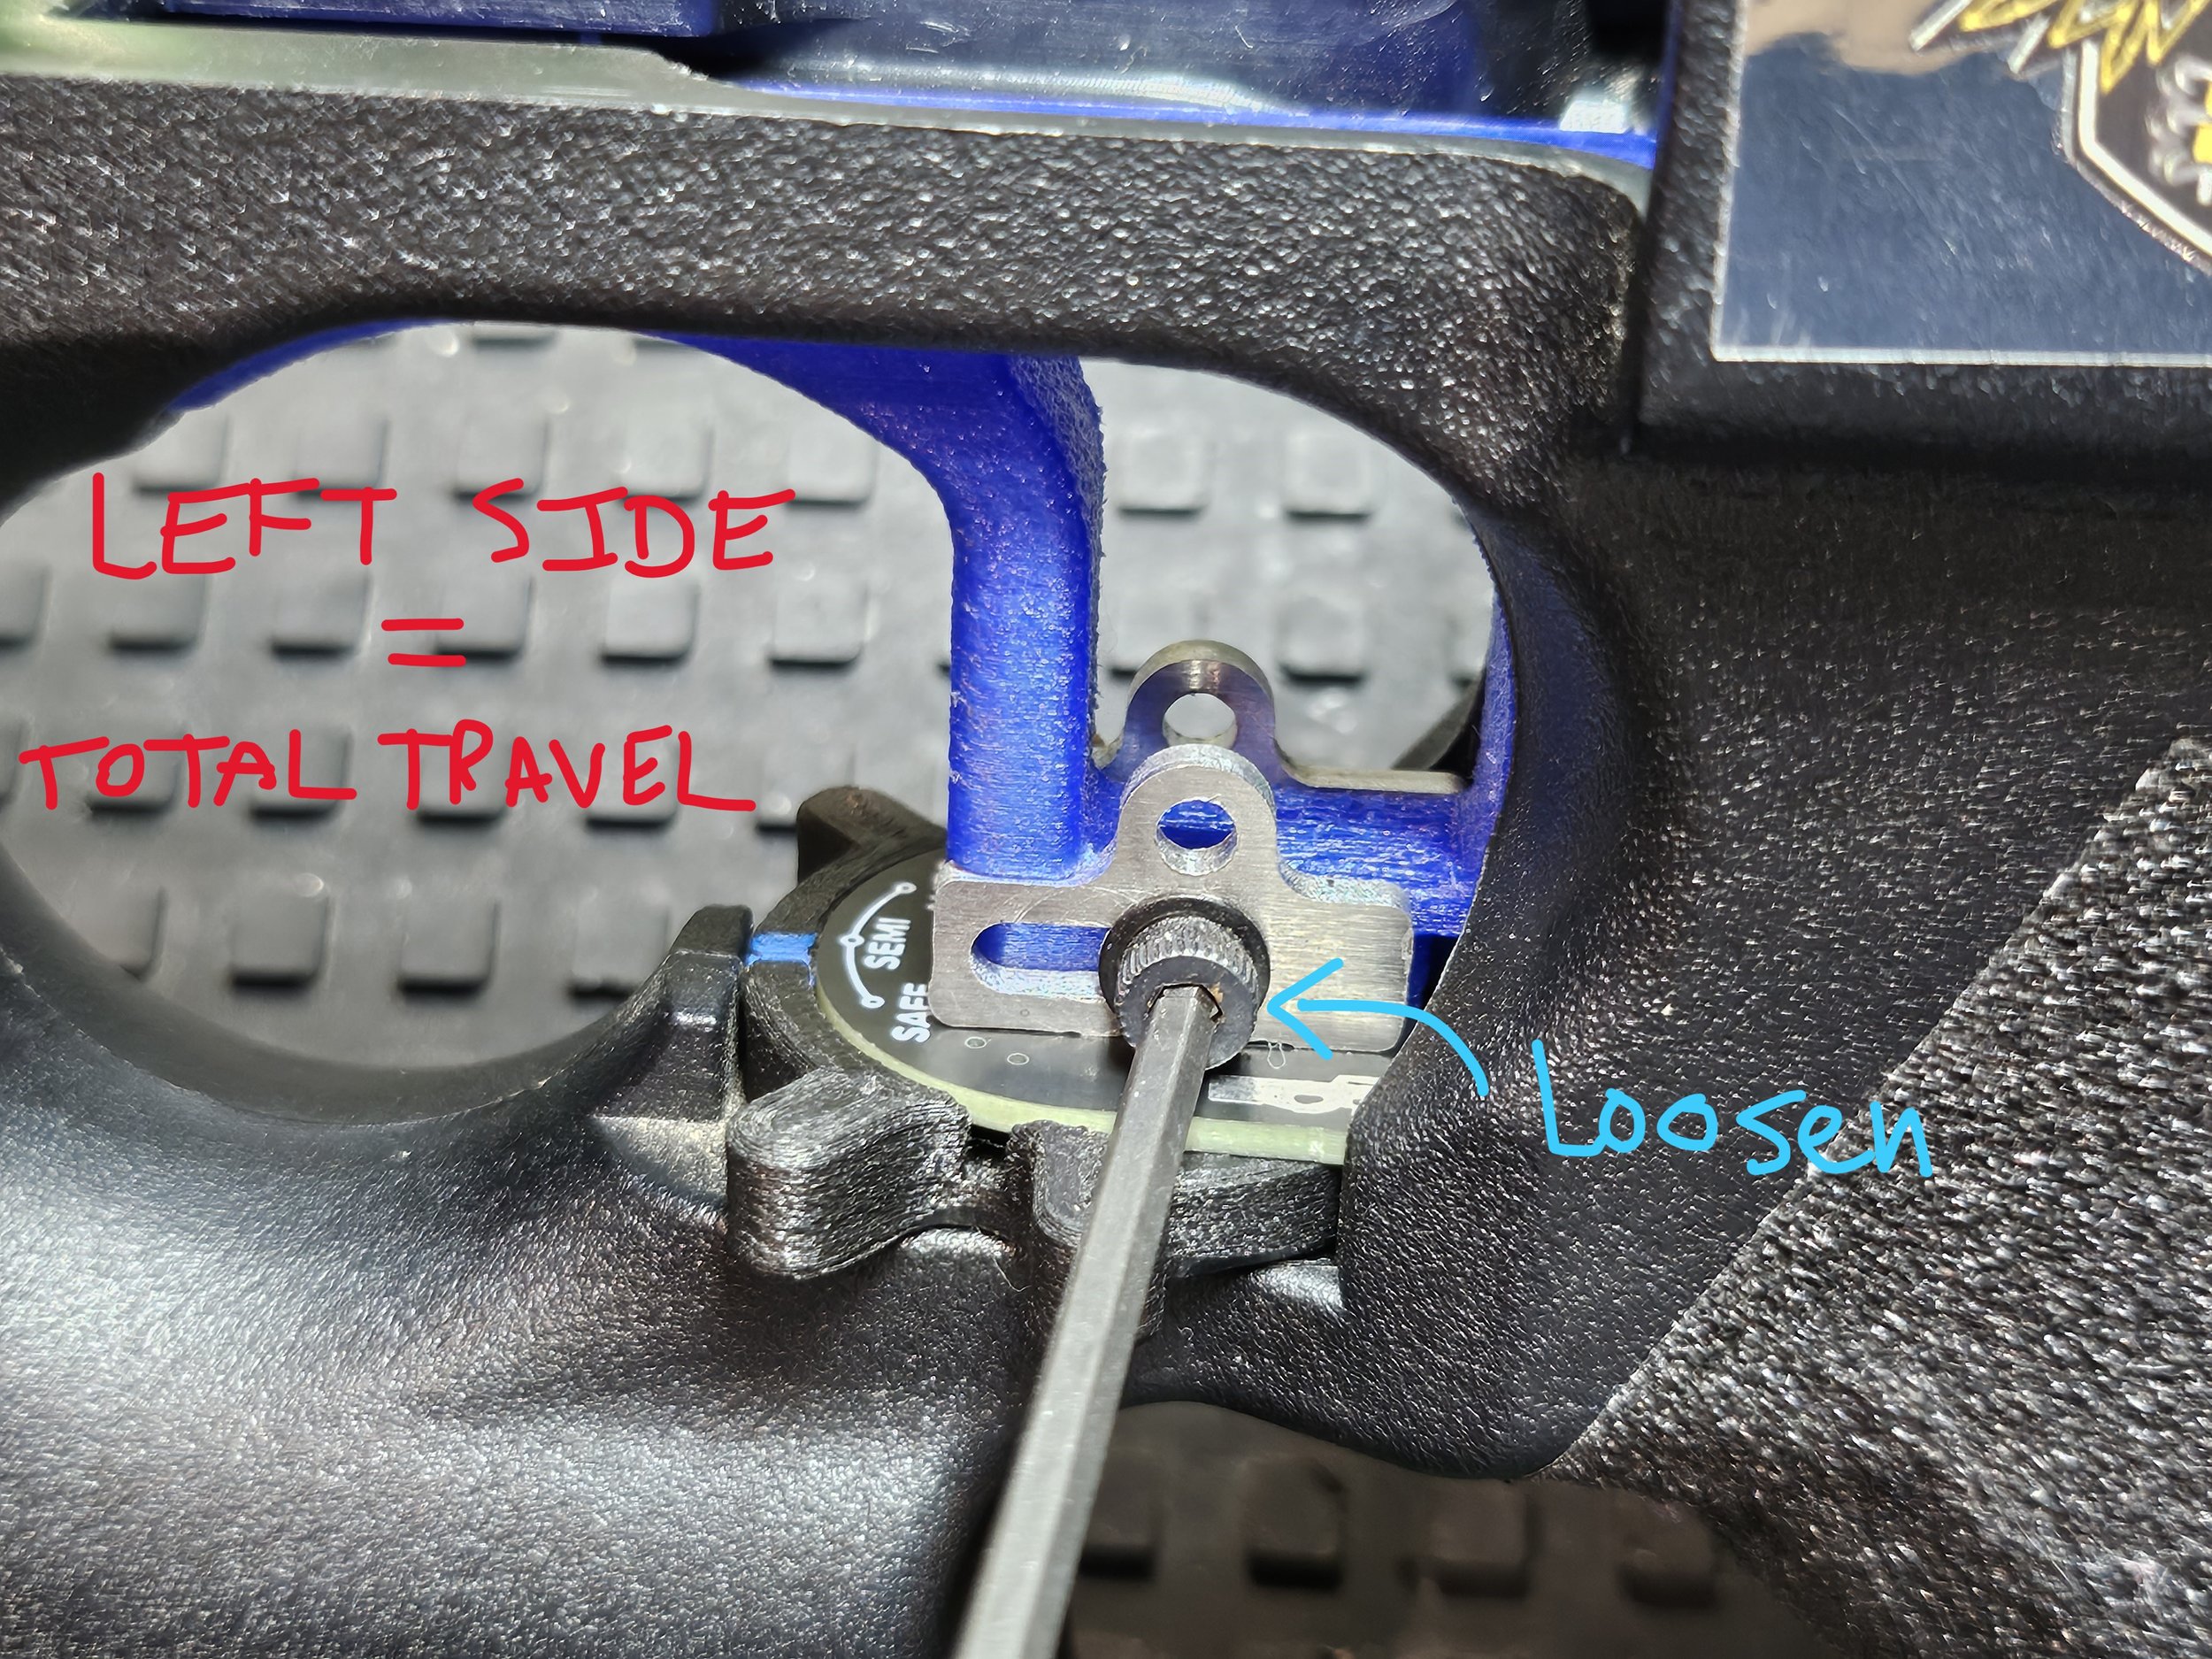
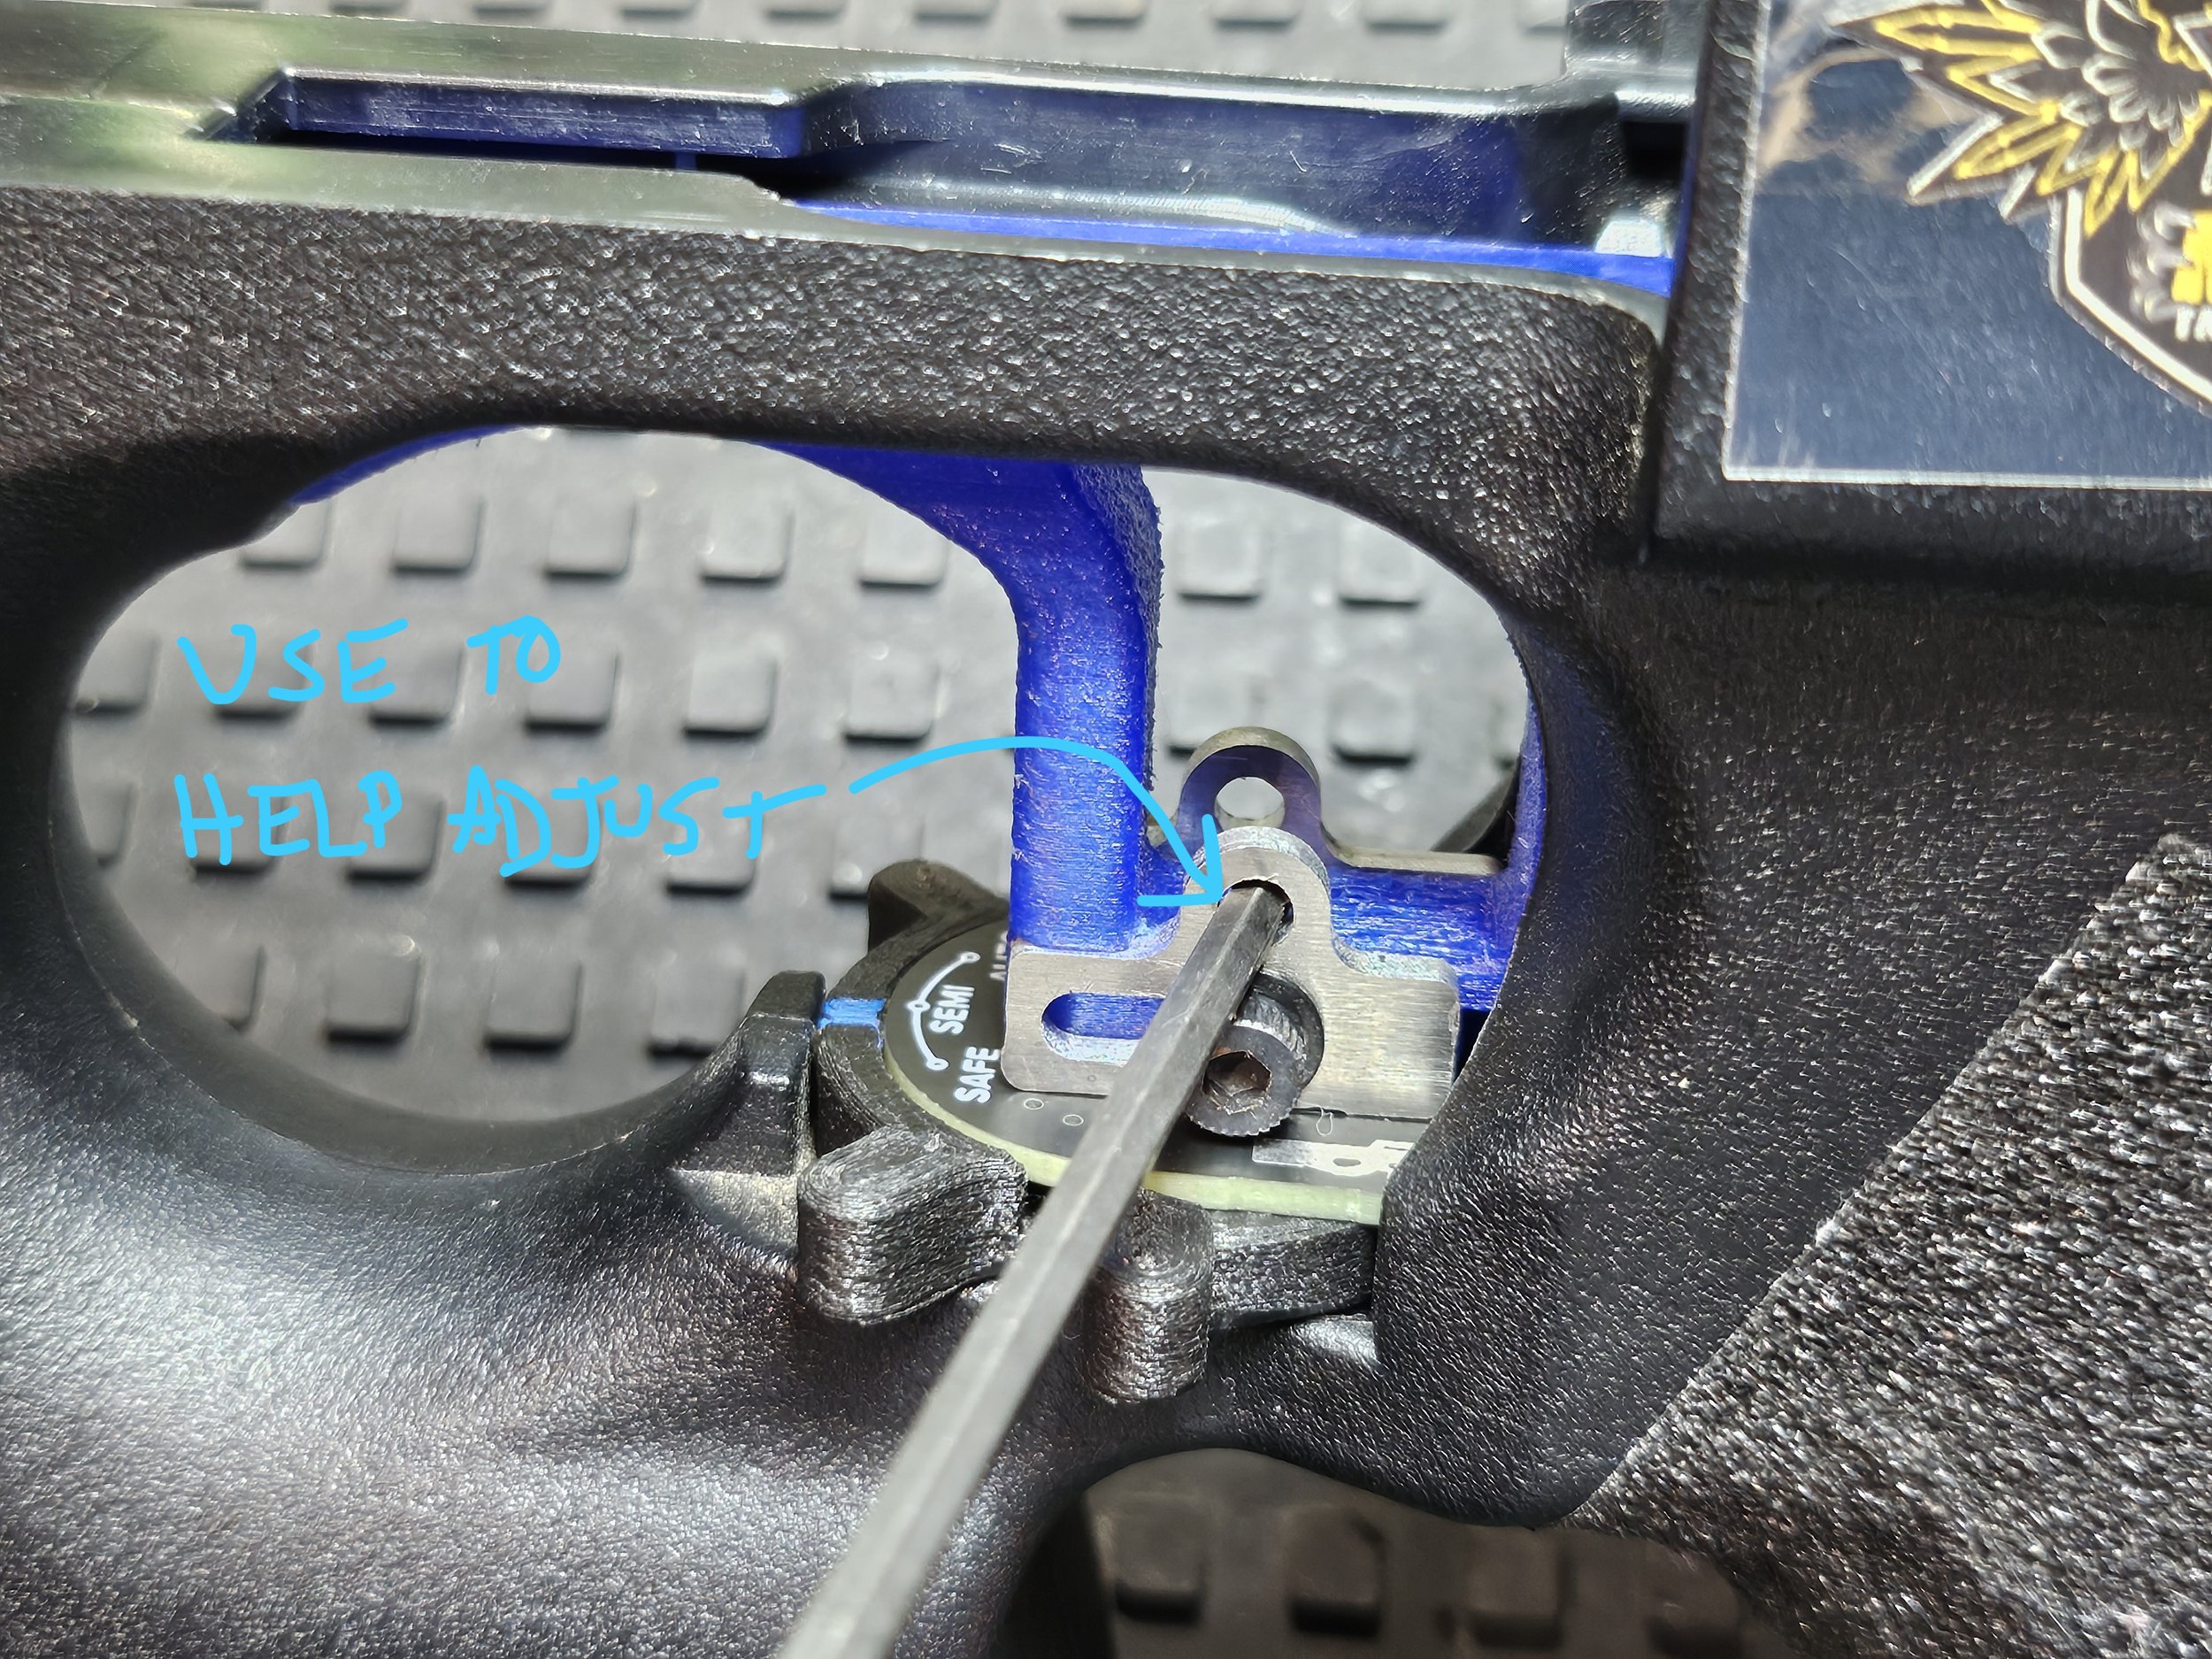
Tuning trigger pull.
The right trigger slider is “Trigger Pull”, or, how soon does the gun shoot when pulling the trigger. Adjustability is 0-6 mm. Slider all the way forward is 6 mm, all the way back is (nearly) 0 mm. The M-Trigger ETU has an electronic safety. The gun will not accidentally shoot in Safe no matter how short you set the trigger pull.
The left trigger slider is “Trigger Travel”, or, when does the trigger actually stop moving. Adjustability is 0-6 mm. Slider all the way forward is 6 mm, all the way back is (nearly) 0 mm. Note that the left slider must be adjusted further forward than the right slider. For example, if you set your right-side trigger pull in the middle (~3mm), then you must adjust your trigger travel to 3-6mm. Otherwise, the trigger will stop moving before the gun actually shoots. Use this to tune how much dead space or “overtravel” you want in your trigger after a shot.
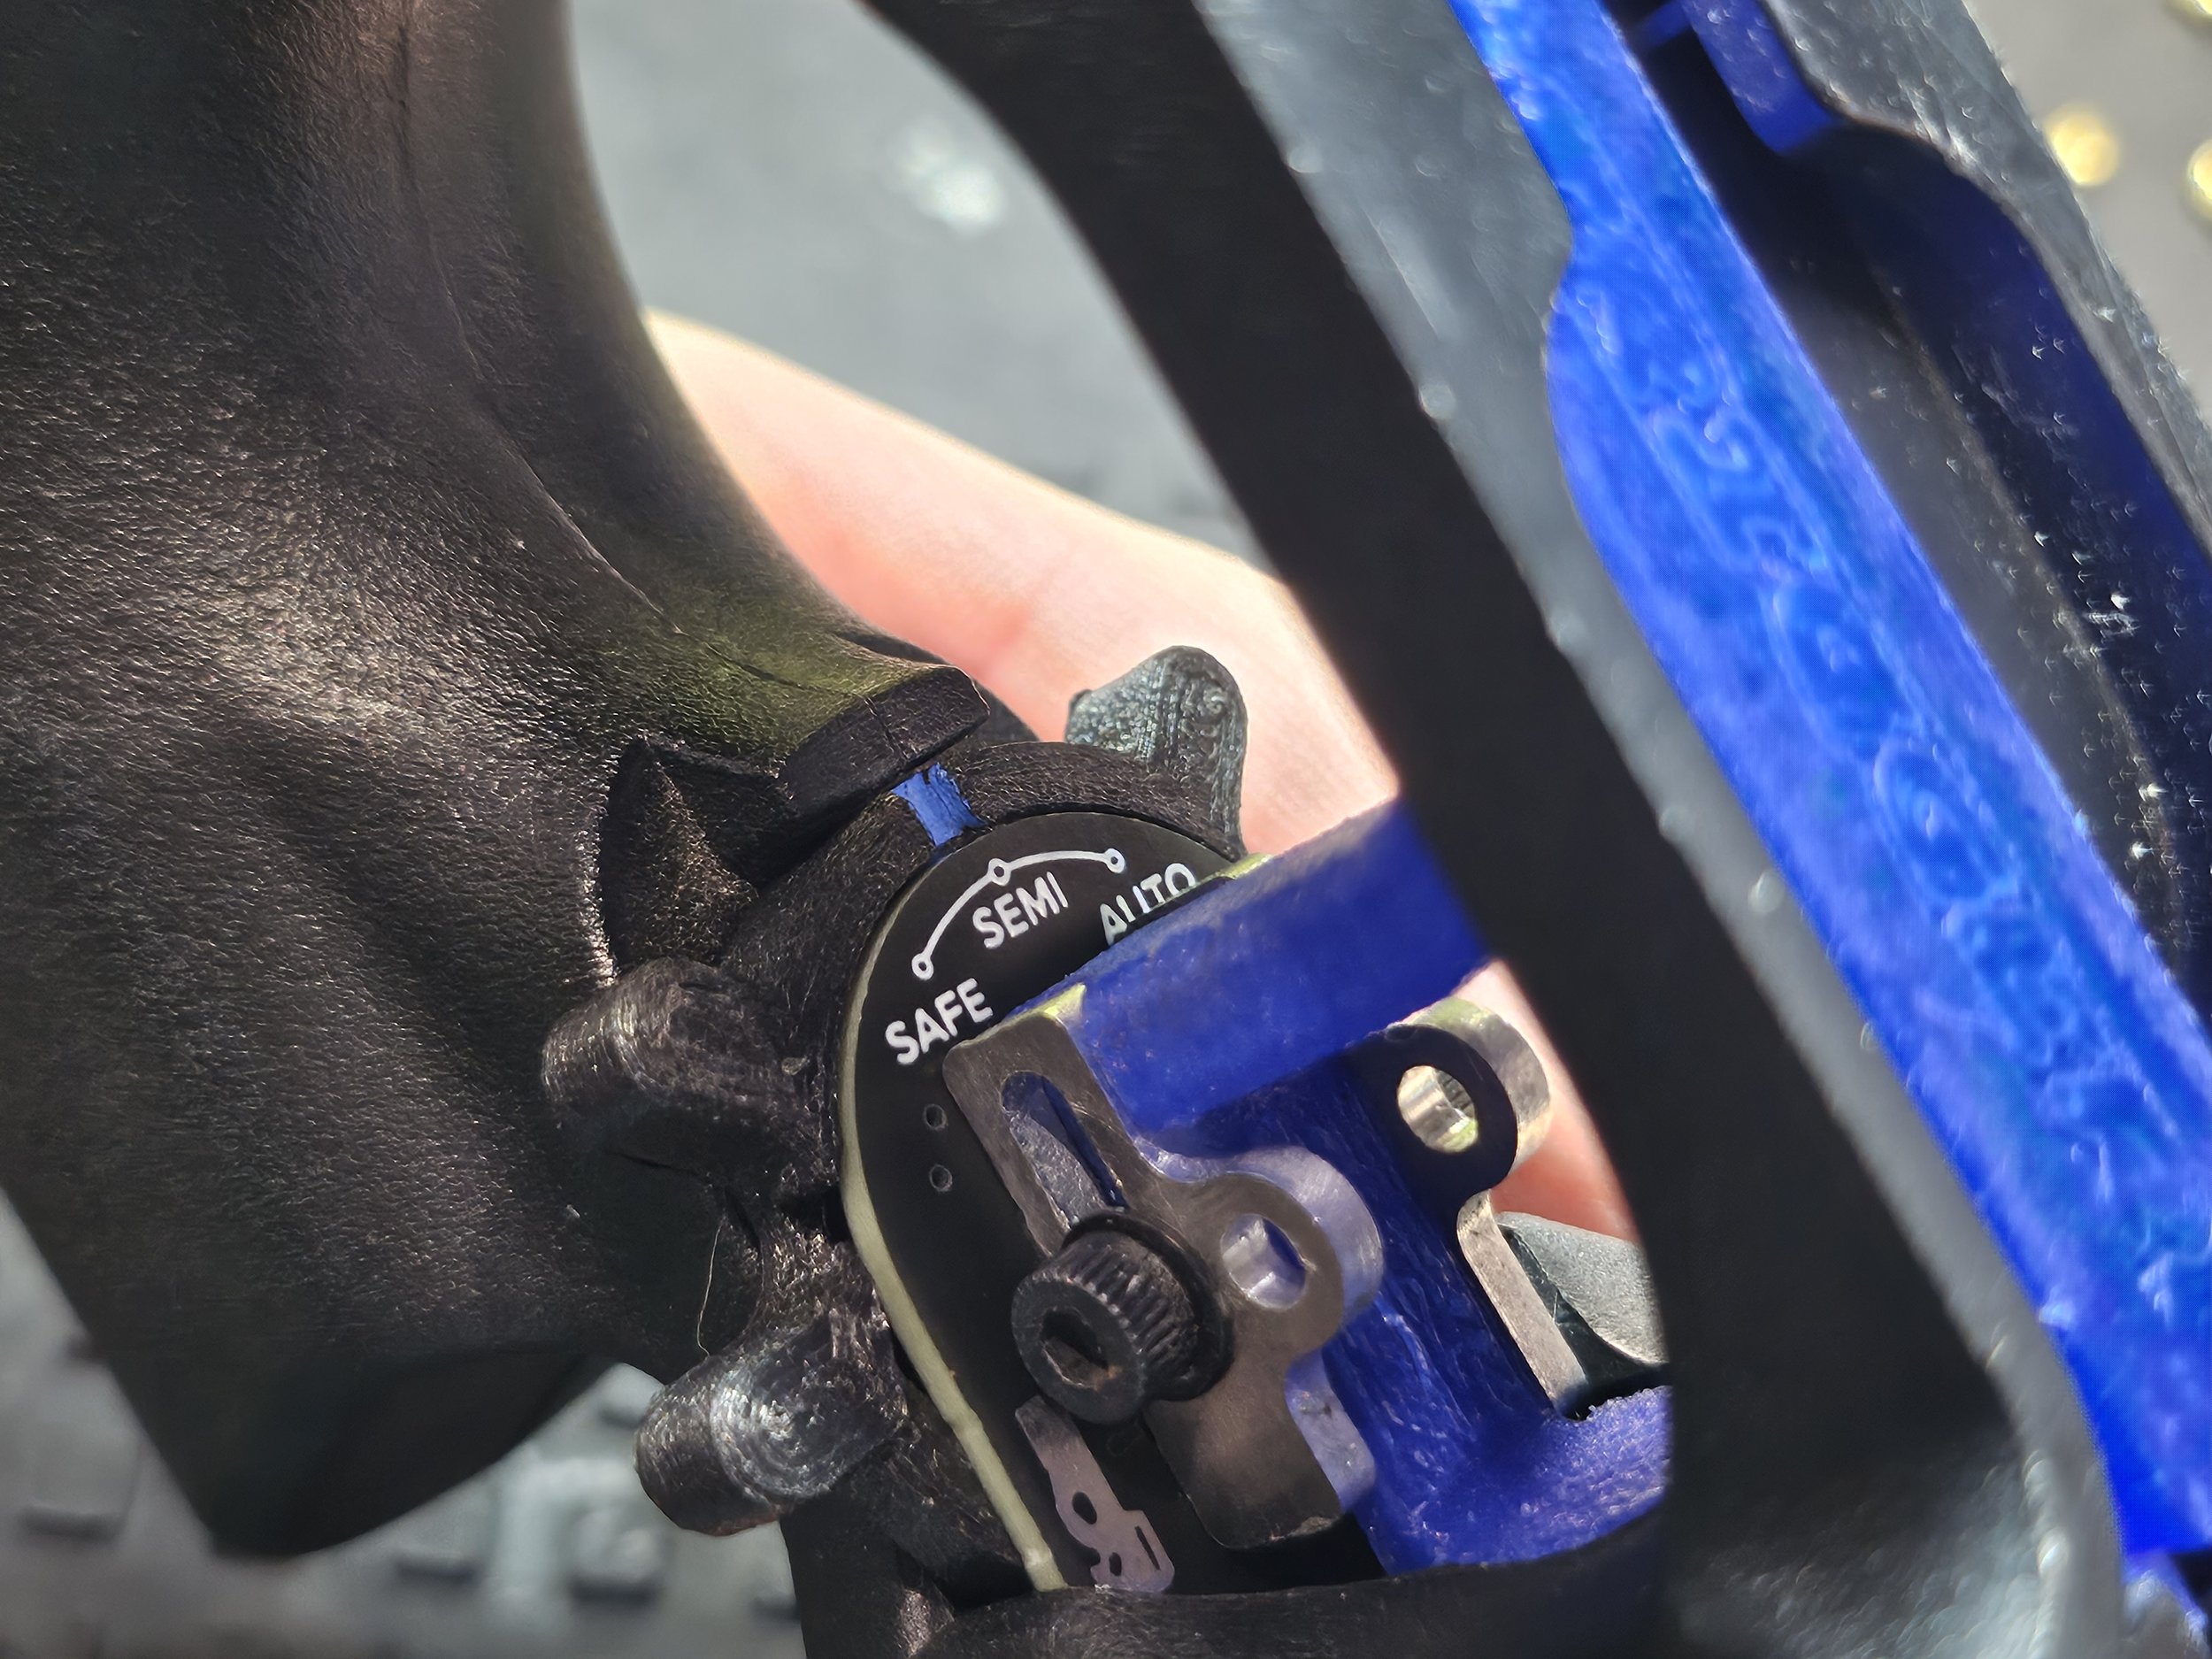
Both selector positions share the same trigger pull and travel setting. There is no 2-stage trigger like the original gun. For reference, the original gun’s trigger pull is 6mm in semi auto and 9mm in full auto.
Programming the mosfet.
Each selector position has its own mosfet settings!! That means you can have different fire modes, active braking, precocking, and more for each selector position independently. Program either selector position to whatever you want. For example, the default is SAFE-SEMI-AUTO, but you can do SAFE-SEMI-SAFE, SAFE-BINARY-BURST, SAFE-AUTO-SEMI, or whatever you want (first position is always Safe).
Read Perun’s manual or watch their video tutorial to learn how to program the mosfet. Perun ETU++ Manual, Perun ETU++ Video Tutorial
Krytac Spec
Instructional video coming soon. If anything is unclear, message us.
Time: 30-60 minutes
Tools: 2.5mm hex wrench, 3mm hex wrench, Optional: flat head screwdriver, needlenose pliers
Contact Us for any help!
Split the body by removing the front barrel assembly, mag catch, gearbox, and all left-side screws.
2. Remove trigger, trigger bar, selector switch, and selector bar. The only thing you need to keep is the trigger spring. You can also choose to use the original trigger, but you will not have adjustable trigger pull. Install the M-Trigger ETU trigger, selector switch & board, and trigger cables. Reassemble the body.
3. Remove the original ETU from the gearbox. Install the M-Trigger ETU cutoff board and Perun ETU++ mosfet.
4. Plug trigger cable into cutoff board and insert gearbox into the body. Care must be taken not to pinch any cables. Recommend keeping the trigger cable taught on the lower right side of the gearbox while slowly lowering gearbox. Do not pinch cables between the motor and body. With gearbox fully seated, all white cables should be loose. Tuck the mosfet in the open space at the back of the gearbox and install gearbox bracket.

5. Test everything and adjust trigger pull. The right trigger slider is trigger pull (how far you need to pull the trigger for the gun to shoot), the left slider is trigger travel (how far the trigger can move total). The left slider should not be set further back than the right slider. By adjusting these two sliders, you can set your perfect pre-travel and overtravel for the trigger. The electronic safety will not allow any shots in safe no matter how short your trigger pull.
6. Customize selector switch fire modes and settings to your liking with the Perun ETU++ mosfet. Each selector position has completely independent mosfet settings. Fire mode, active braking, precocking, and rate of fire reduction can all be programmed separately for each selector switch position. The selector switch can be set to any combination (including duplicates) of safe, semi, binary, 2-5rd burst, or full auto. Perun ETU++ Manual, Perun ETU++ Video Tutorial
G&G Spec
Coming Soon