M-Trigger Getting Started
Thanks for your order of our P90 or F2000 M-Trigger! This page has everything you need to get started.
Updated Nov. 2022
Customer Support
Full installation instructions are below. Need some help with the install or have questions? Contact us and we will help you out. I make and test every M-Trigger by hand, and I’d much rather you just ask me a question than have it not working :)
For all support, you can use the Facebook Messenger button in the bottom right corner (please sign into Facebook first), or email us at 3dprinting@srairsoft.com.
Leave a Review
Go ahead and install your M-Trigger and test it out. You’ll get an email in about 2 weeks where you can leave a review and share your thoughts. Thanks in advance!
International customers: you will probably get the review email before you actually get your M-Trigger due to longer shipping times. Be sure to check!
Like, Follow, Sub
Here are all our social media links. We post about new products and airsoft events we go to. A like and follow really help us grow our business!
Installation
The M-Trigger is a direct replacement of the stock trigger unit. Remove the gearbox from the body, unscrew the old trigger unit, and attach the M-Trigger in the same location. Only a screwdriver/hex wrench is needed.
KRYTAC ONLY: After removing the gearbox, split the body completely by removing all the left-side body screws and the mag release. Remove and discard the trigger and selector switch bars and install the Shadow Regime Krytac M-Trigger Bar. Replace the cutoff lever with any other normal P90 cutoff lever. Reassemble.
BASE ONLY: Wire and solder your mosfet and attach the trigger wires to the M-Trigger leads (wire order does not matter). If using a Gate Warfet, set it to modified wiring mode.
PRO ONLY: A Perun AB++ mosfet is preinstalled for you. Adjust mosfet settings to your preference. Click here for manual.Before putting the gearbox back in, plug in your battery and test by hand. Half trigger pull for semi, full trigger pull for full auto. If everything works, then insert gearbox into the gun and test again with everything assembled. If semi or auto is not working, see next steps. If it’s still not working, contact us.
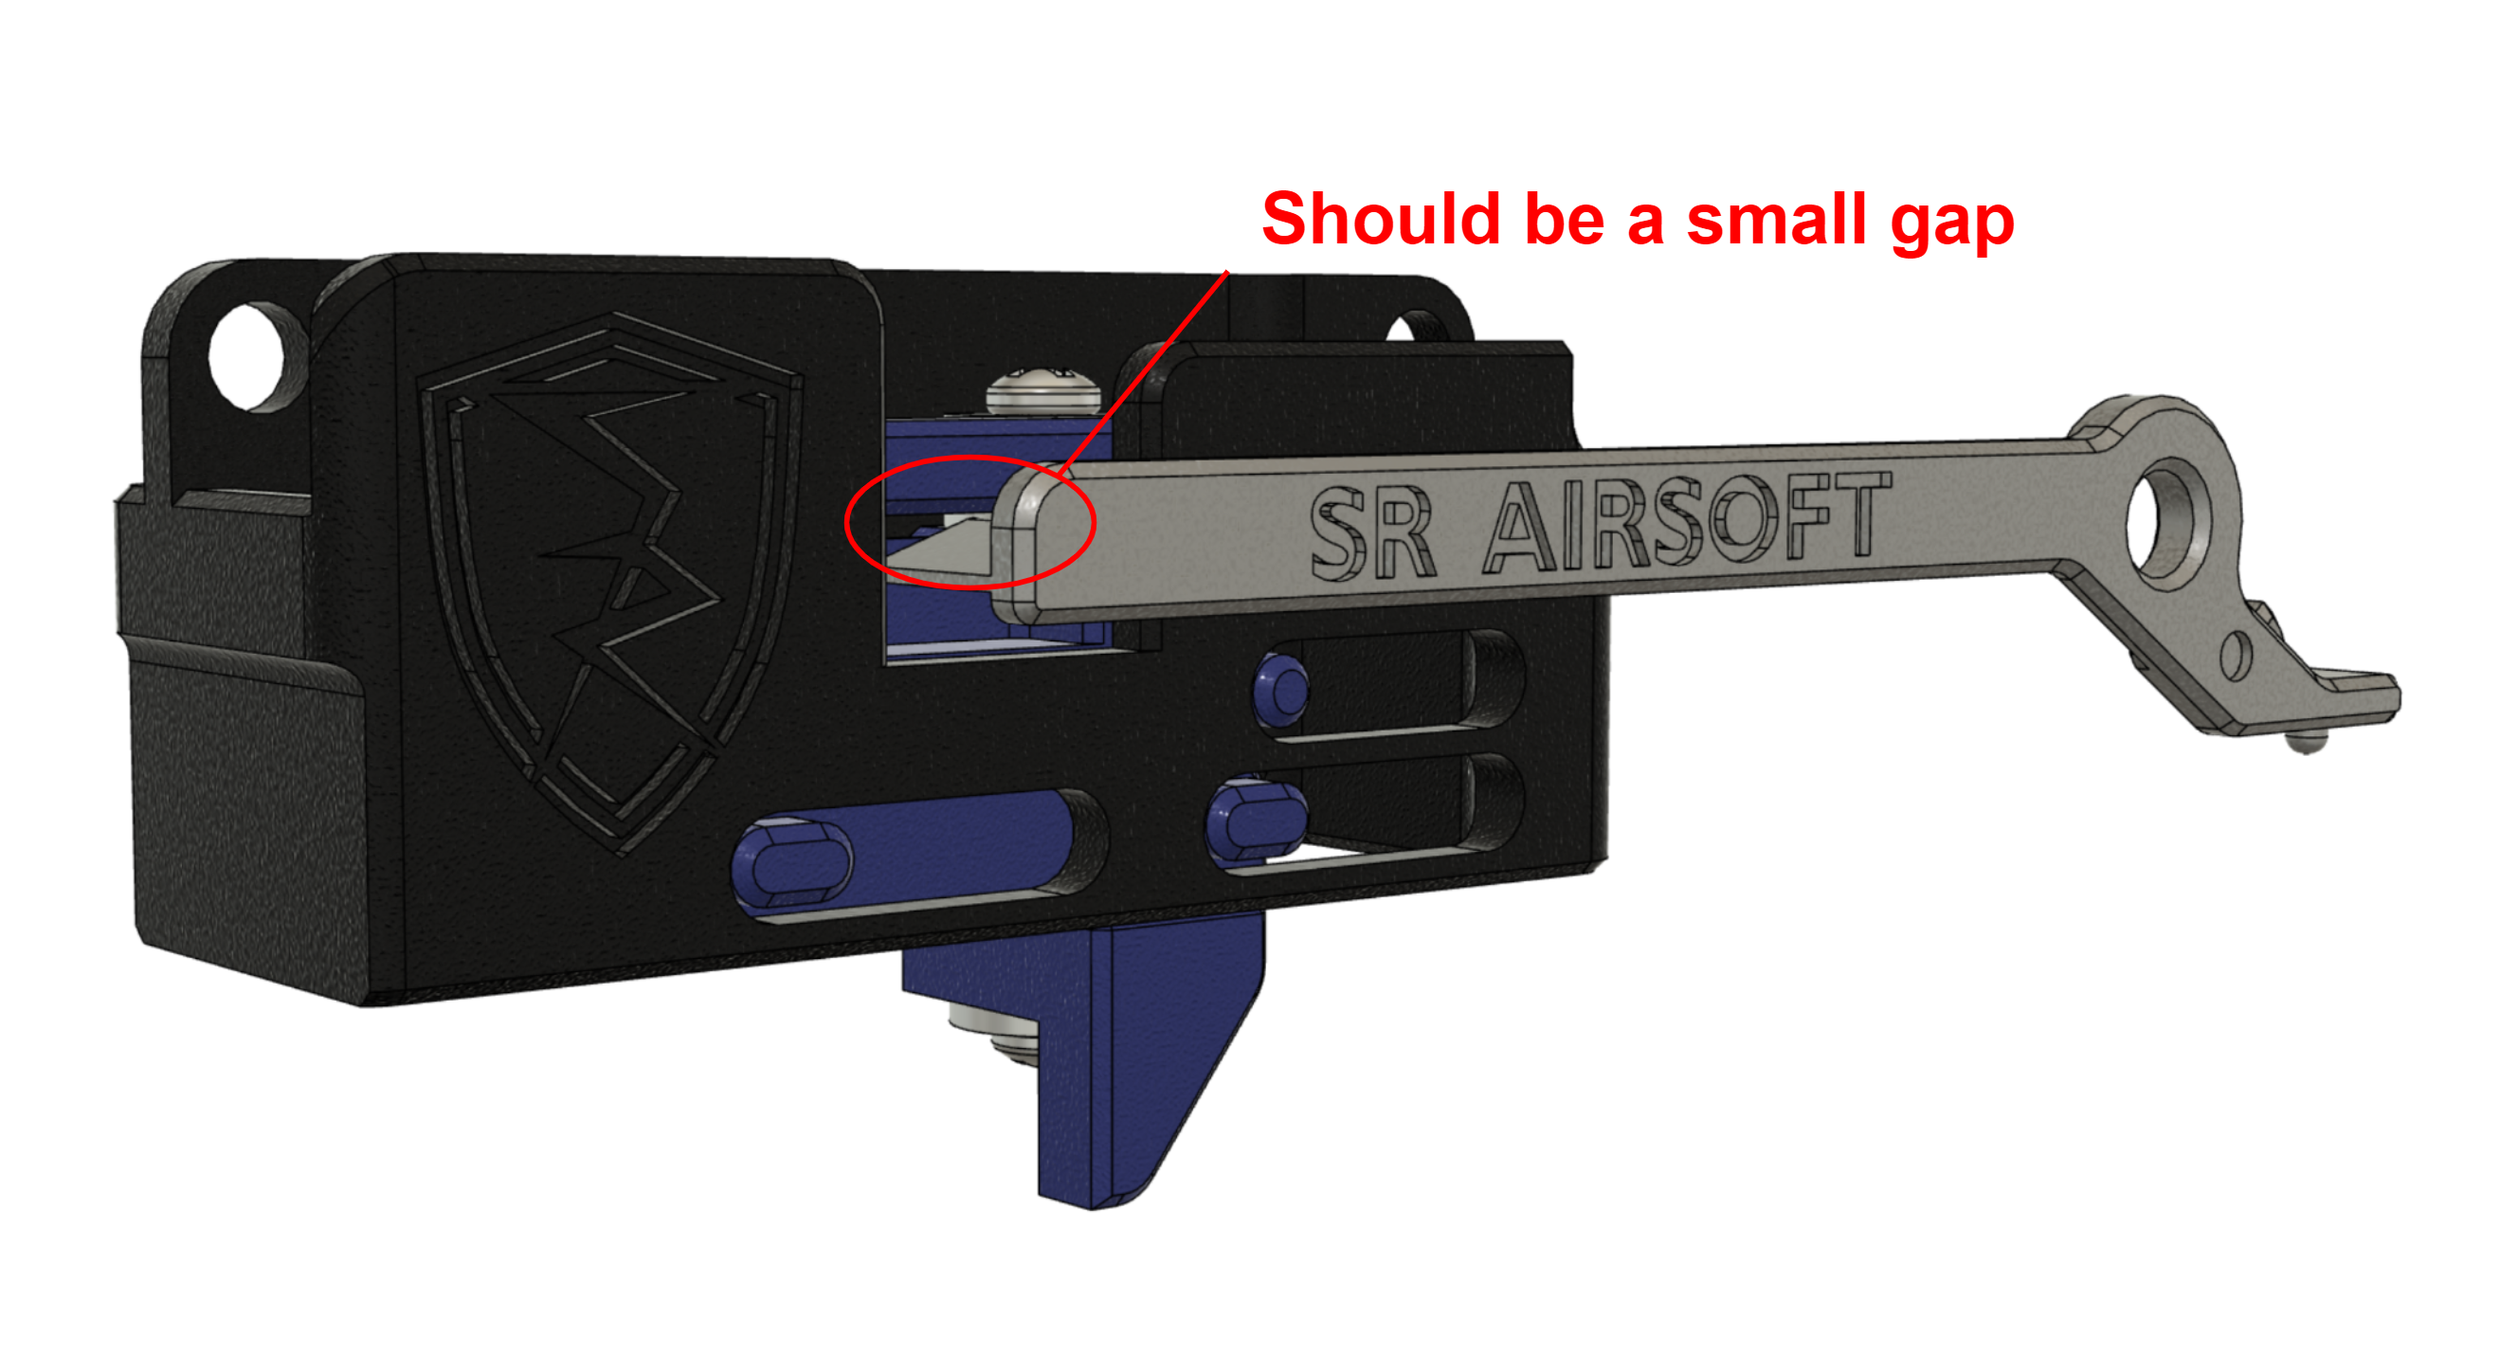
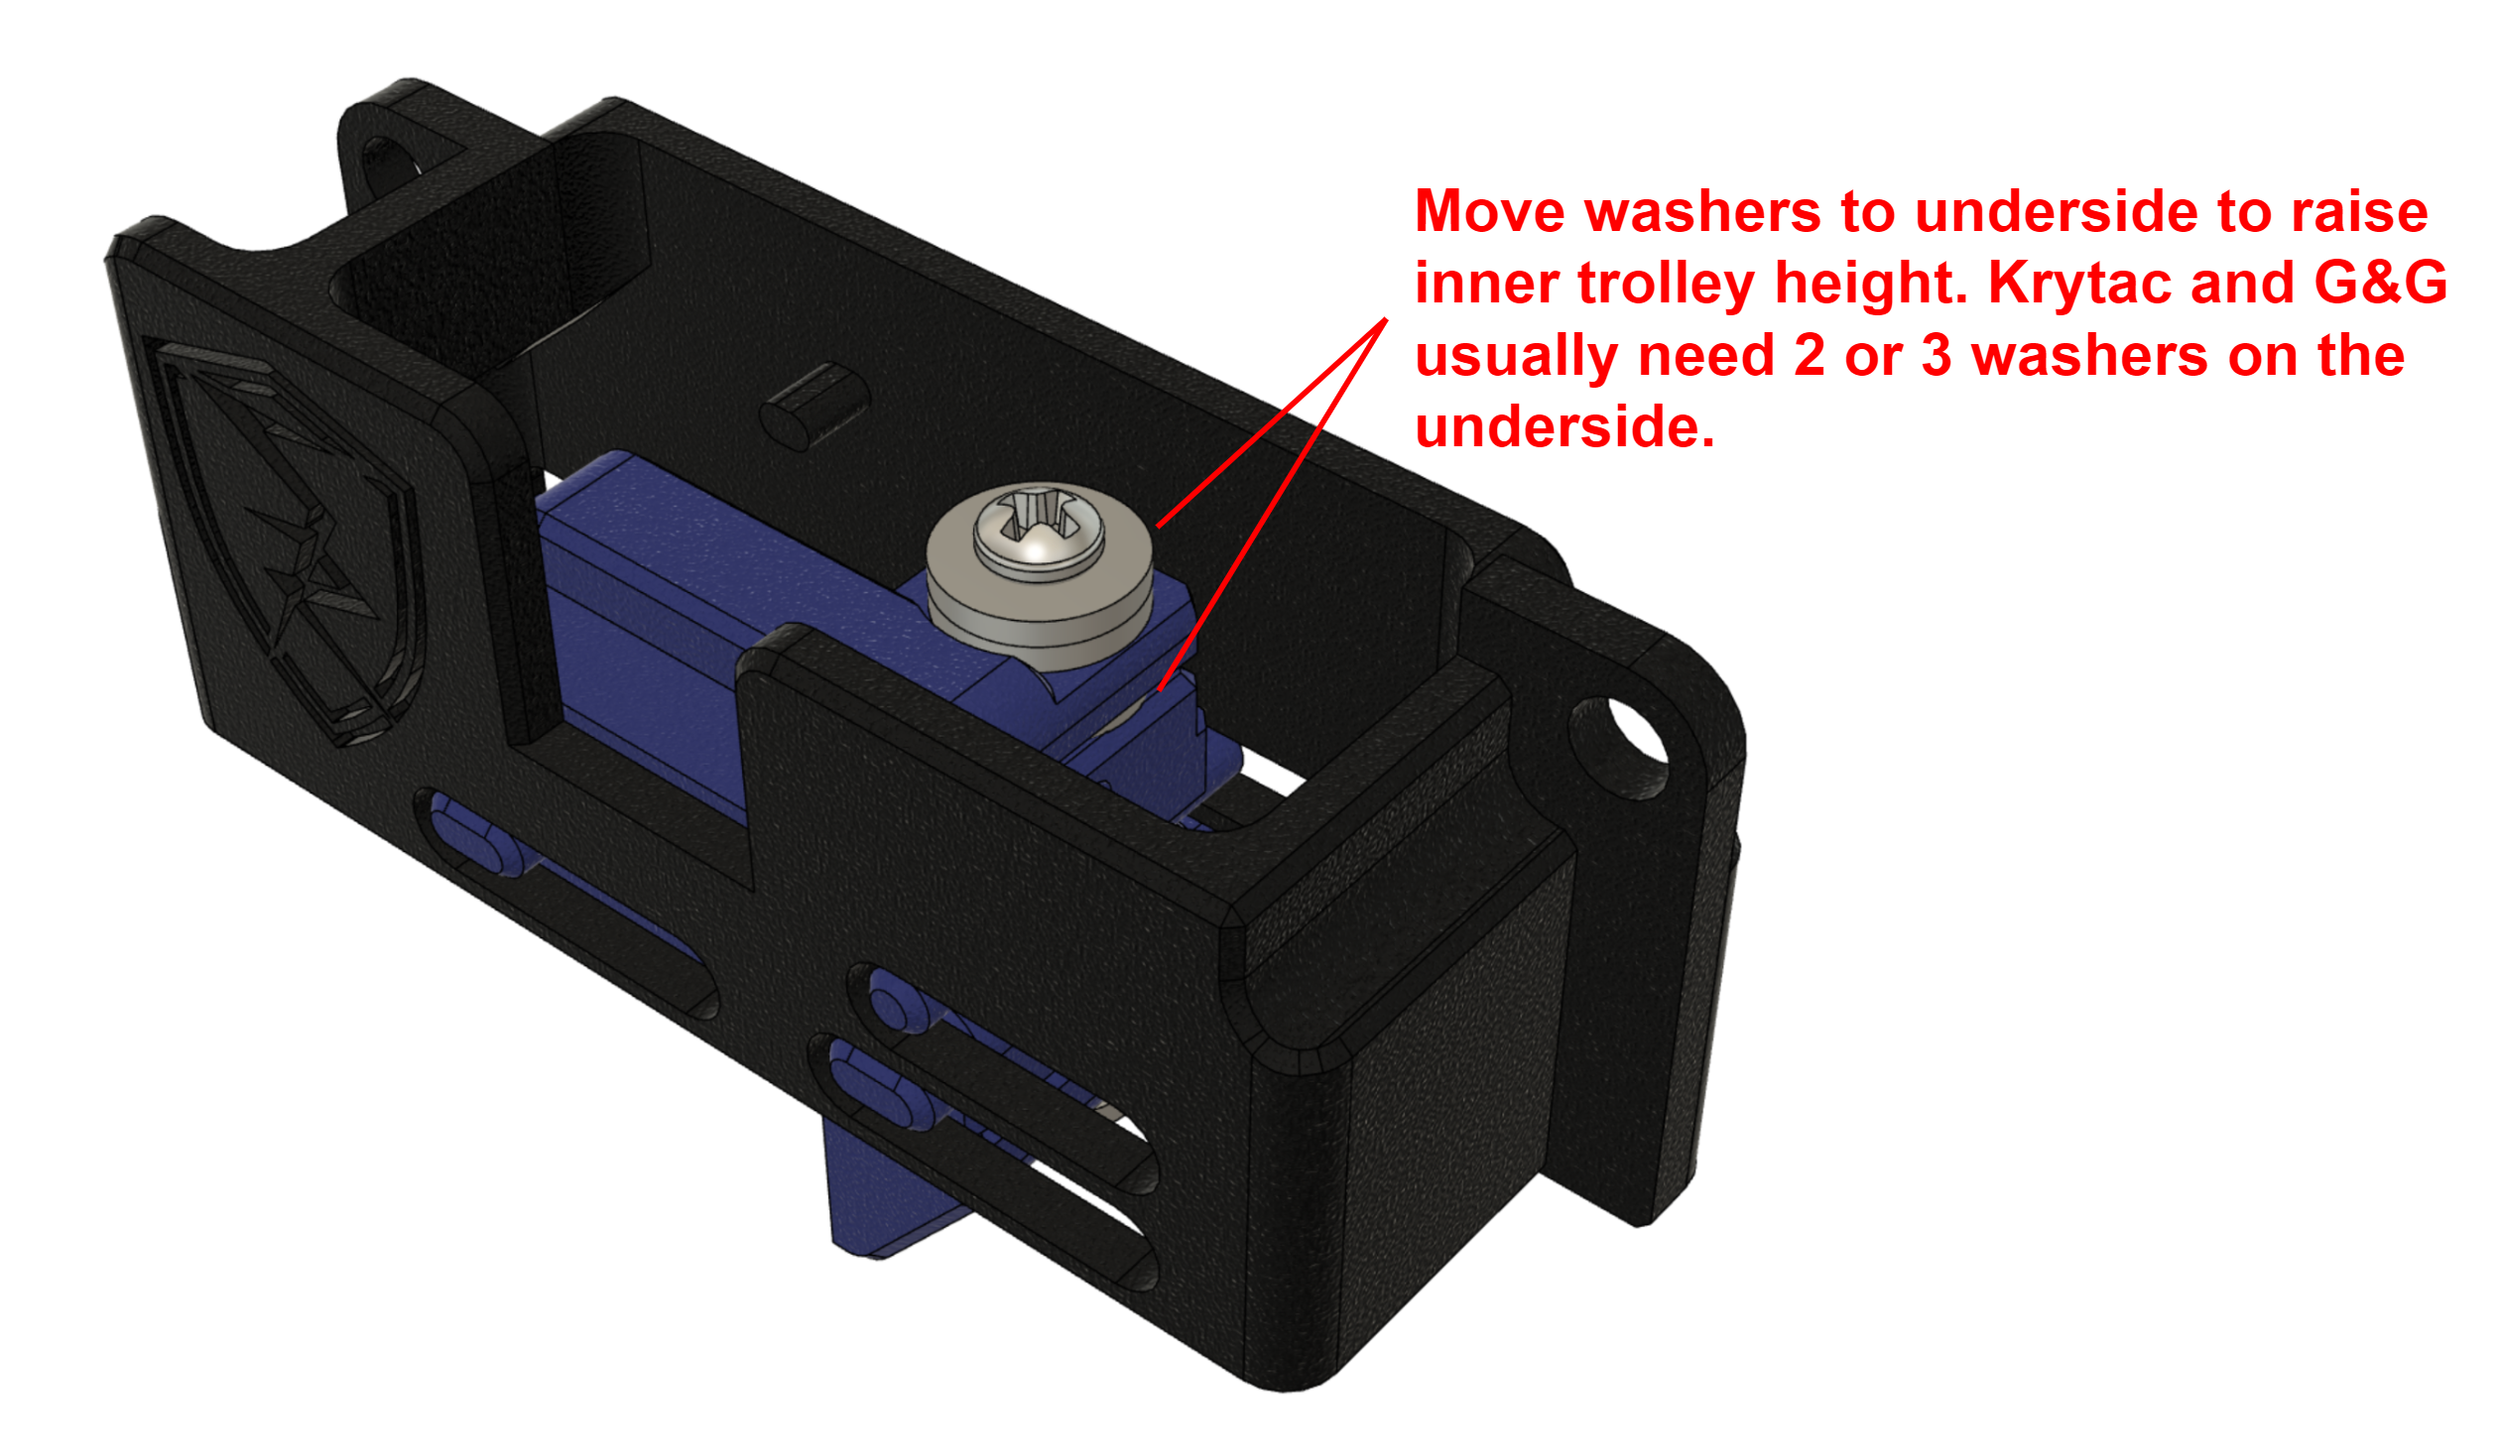
TUNING CUTOFF LEVER HEIGHT: The cutoff lever should not be touching any part of the M-Trigger. If it’s pushing up on the inner trolley, that will cause semi auto problems. The inner trolley height can be adjusted to perfectly meet your cutoff lever. If needed, unscrew and add or remove washers from inner trolley until the height is perfect. Gear shims can also be used for finer adjustments. G&G and Krytac P90’s will always need to have the cutoff height adjusted.
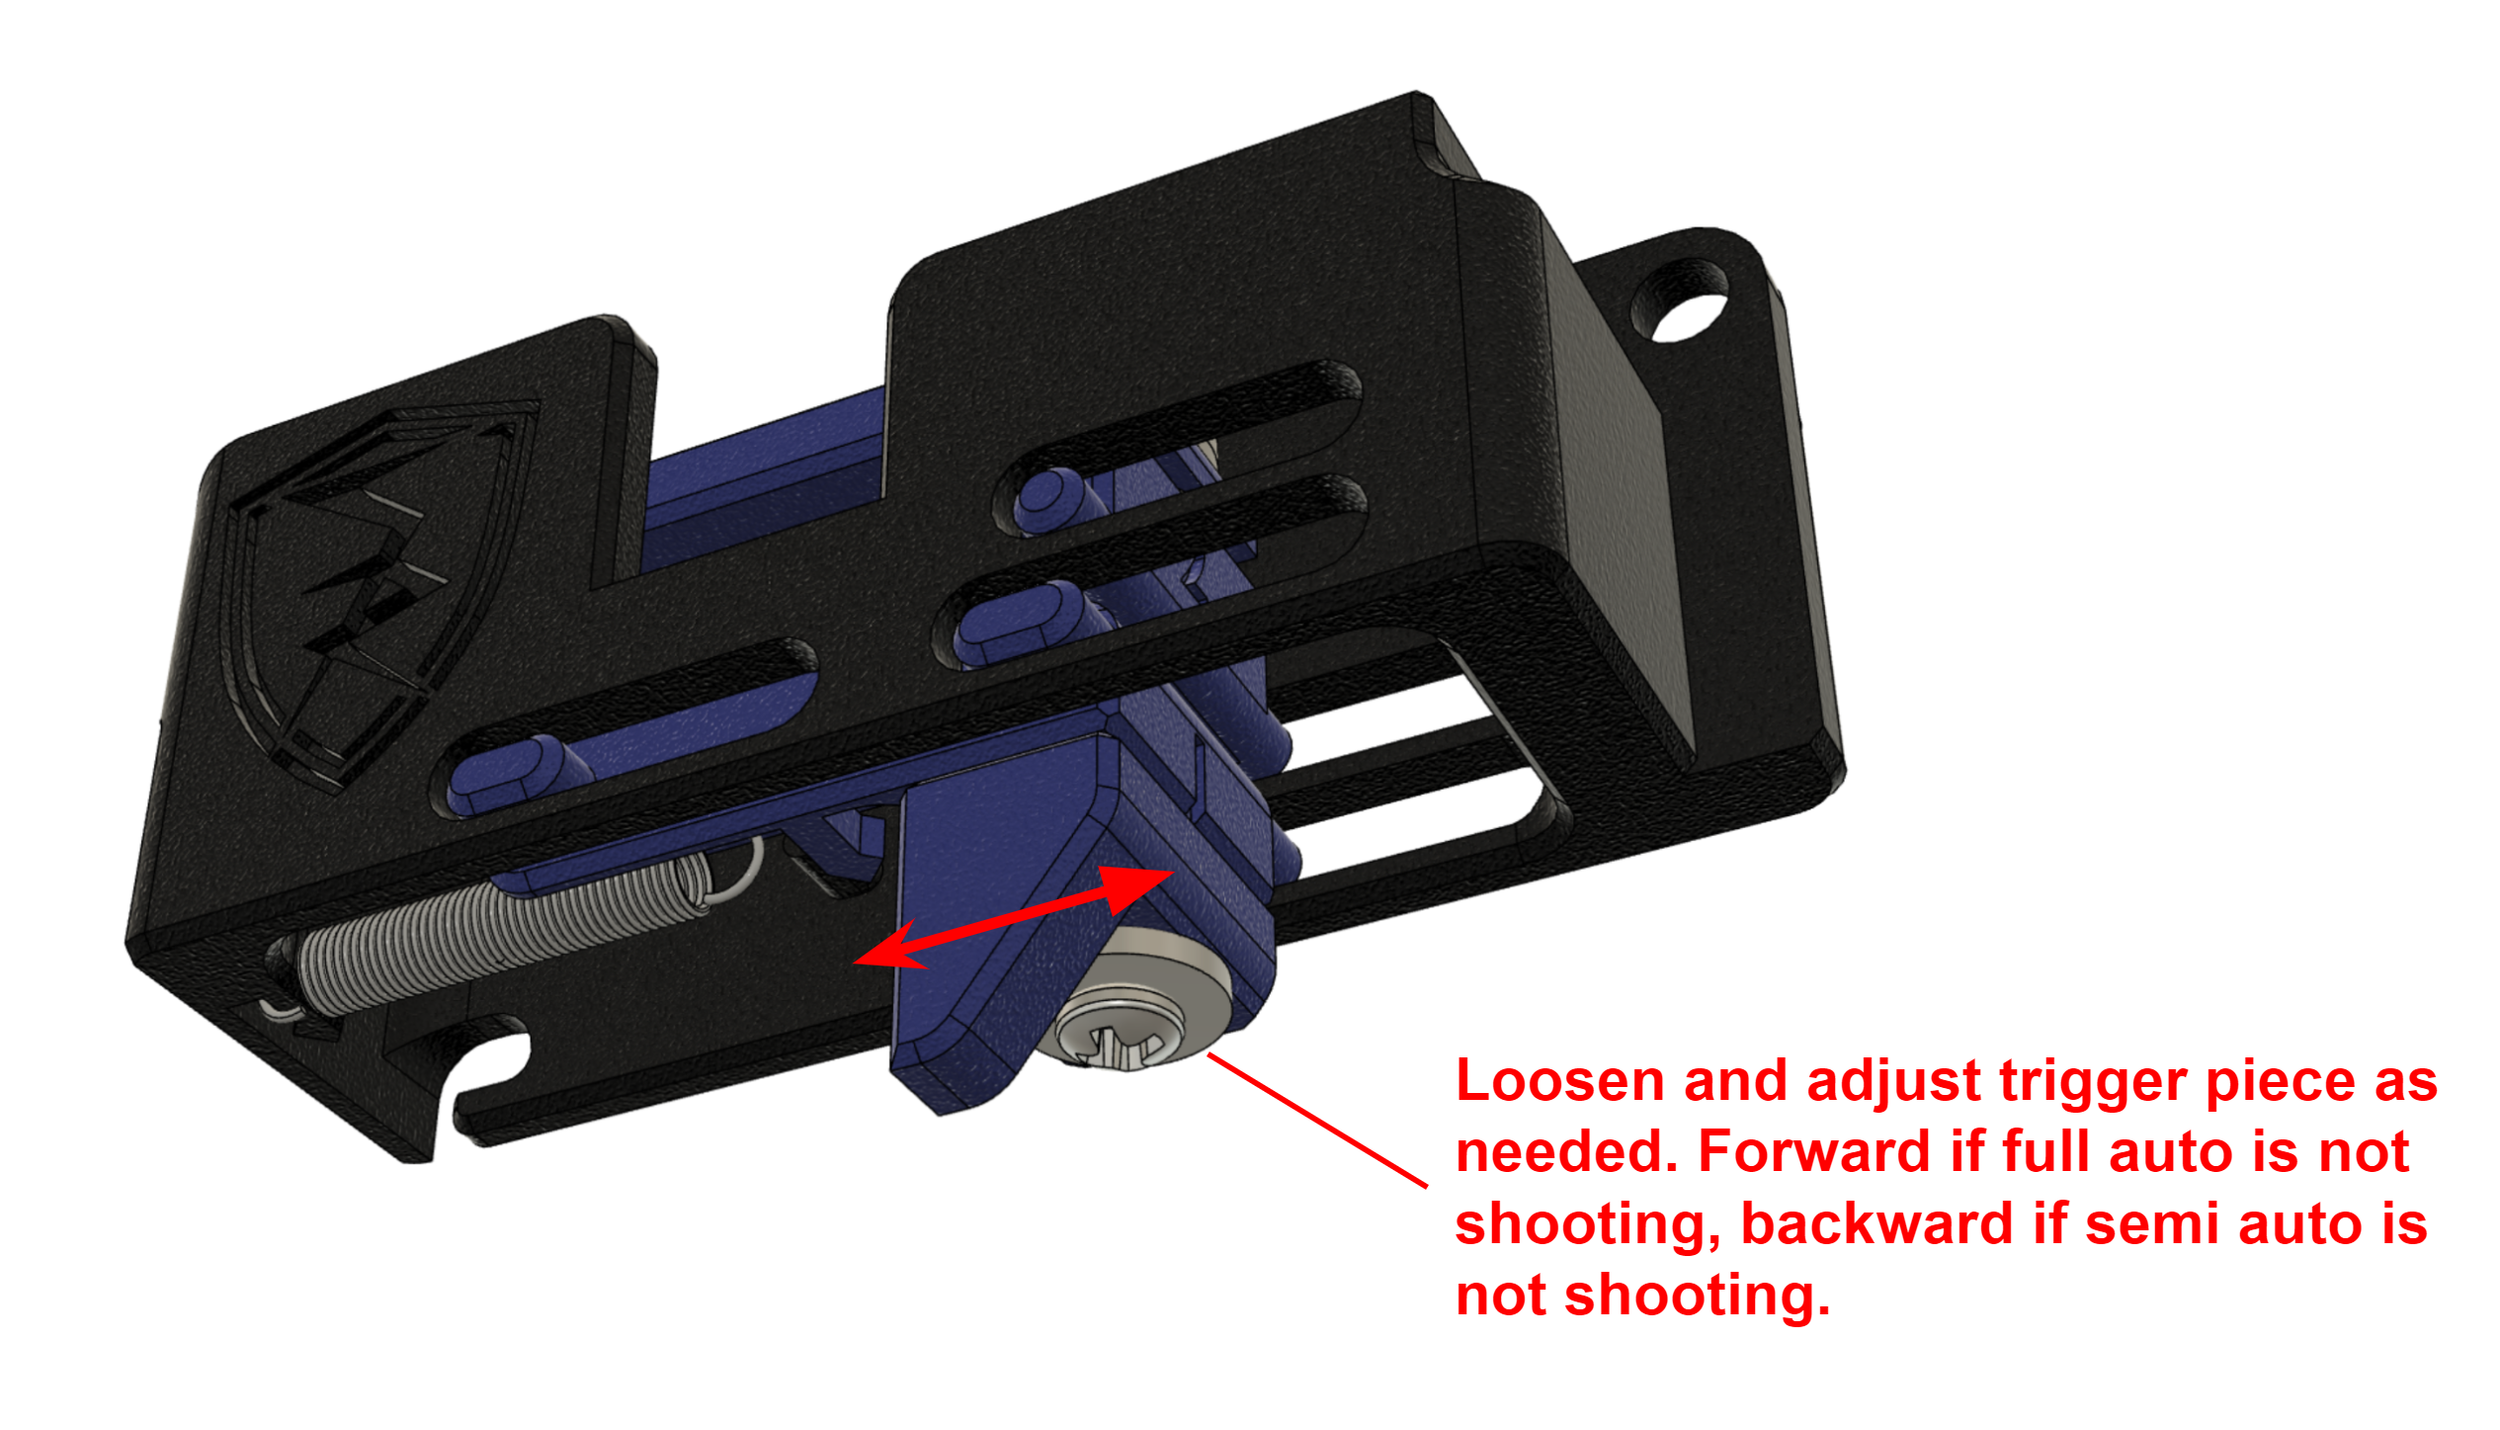
TUNING TRIGGER BAR LENGTH: If your trigger bar is slightly shorter or longer, you may lose either the first or second stage of the trigger. The lower trolley can be adjusted back and forth to account for longer/shorter trigger bars or for longer/shorter trigger pulls. Loosen trigger piece screw and move piece back and forth to adjust. Move forward if you aren’t getting the second stage (full auto), move backward if you aren’t getting the first stage (semi).
Gen 3 installation video is below. Gen 4 installation is almost identical, and an updated Gen 4 installation video is in progress.