
M-Trigger Installation Guide
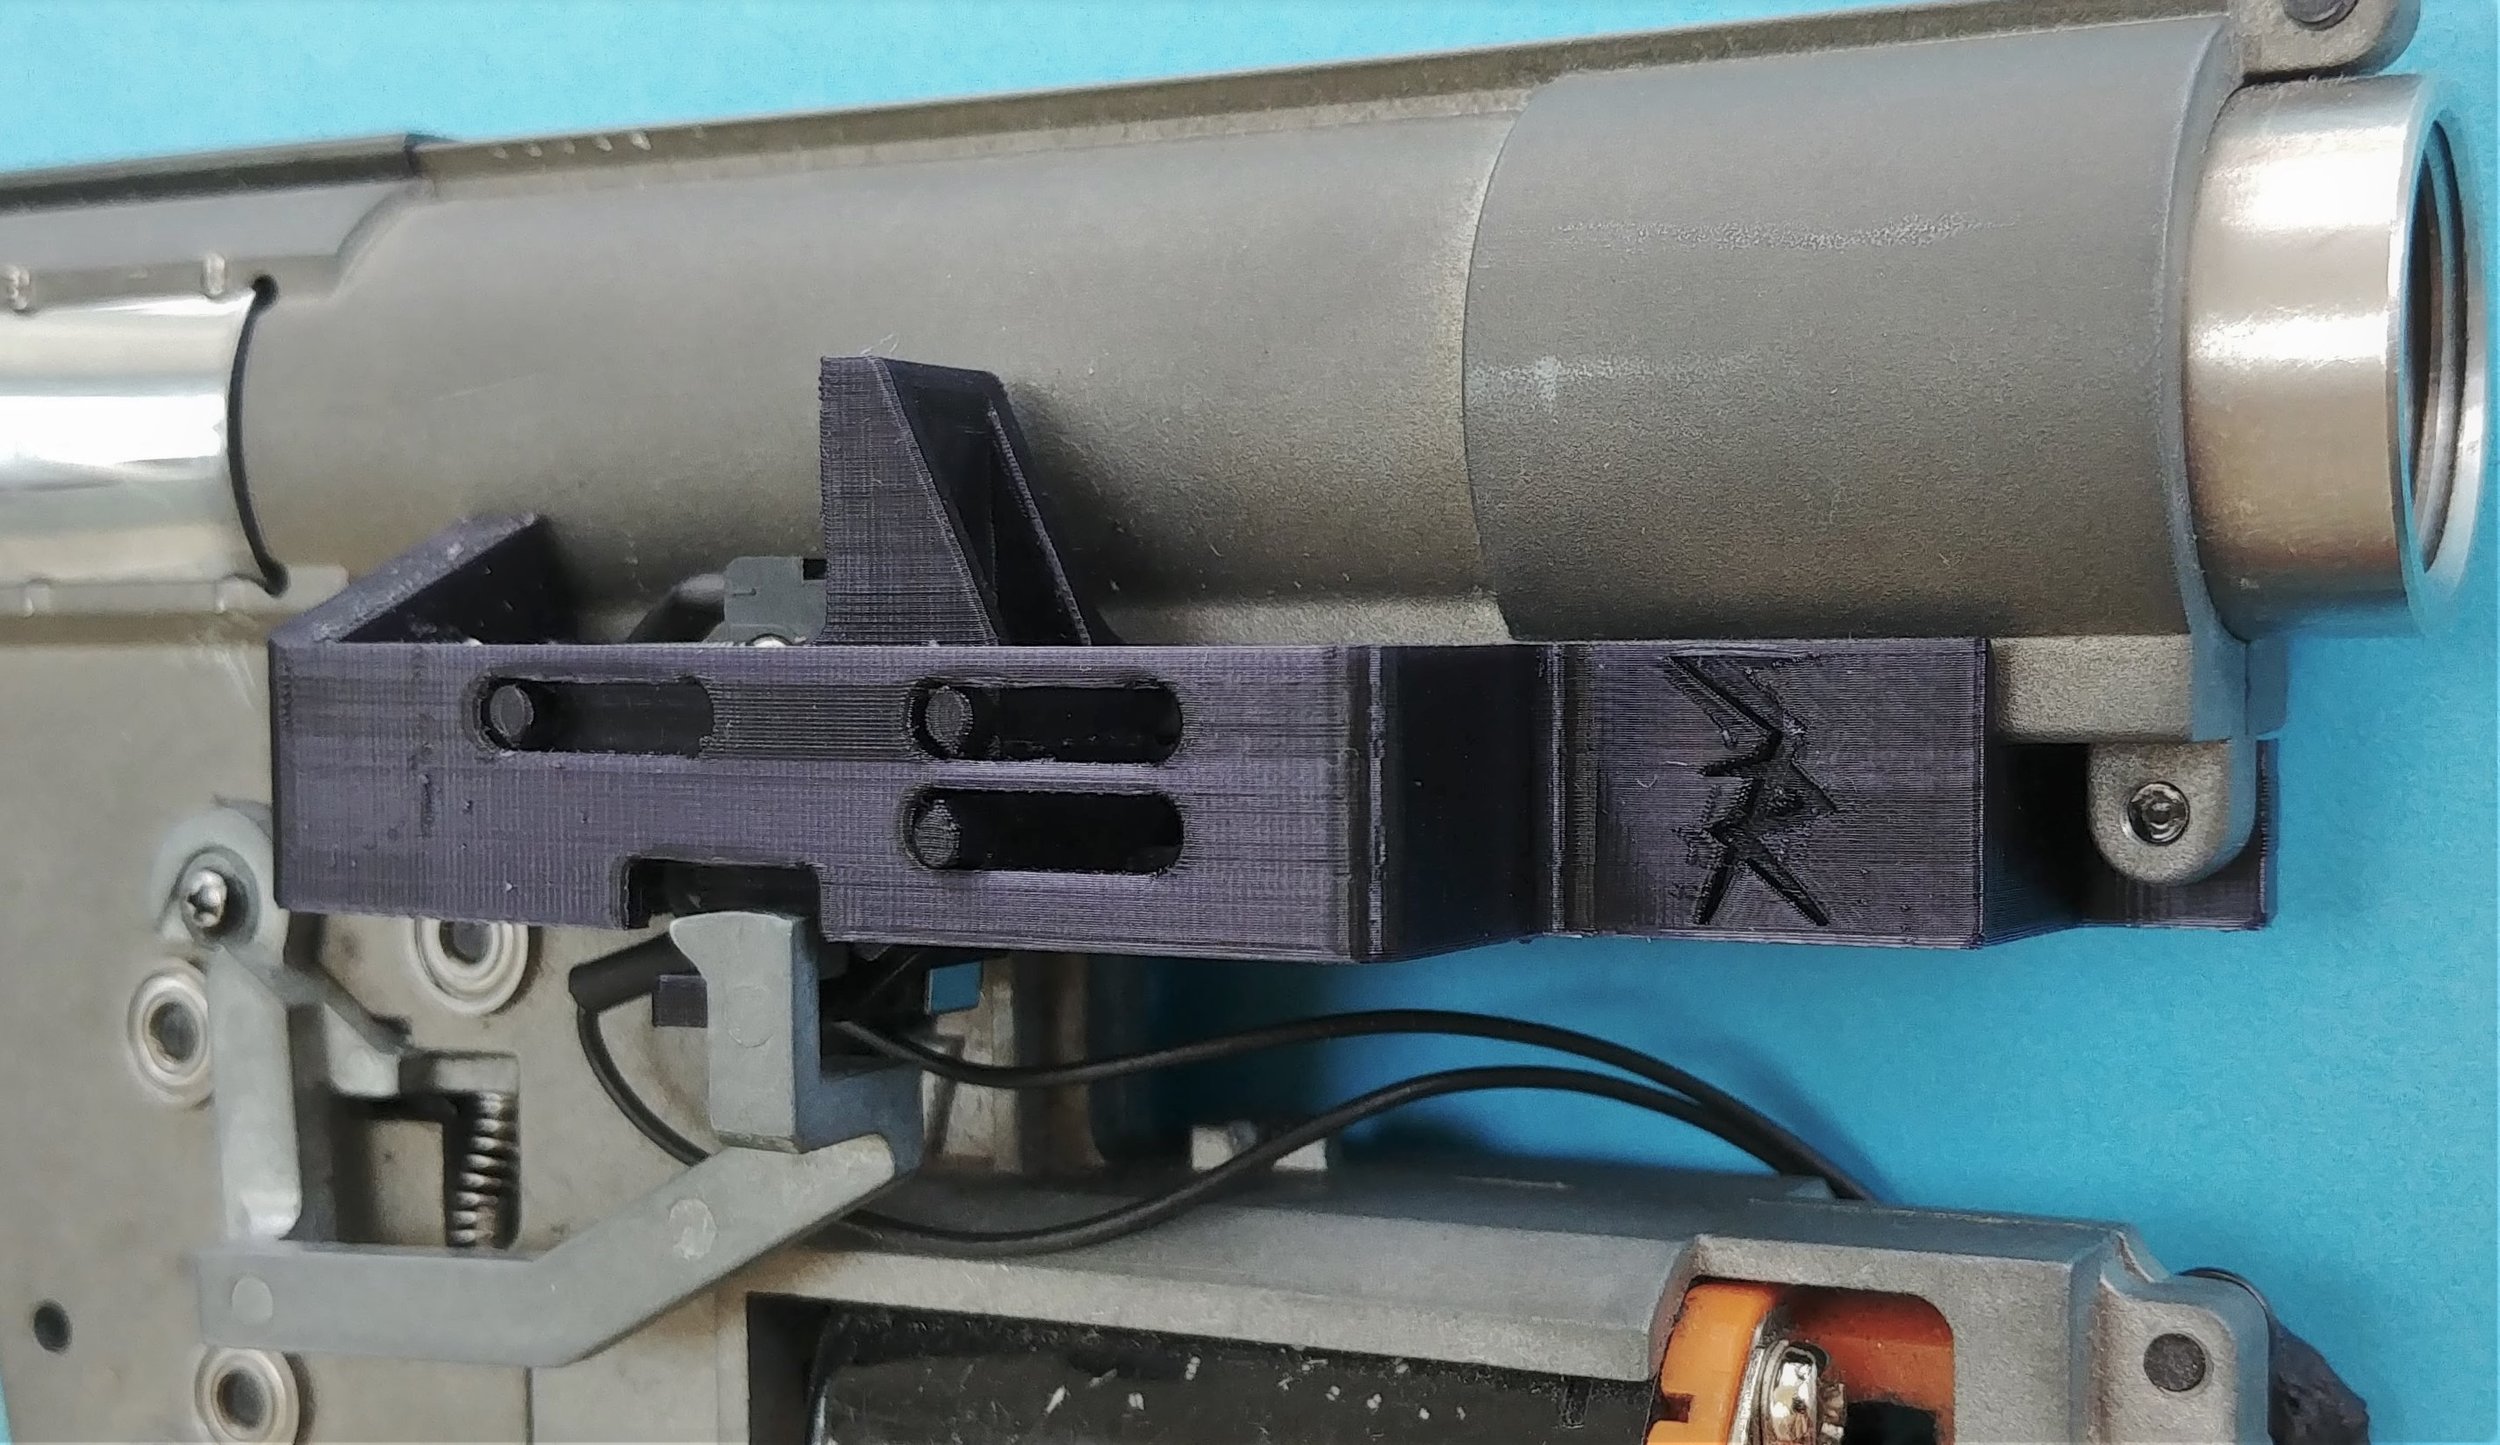
Step-by-step instructions for installing your P90 or F2000 M-Trigger.
P90 pictures coming soon, but the procedure is nearly identical to the F2000.
Total time for install: ~20-30 minutes
Add 10-45 minutes for wiring and soldering depending on experience.
Before you start
Read the M-Trigger page to get familiar with the features and requirements for install. To repeat the important parts:
· You will need the two small springs from the original trigger unit (see Step 2). If yours are lost or damaged, you will need to find replacements.
· A hardwired mosfet is required. This protects the microswitch from the high current. If you already have one, you'll only need to solder the trigger wires to the microswitch. If you don't have one, they are available to order with your M-Trigger so that it arrives fully wired and ready to go, no soldering required.
· The M-Trigger has a 6 Month Warranty. For any malfunctions, replacement parts are completely free.
When you receive your M-Trigger, note that it arrives fully assembled. For disassembly (and reassembly) of the M-Trigger, simply squeeze or flex the base until you can twist and remove the two trigger trolleys. This is necessary before removing the microswitch for soldering. If you ordered a mosfet with your M-Trigger, disassembly is not required, but you may find it easier to install the springs with the trigger pieces out.
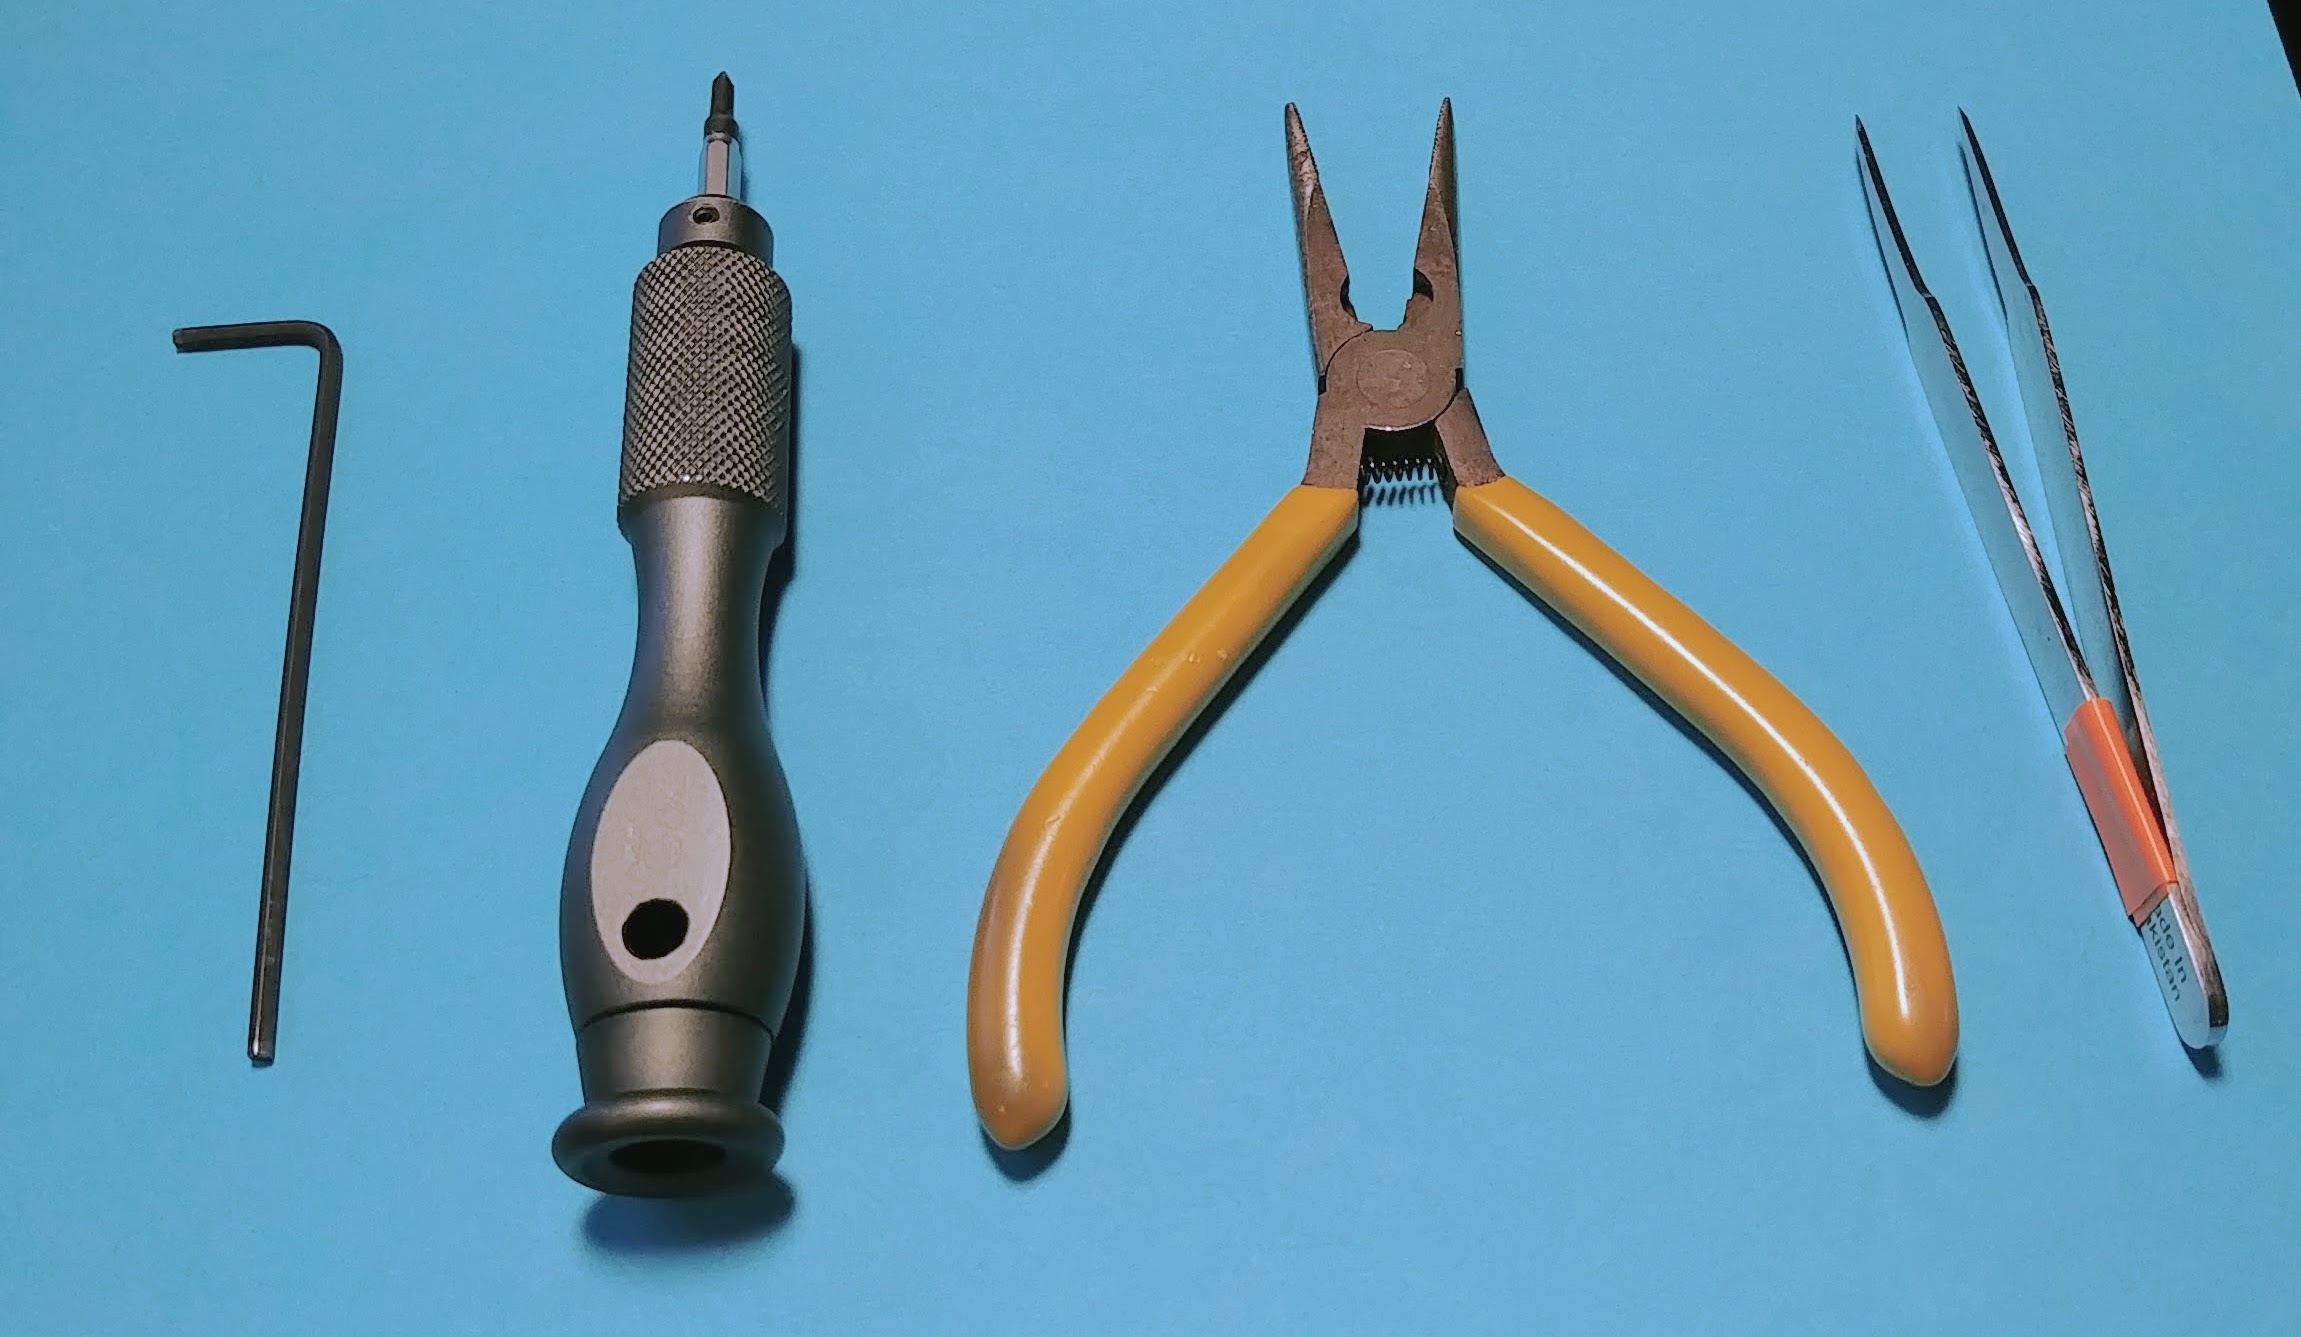
Tools Required:
· Small screwdriver or hex key for removing gearbox screws
· Small pliers or tweezers for attaching springs
· Soldering iron and related materials for wiring mosfet (not required if you ordered a mosfet with your M-Trigger)
Step 1: Remove the gearbox from the back of the gun.
Both the P90 and the F2000 gearboxes are held in by a plastic bracket with two screws. Undo those two screws, remove the plastic bracket, and pull the gearbox straight out the back of the body.
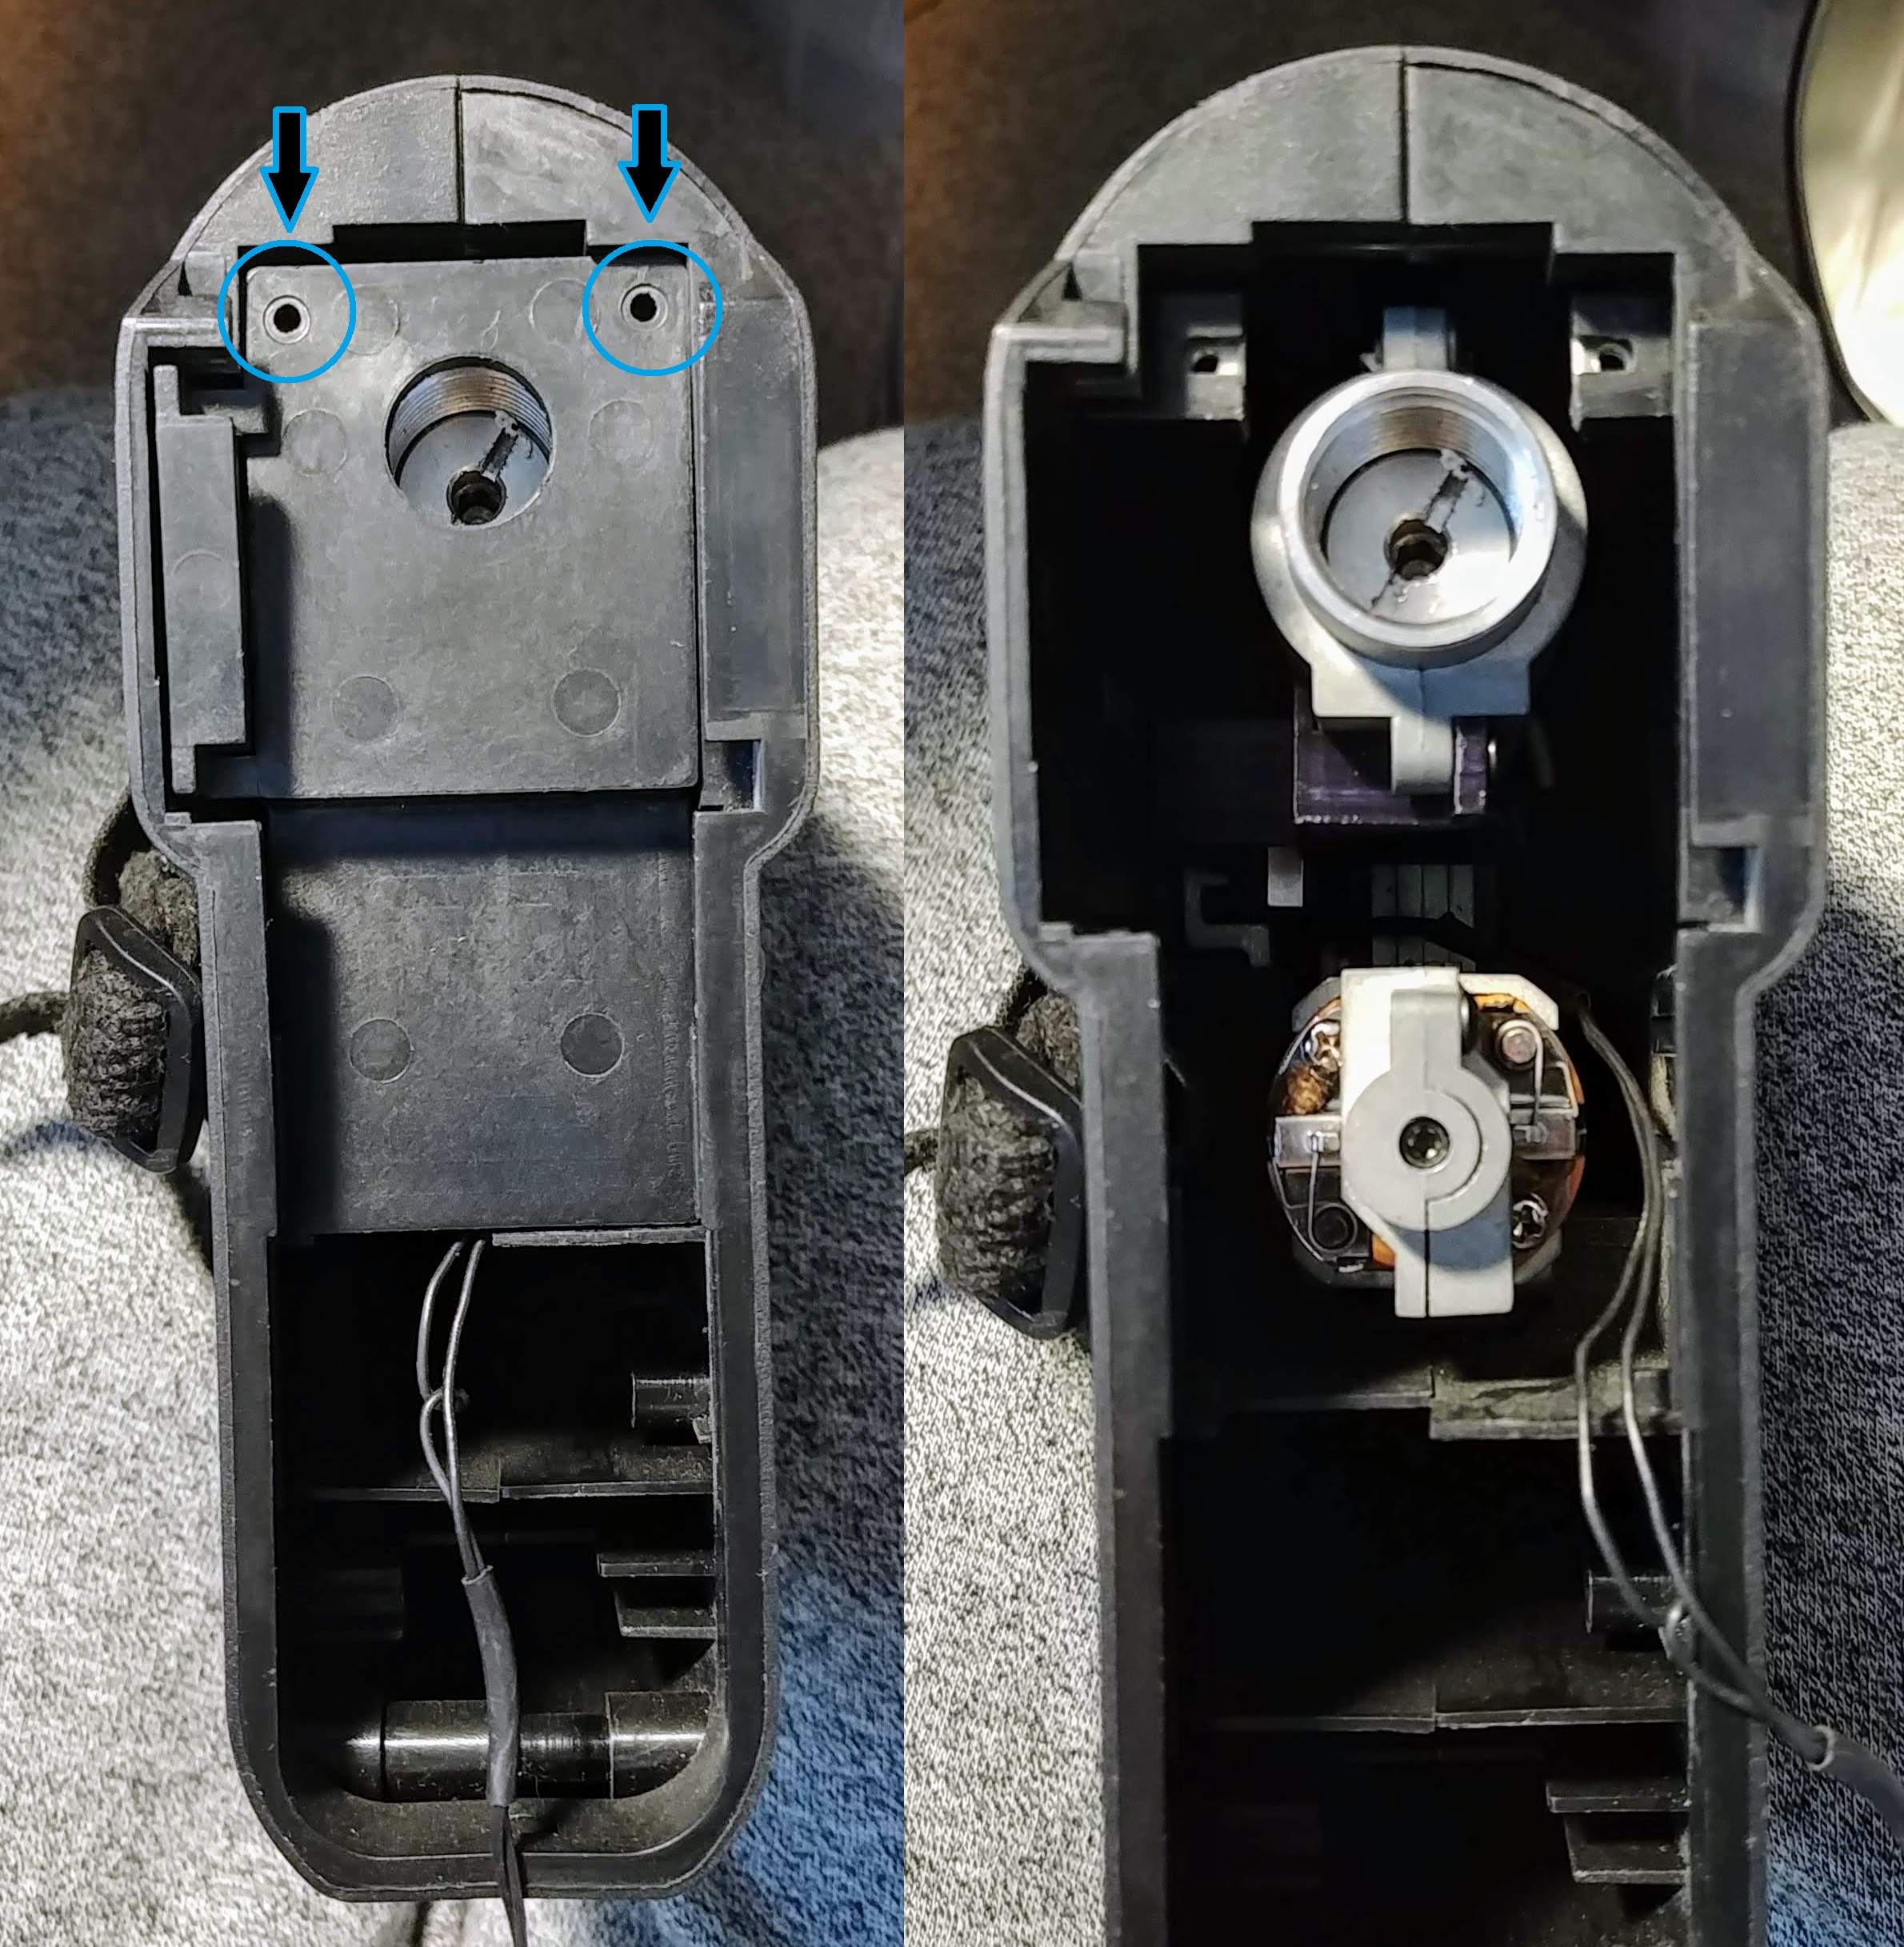
Remove gearbox bracket

Gearbox out of the gun
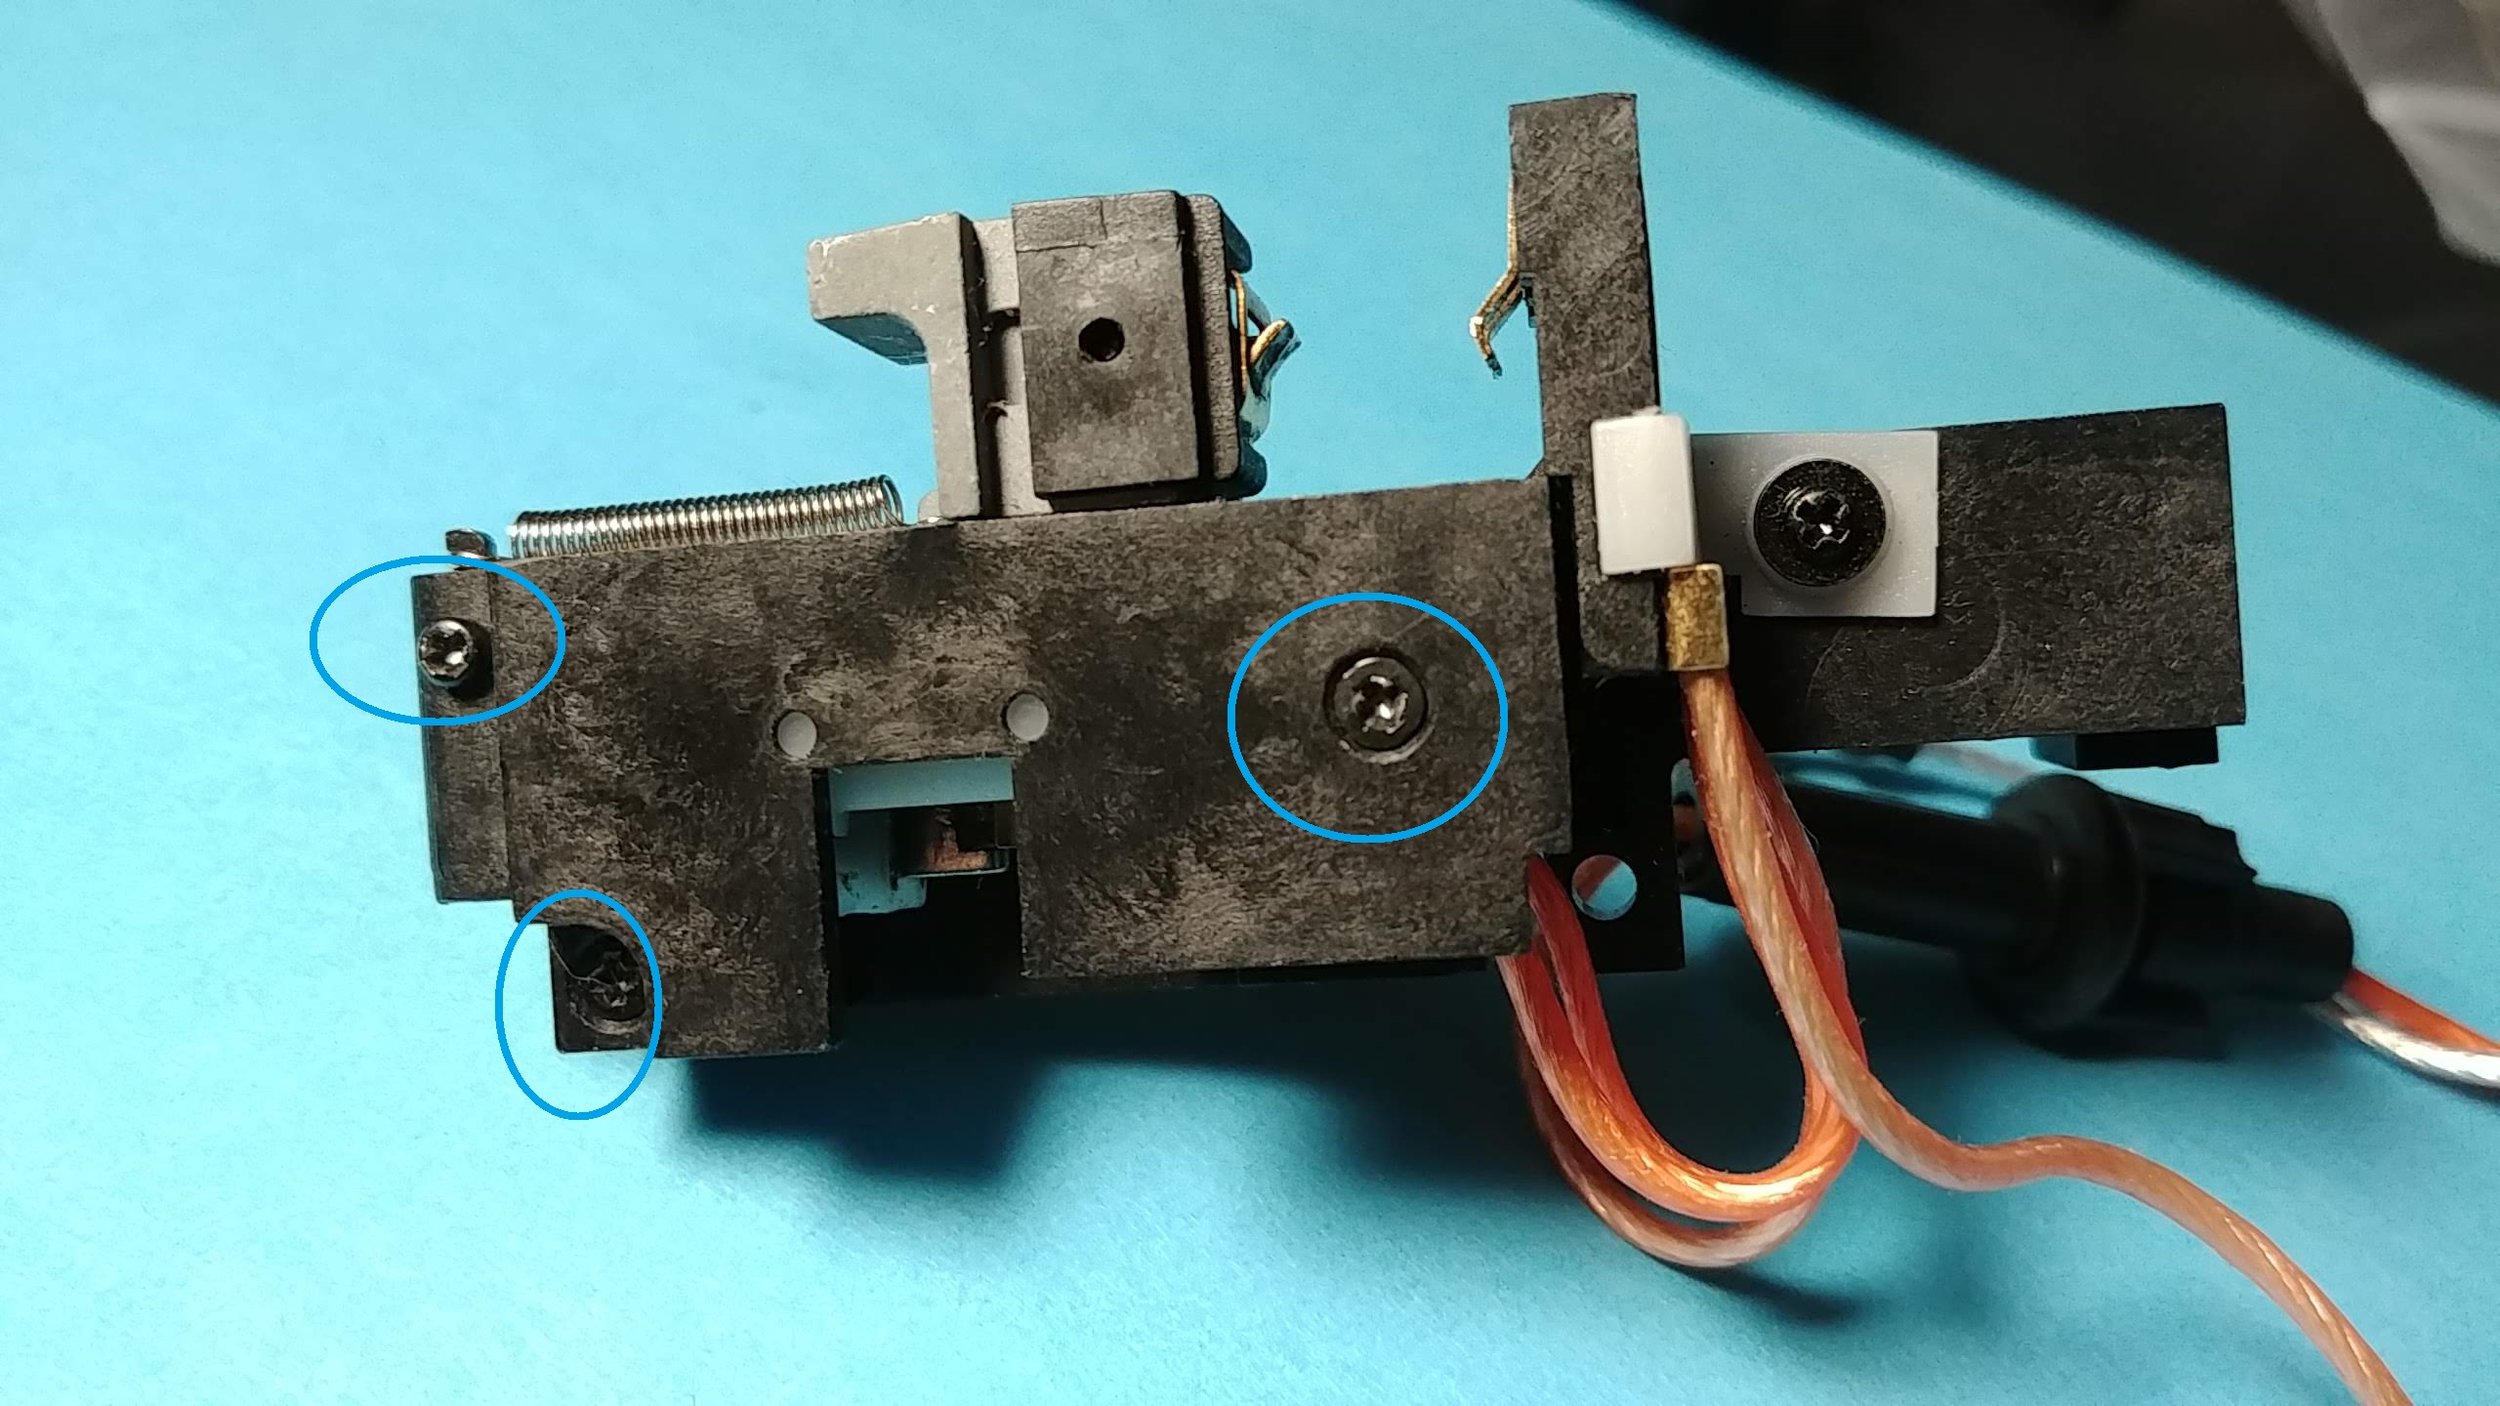
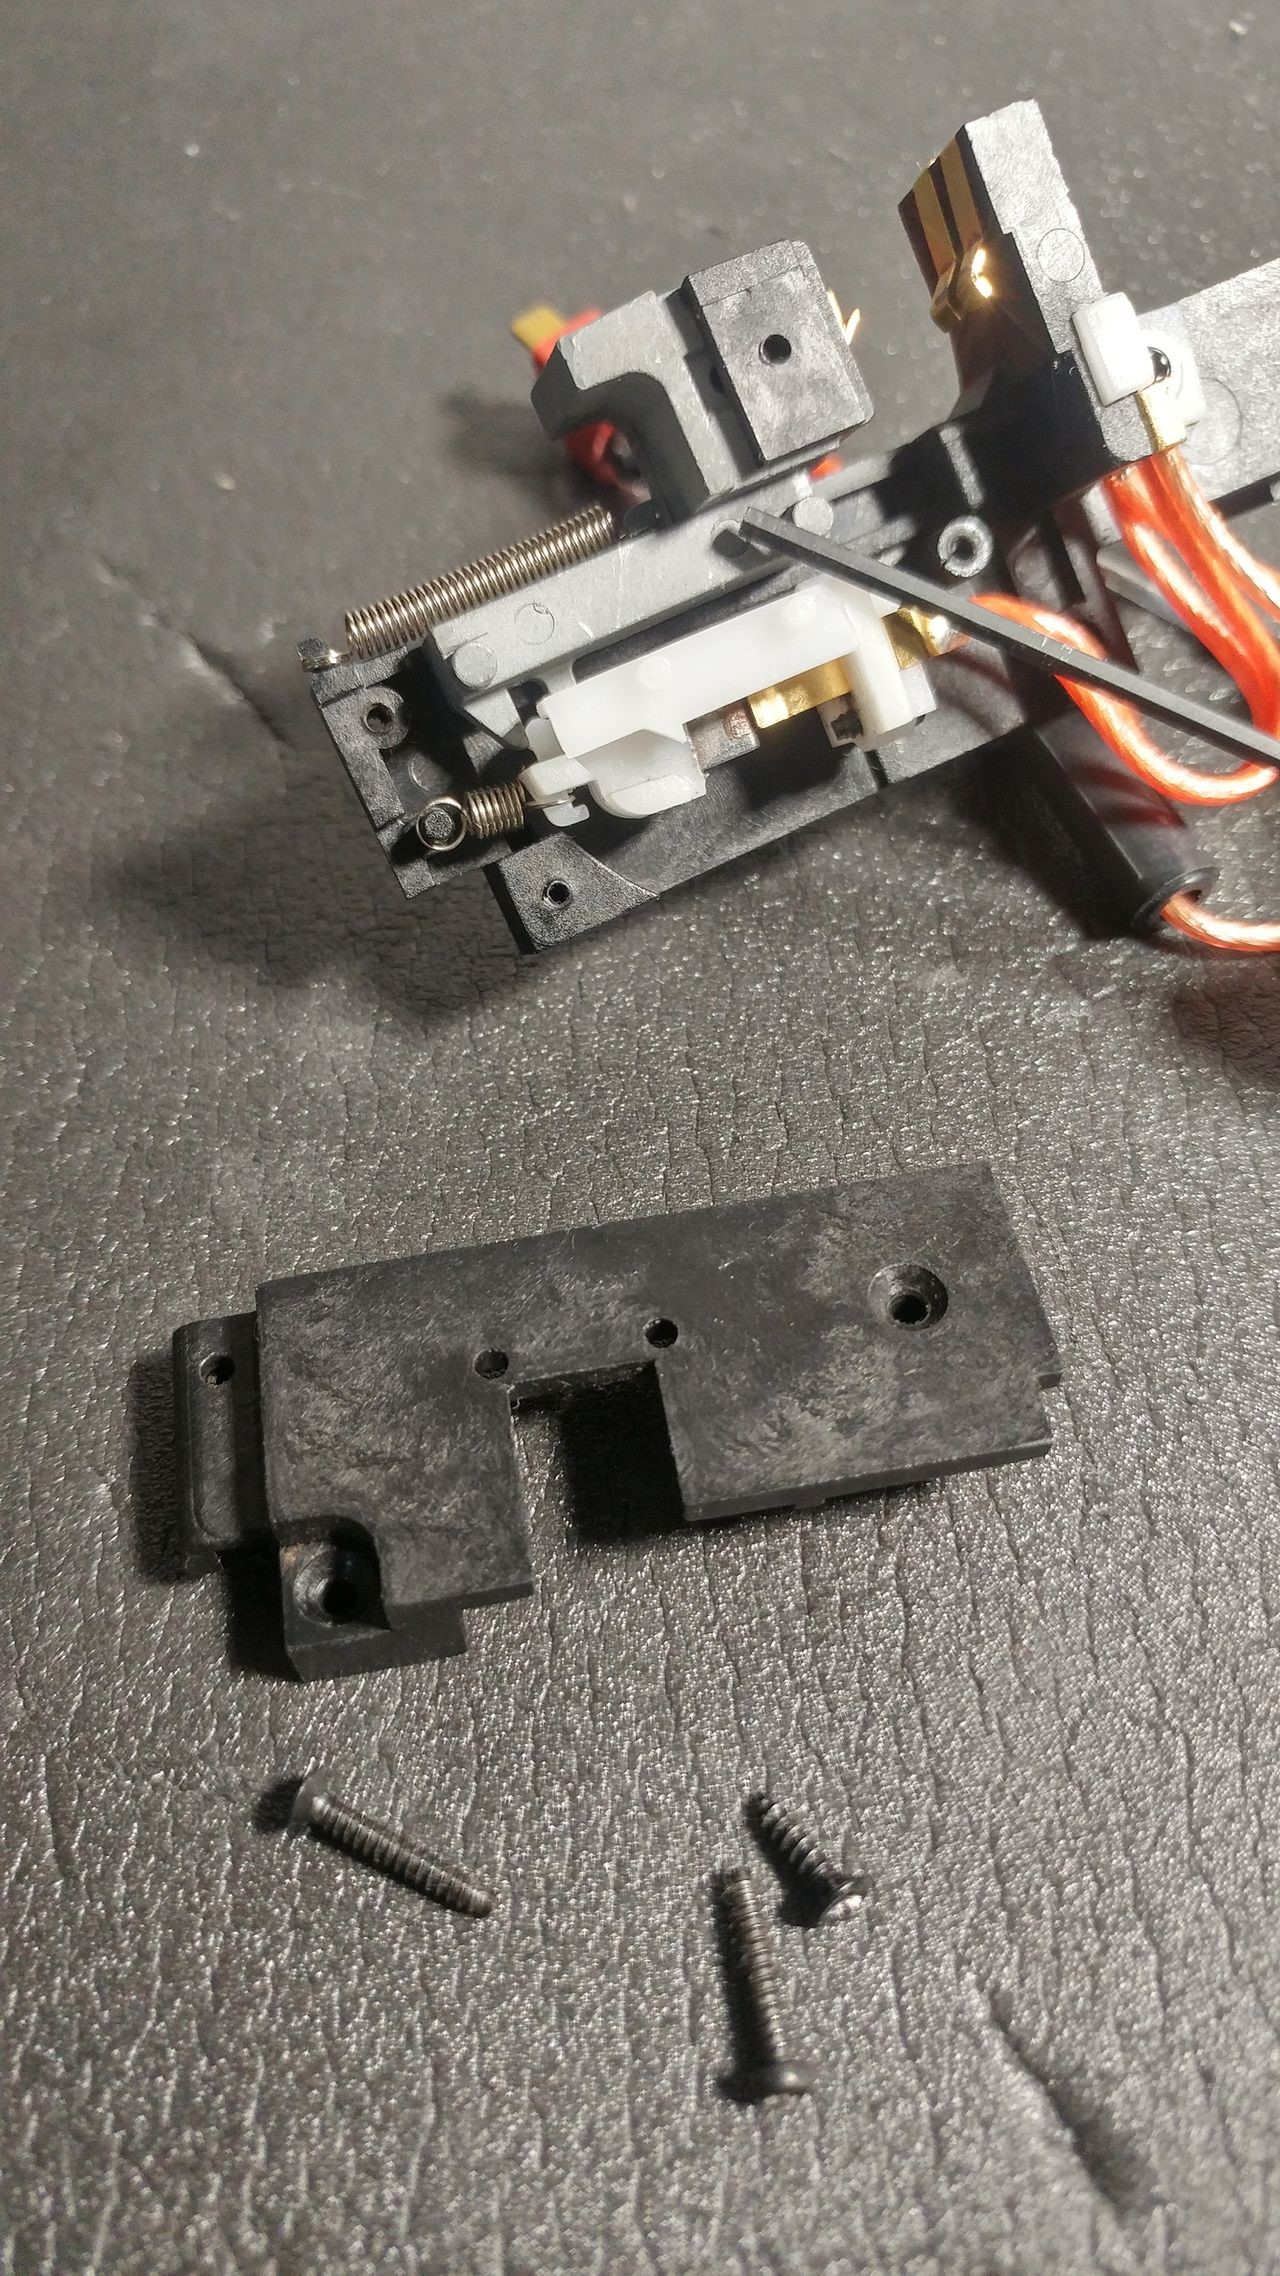
Step 2: Recover the two small springs from original trigger
Remove the original trigger assembly from the gearbox by unscrewing the 3 (P90) or 2 (F2000) screws that secure it to the gearbox shell. You may need to loosen the cut off lever

Remove screws to take off trigger unit

You may need to remove the cut off lever to get the trigger unit off
The large spring can be pulled off its hooks before taking the assembly apart.

Remove big top spring
To reach the small spring, unscrew the 2 (P90) or 3 (F2000) small screws on the side of the trigger and pull off the plastic housing. The small spring can now be removed. Don't lose these!
Step 3: Wire mosfet to microswitch
If you ordered a mosfet with your M-Trigger, you can skip this step!
The trigger/signal wires need to be soldered onto the top and bottom contacts on the microswitch (order doesn't matter). Note the limited space for wiring when the microswitch is inserted into the Base. Thin wires and heat shrink are recommended.
The wiring diagram below is based off of Gate mosfets, but just follow the normal wiring procedure for whatever mosfet you have. Treat the contacts on the microswitch as if they were normal trigger contacts.

Wiring diagram example for Gate mosfets
After soldering, insert microswitch back onto the pegs in the base. The orientation of the microswitch in the base has the lever pointing down, similar to the above picture.
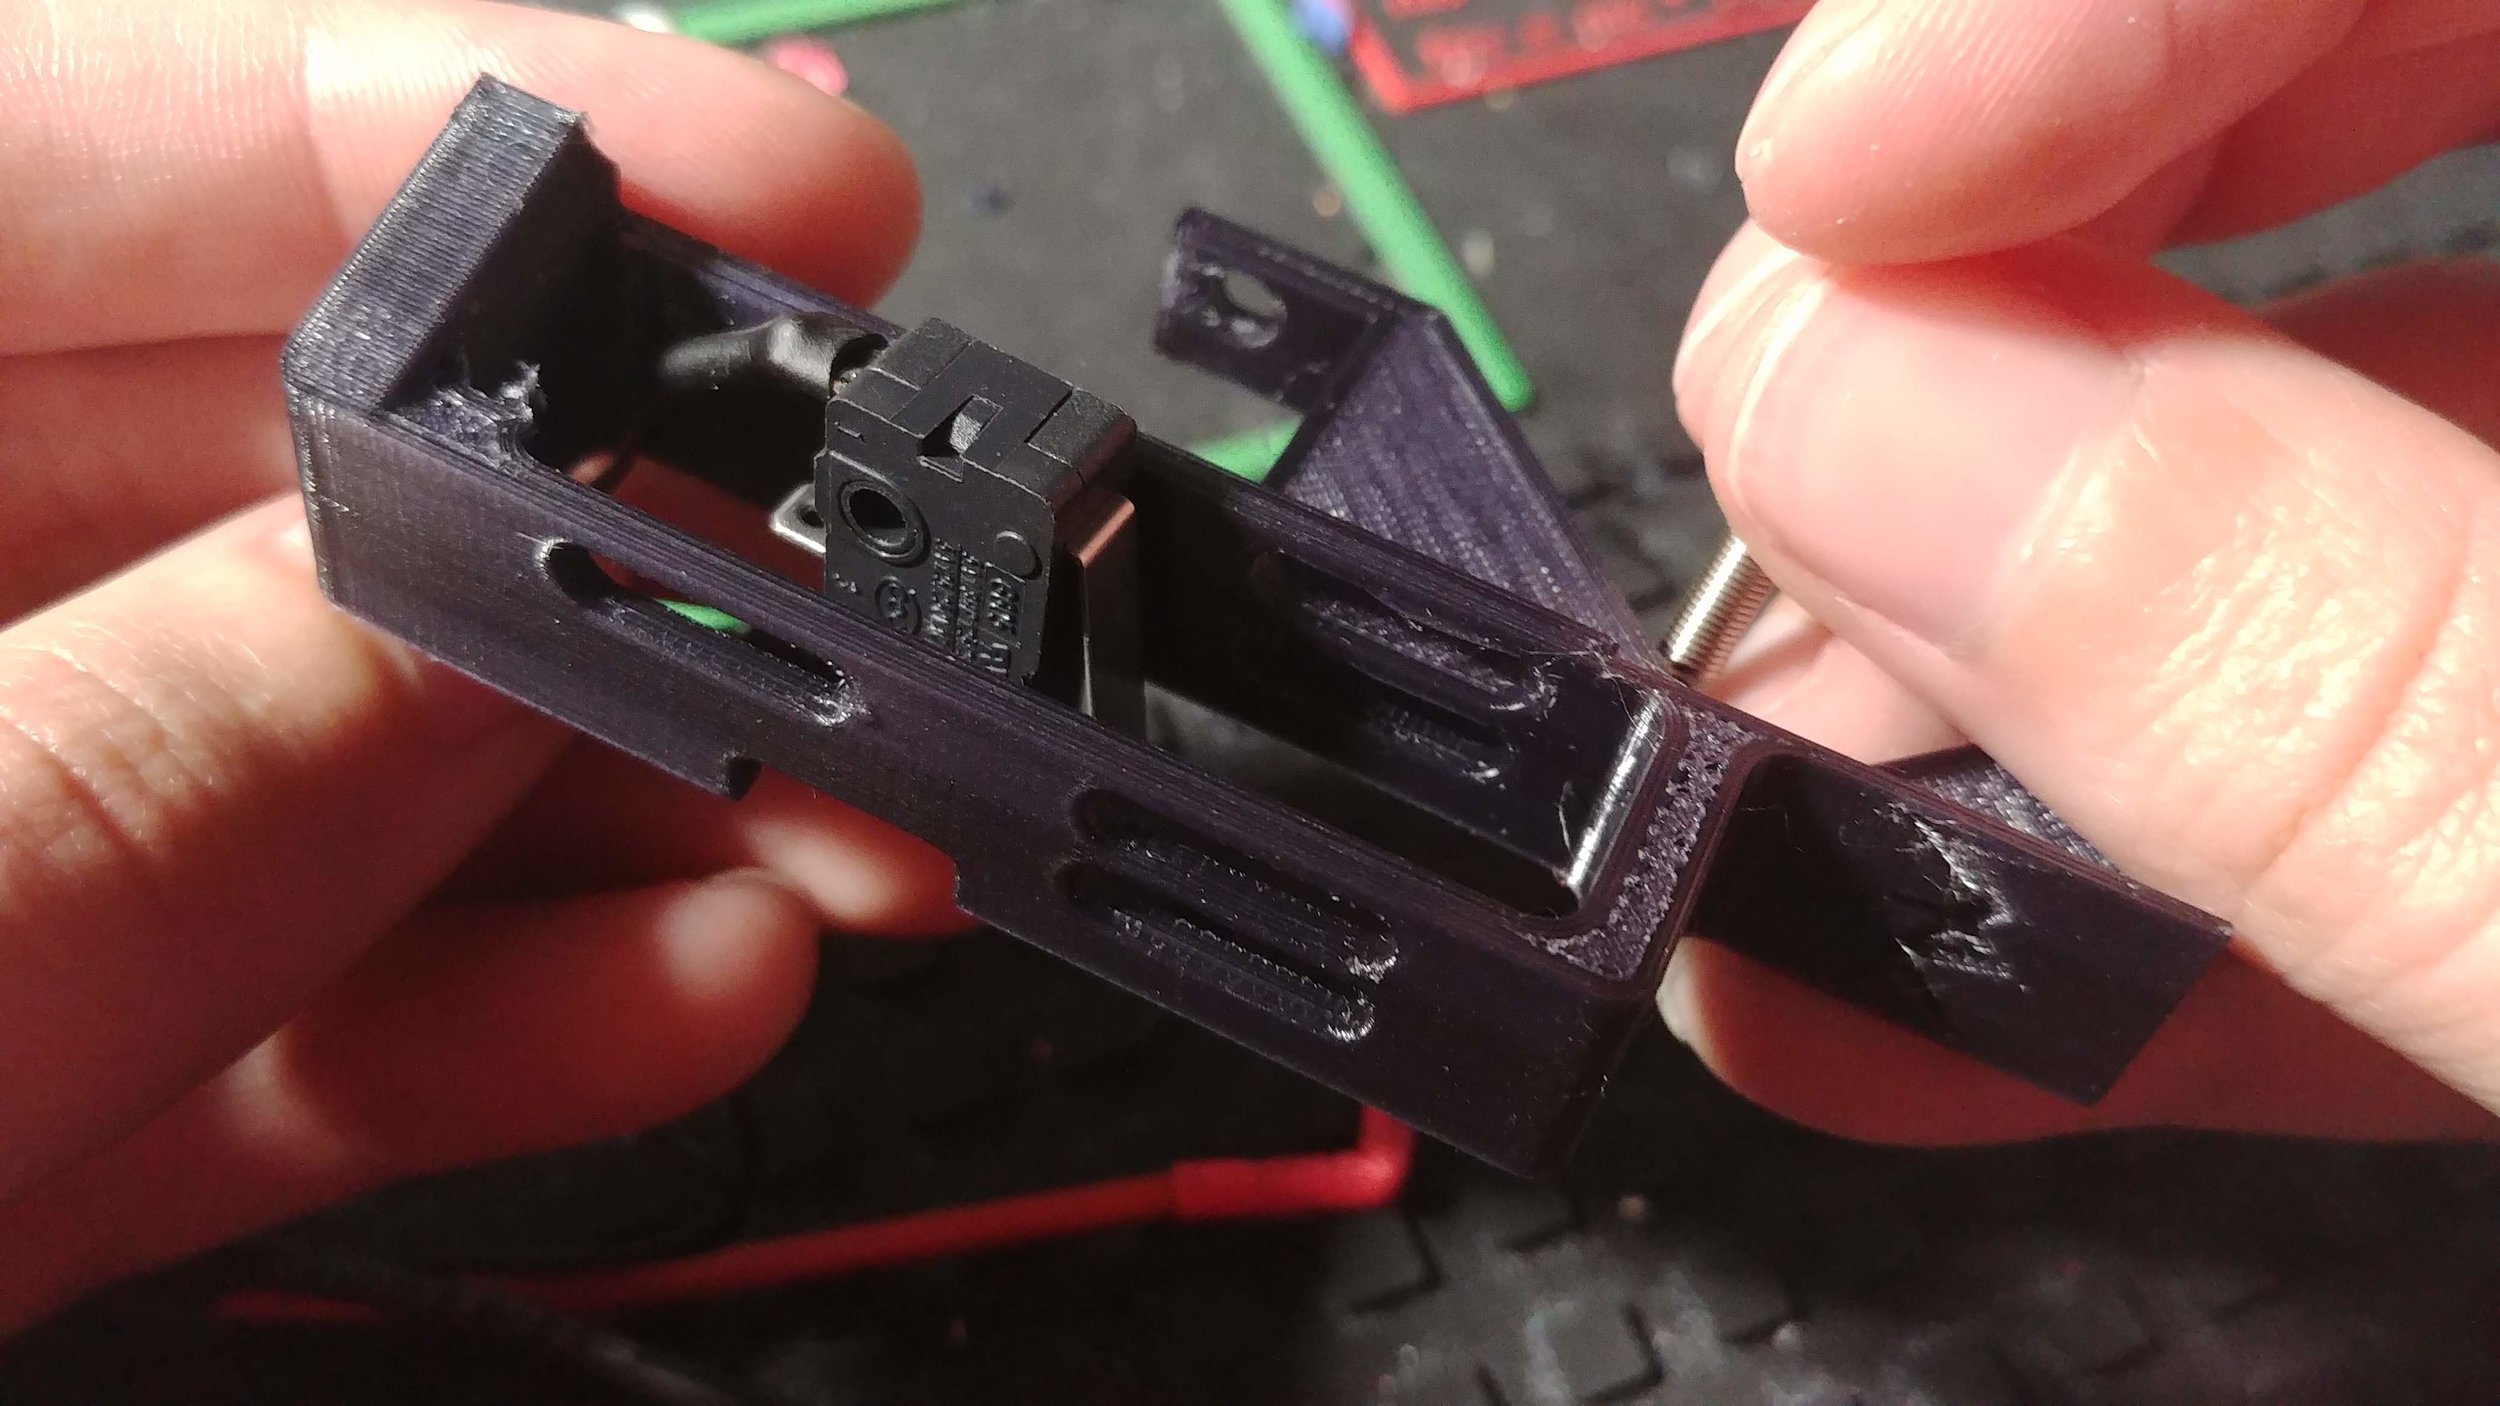
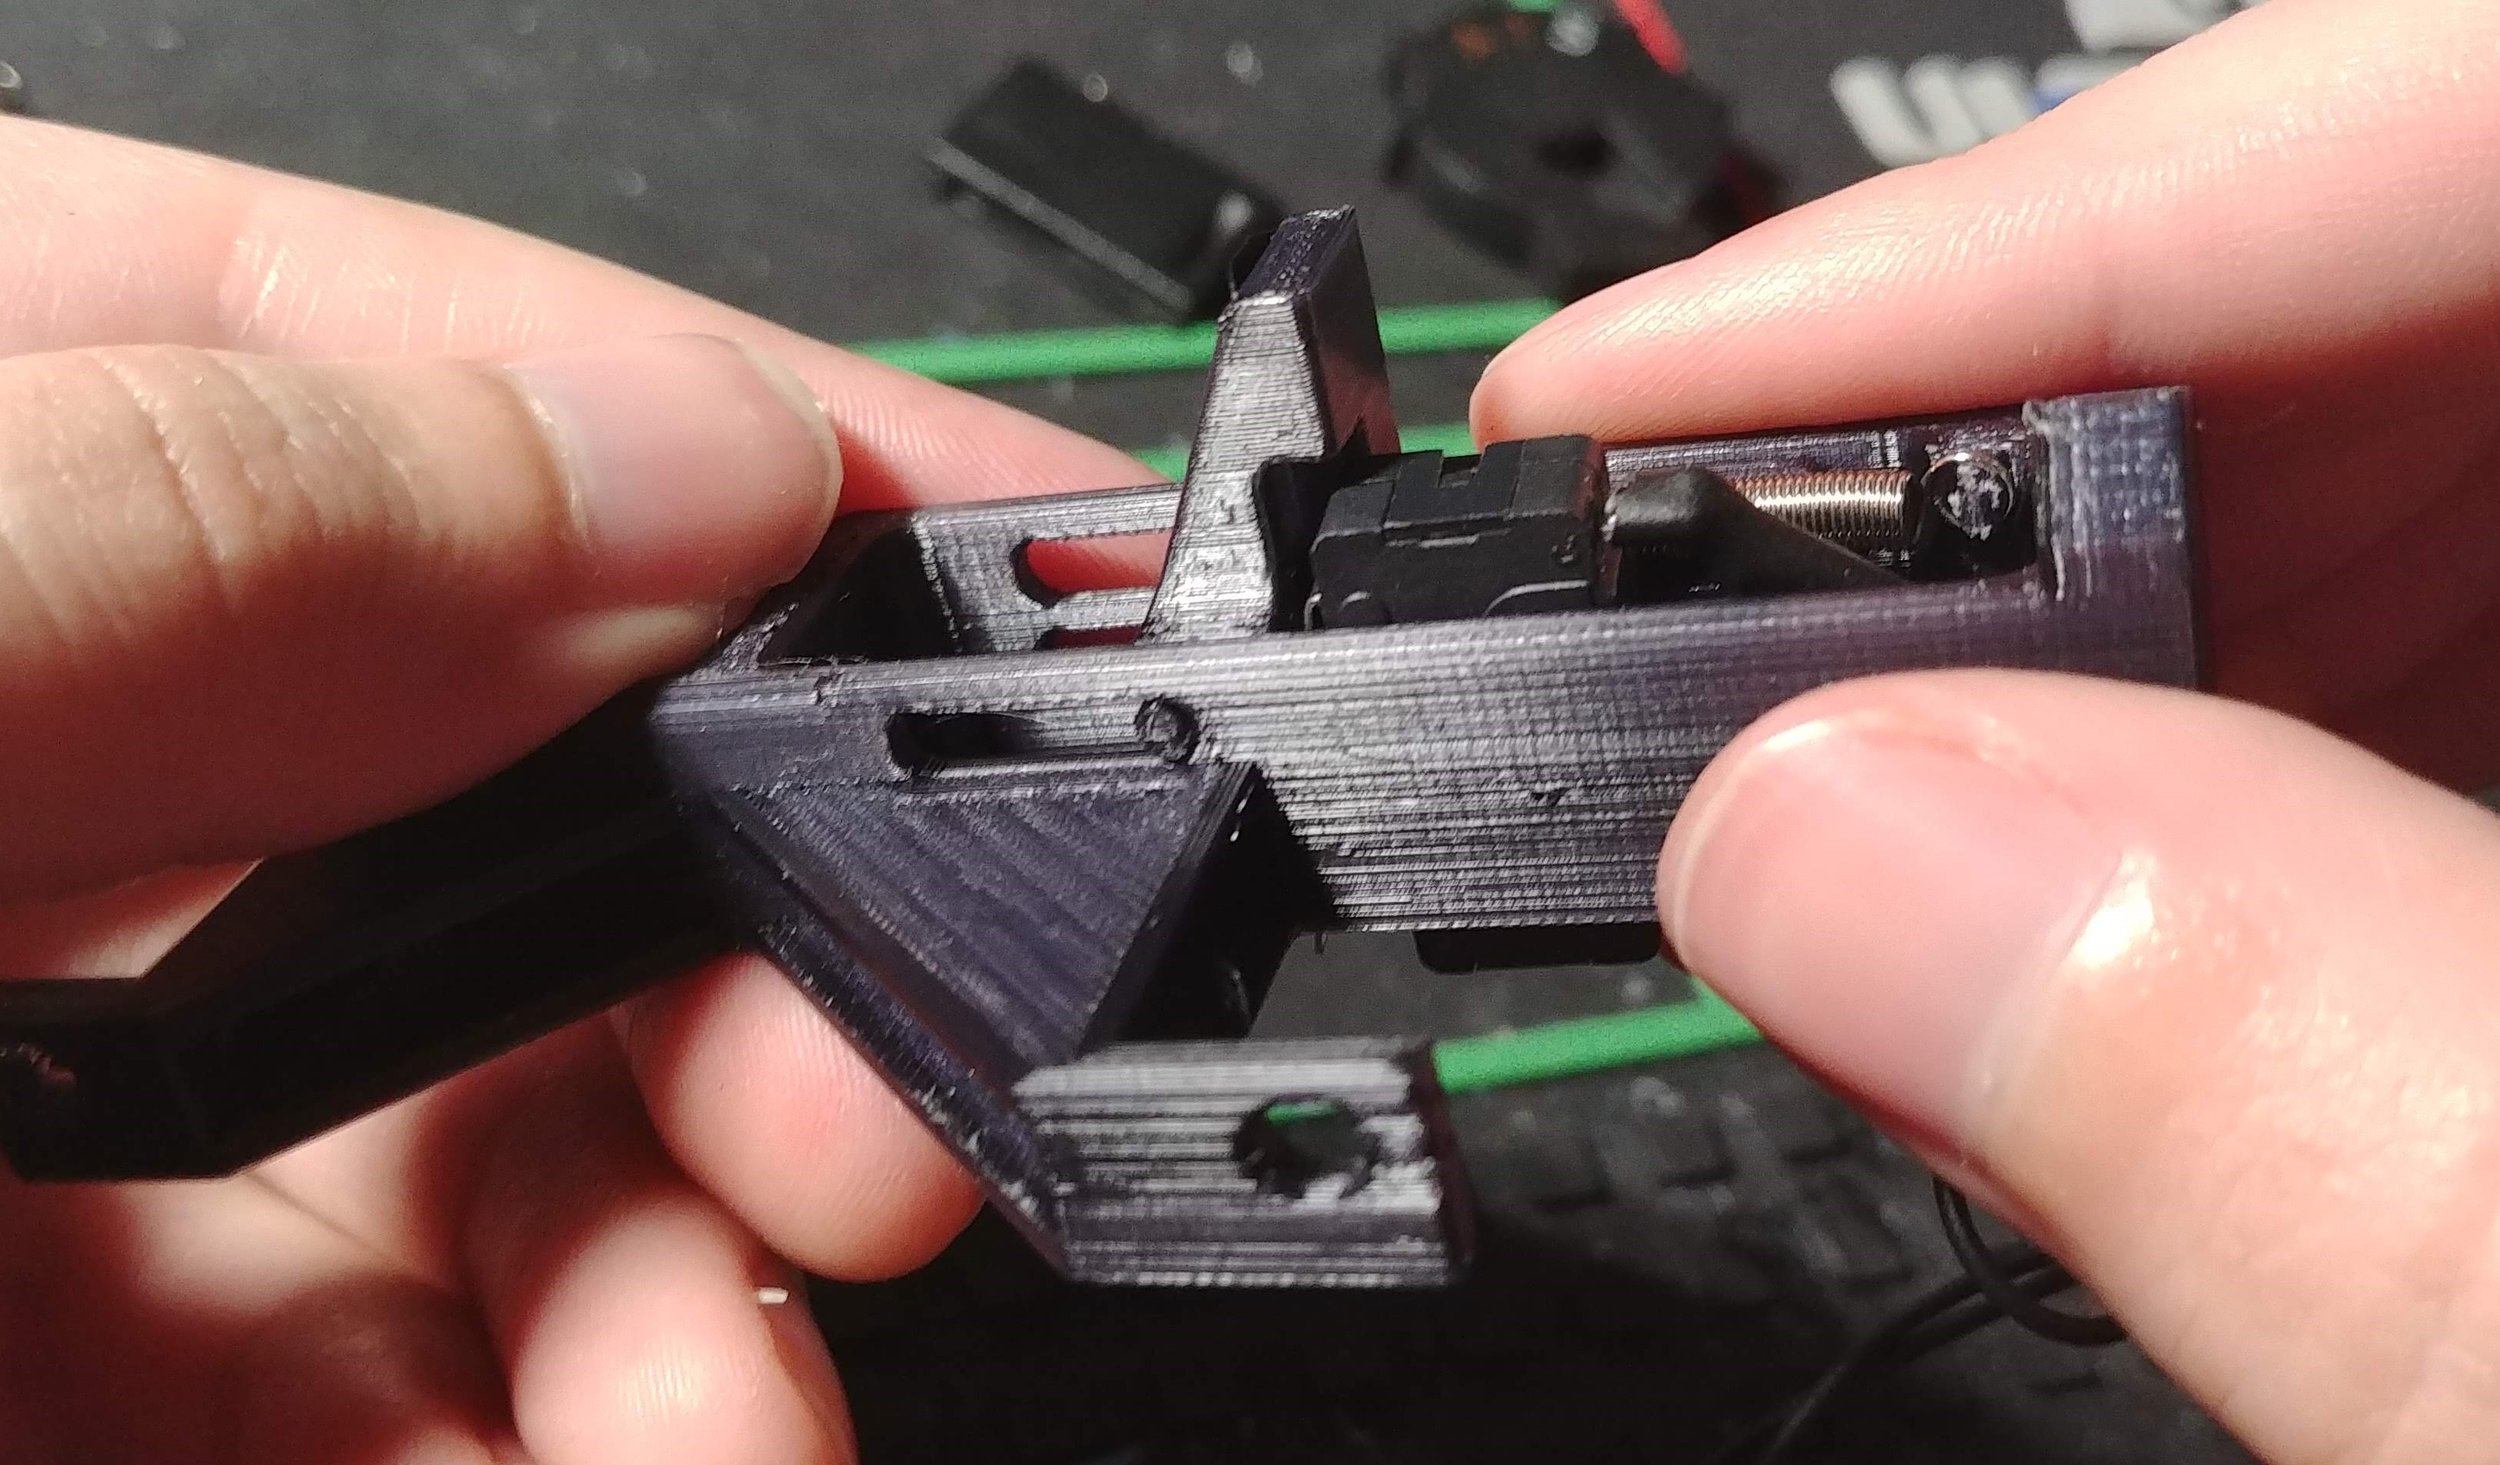
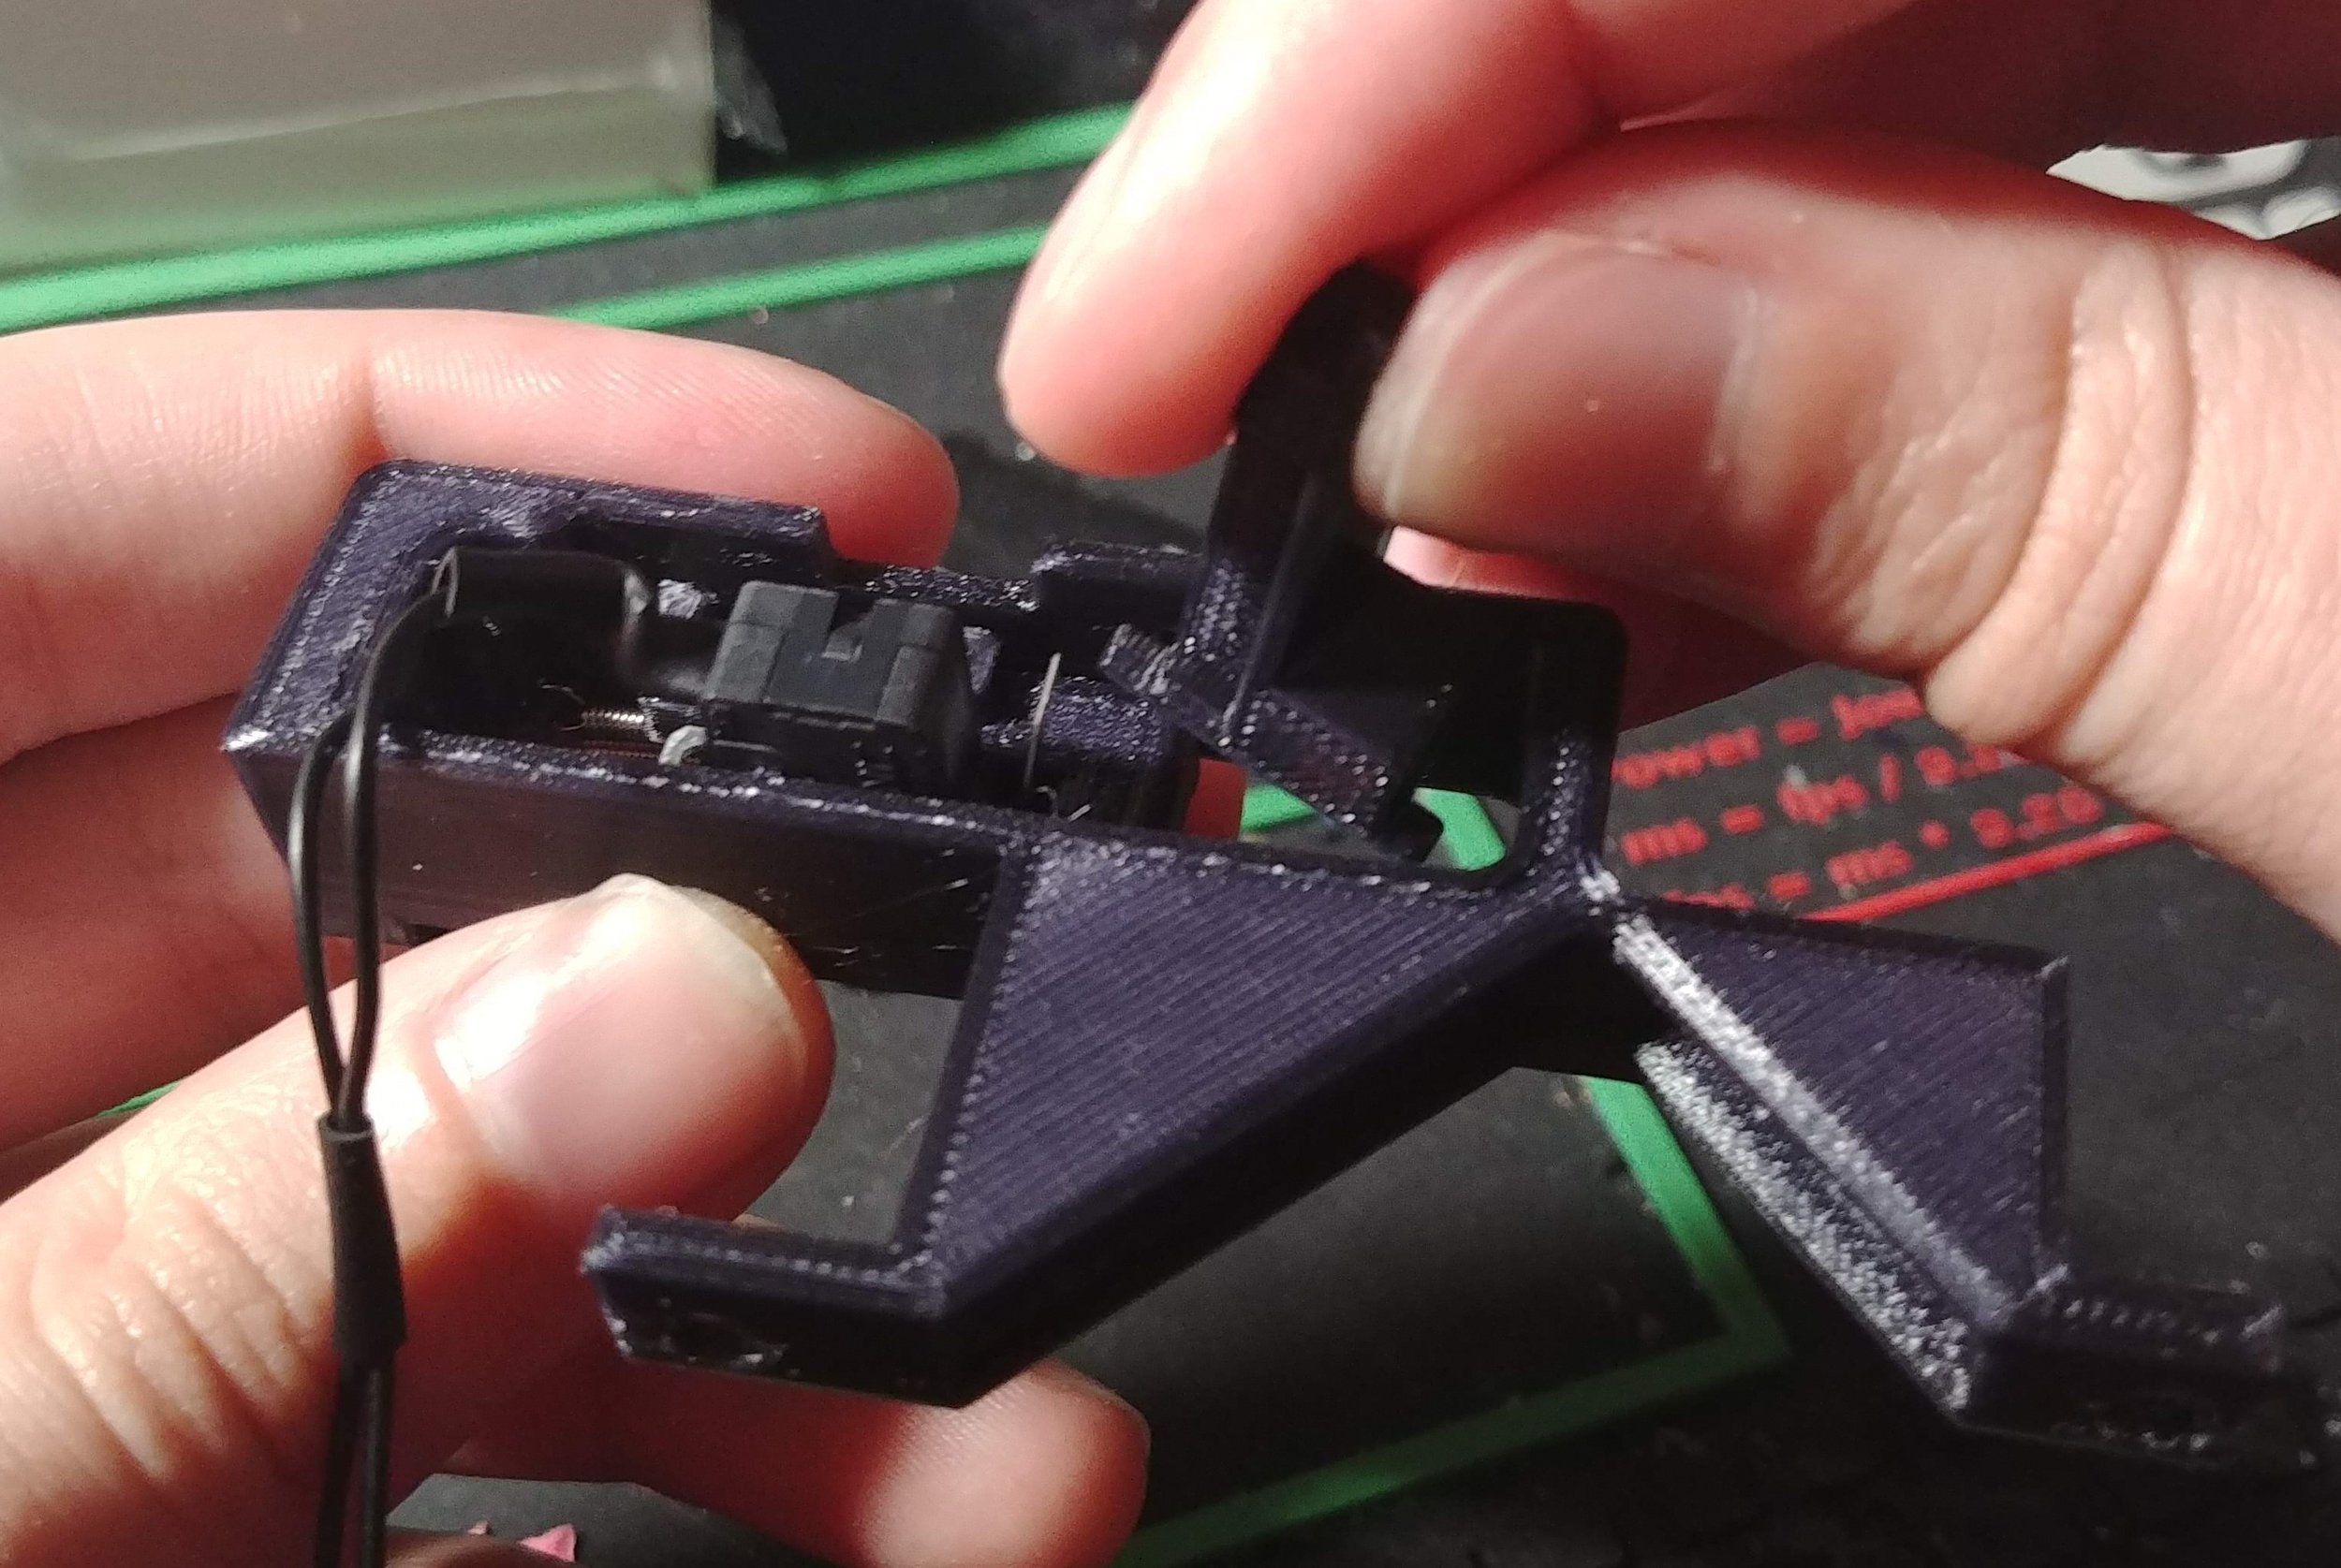
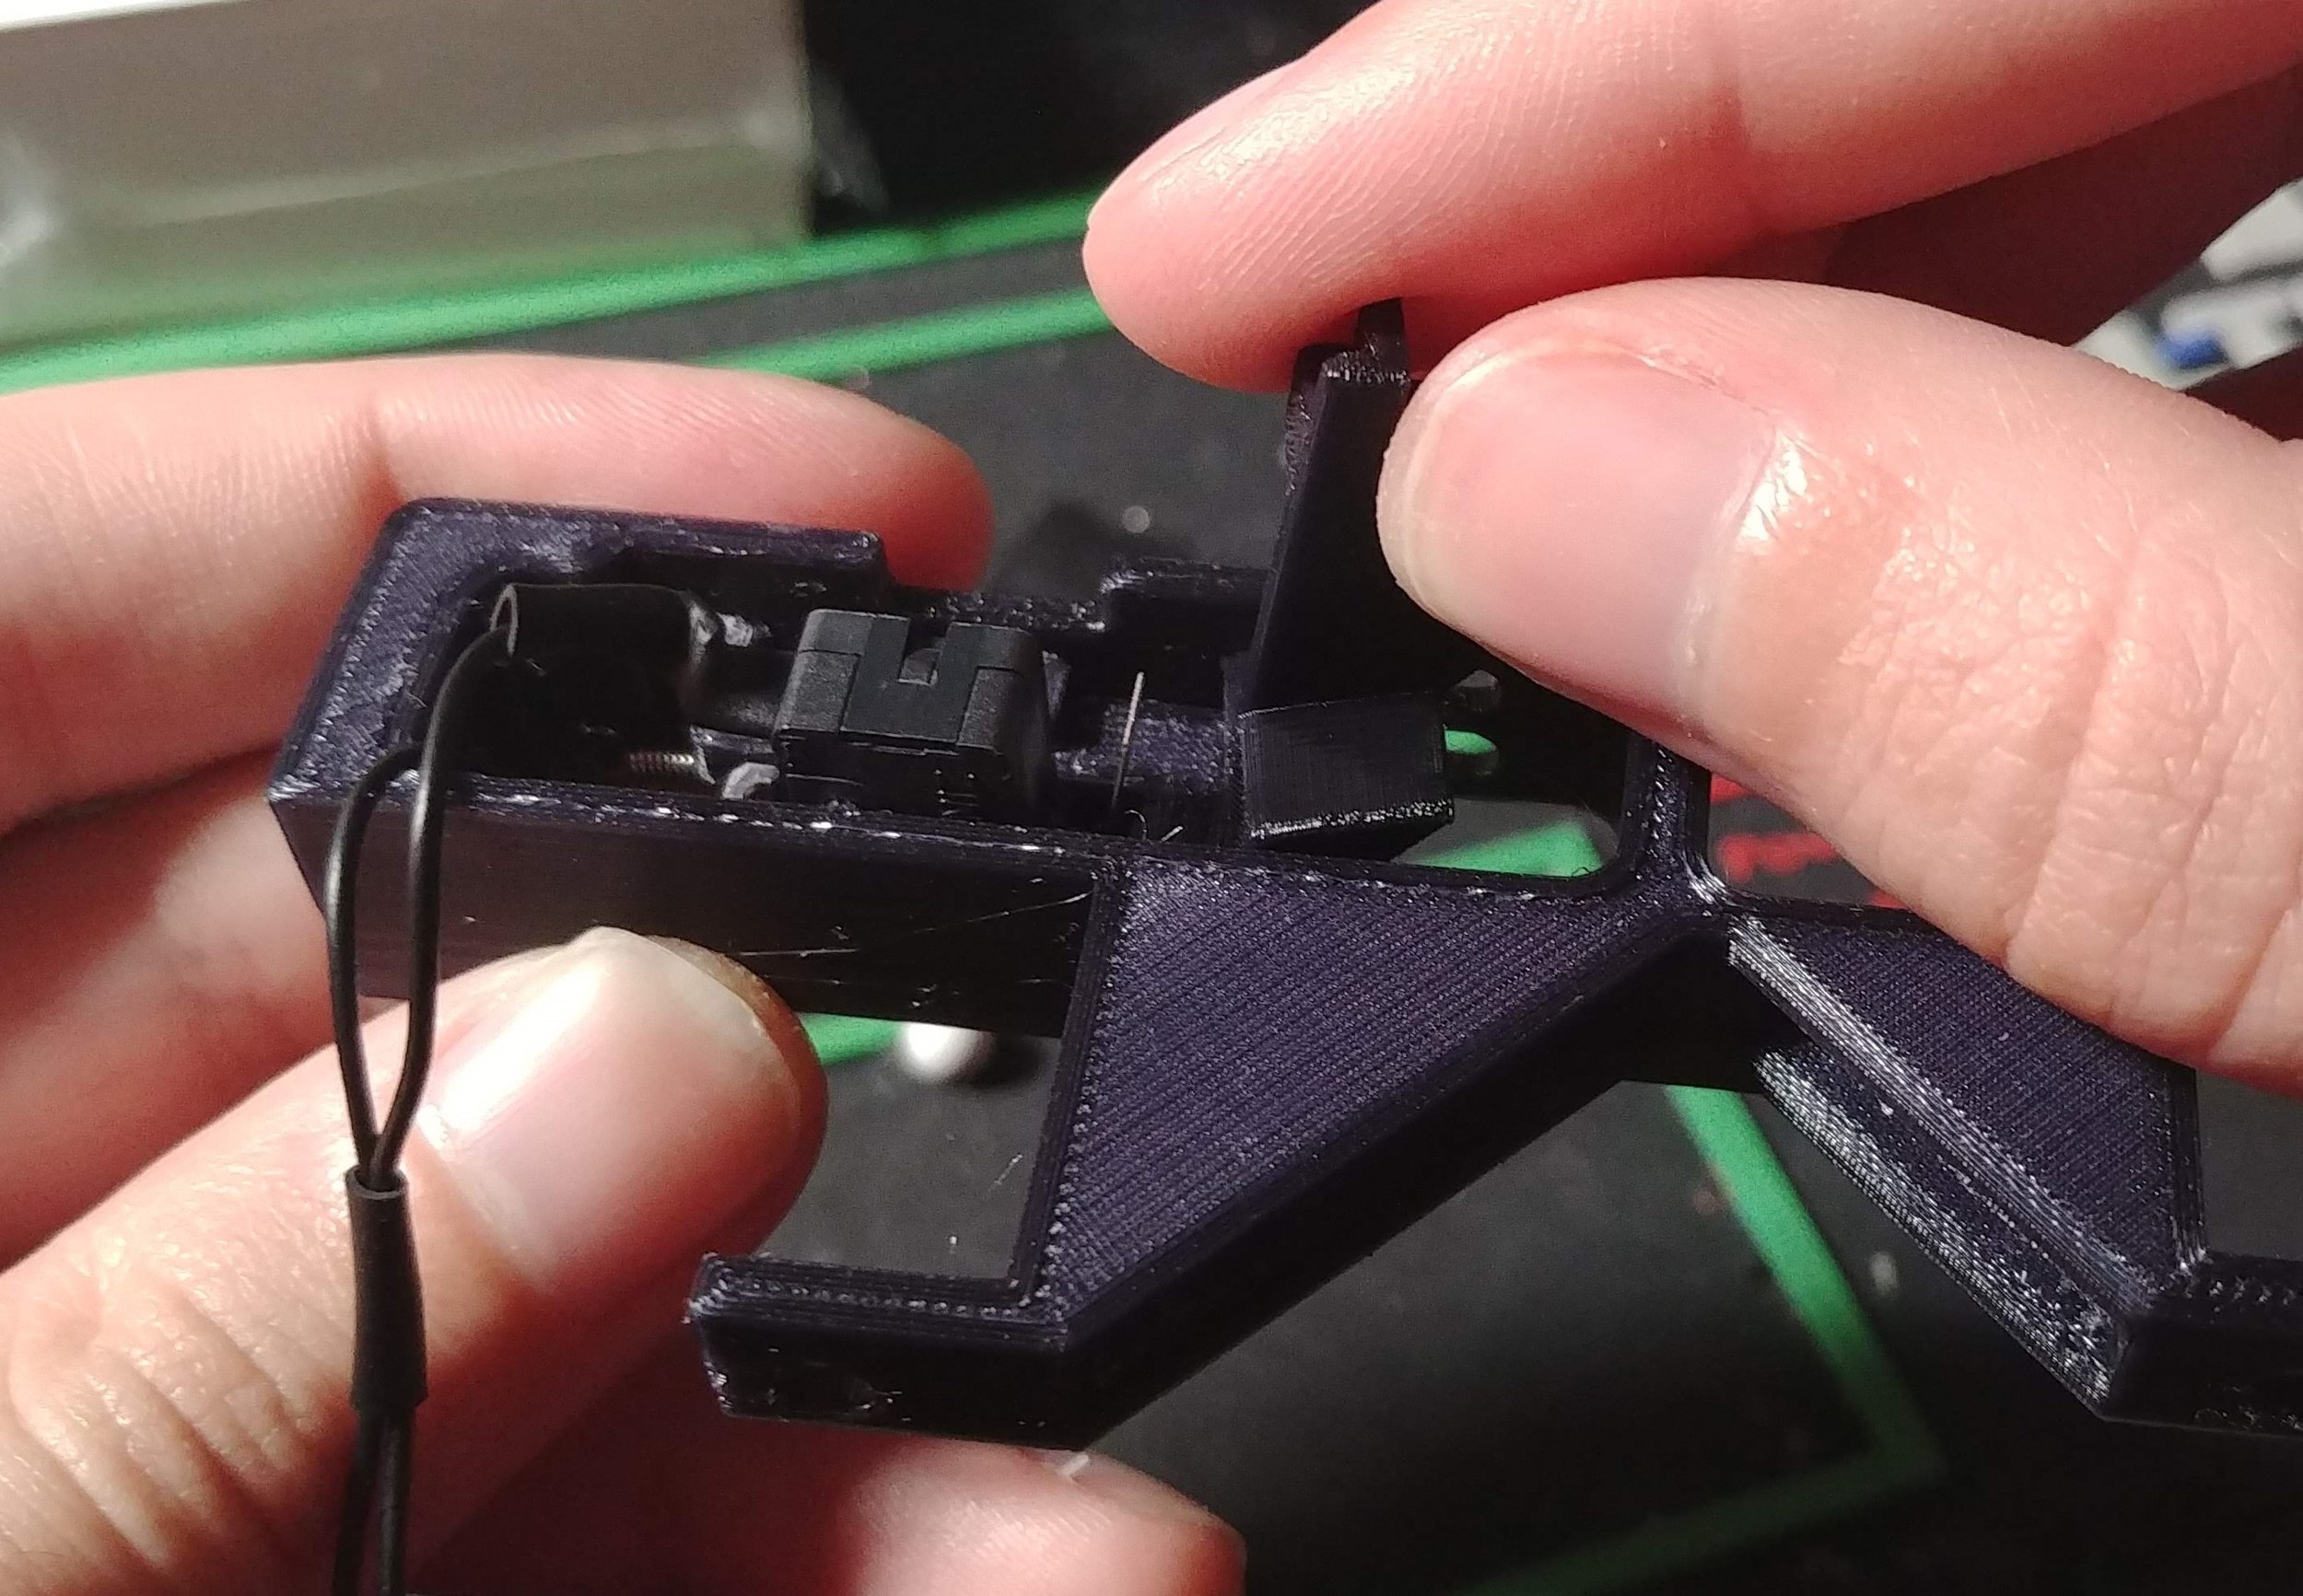
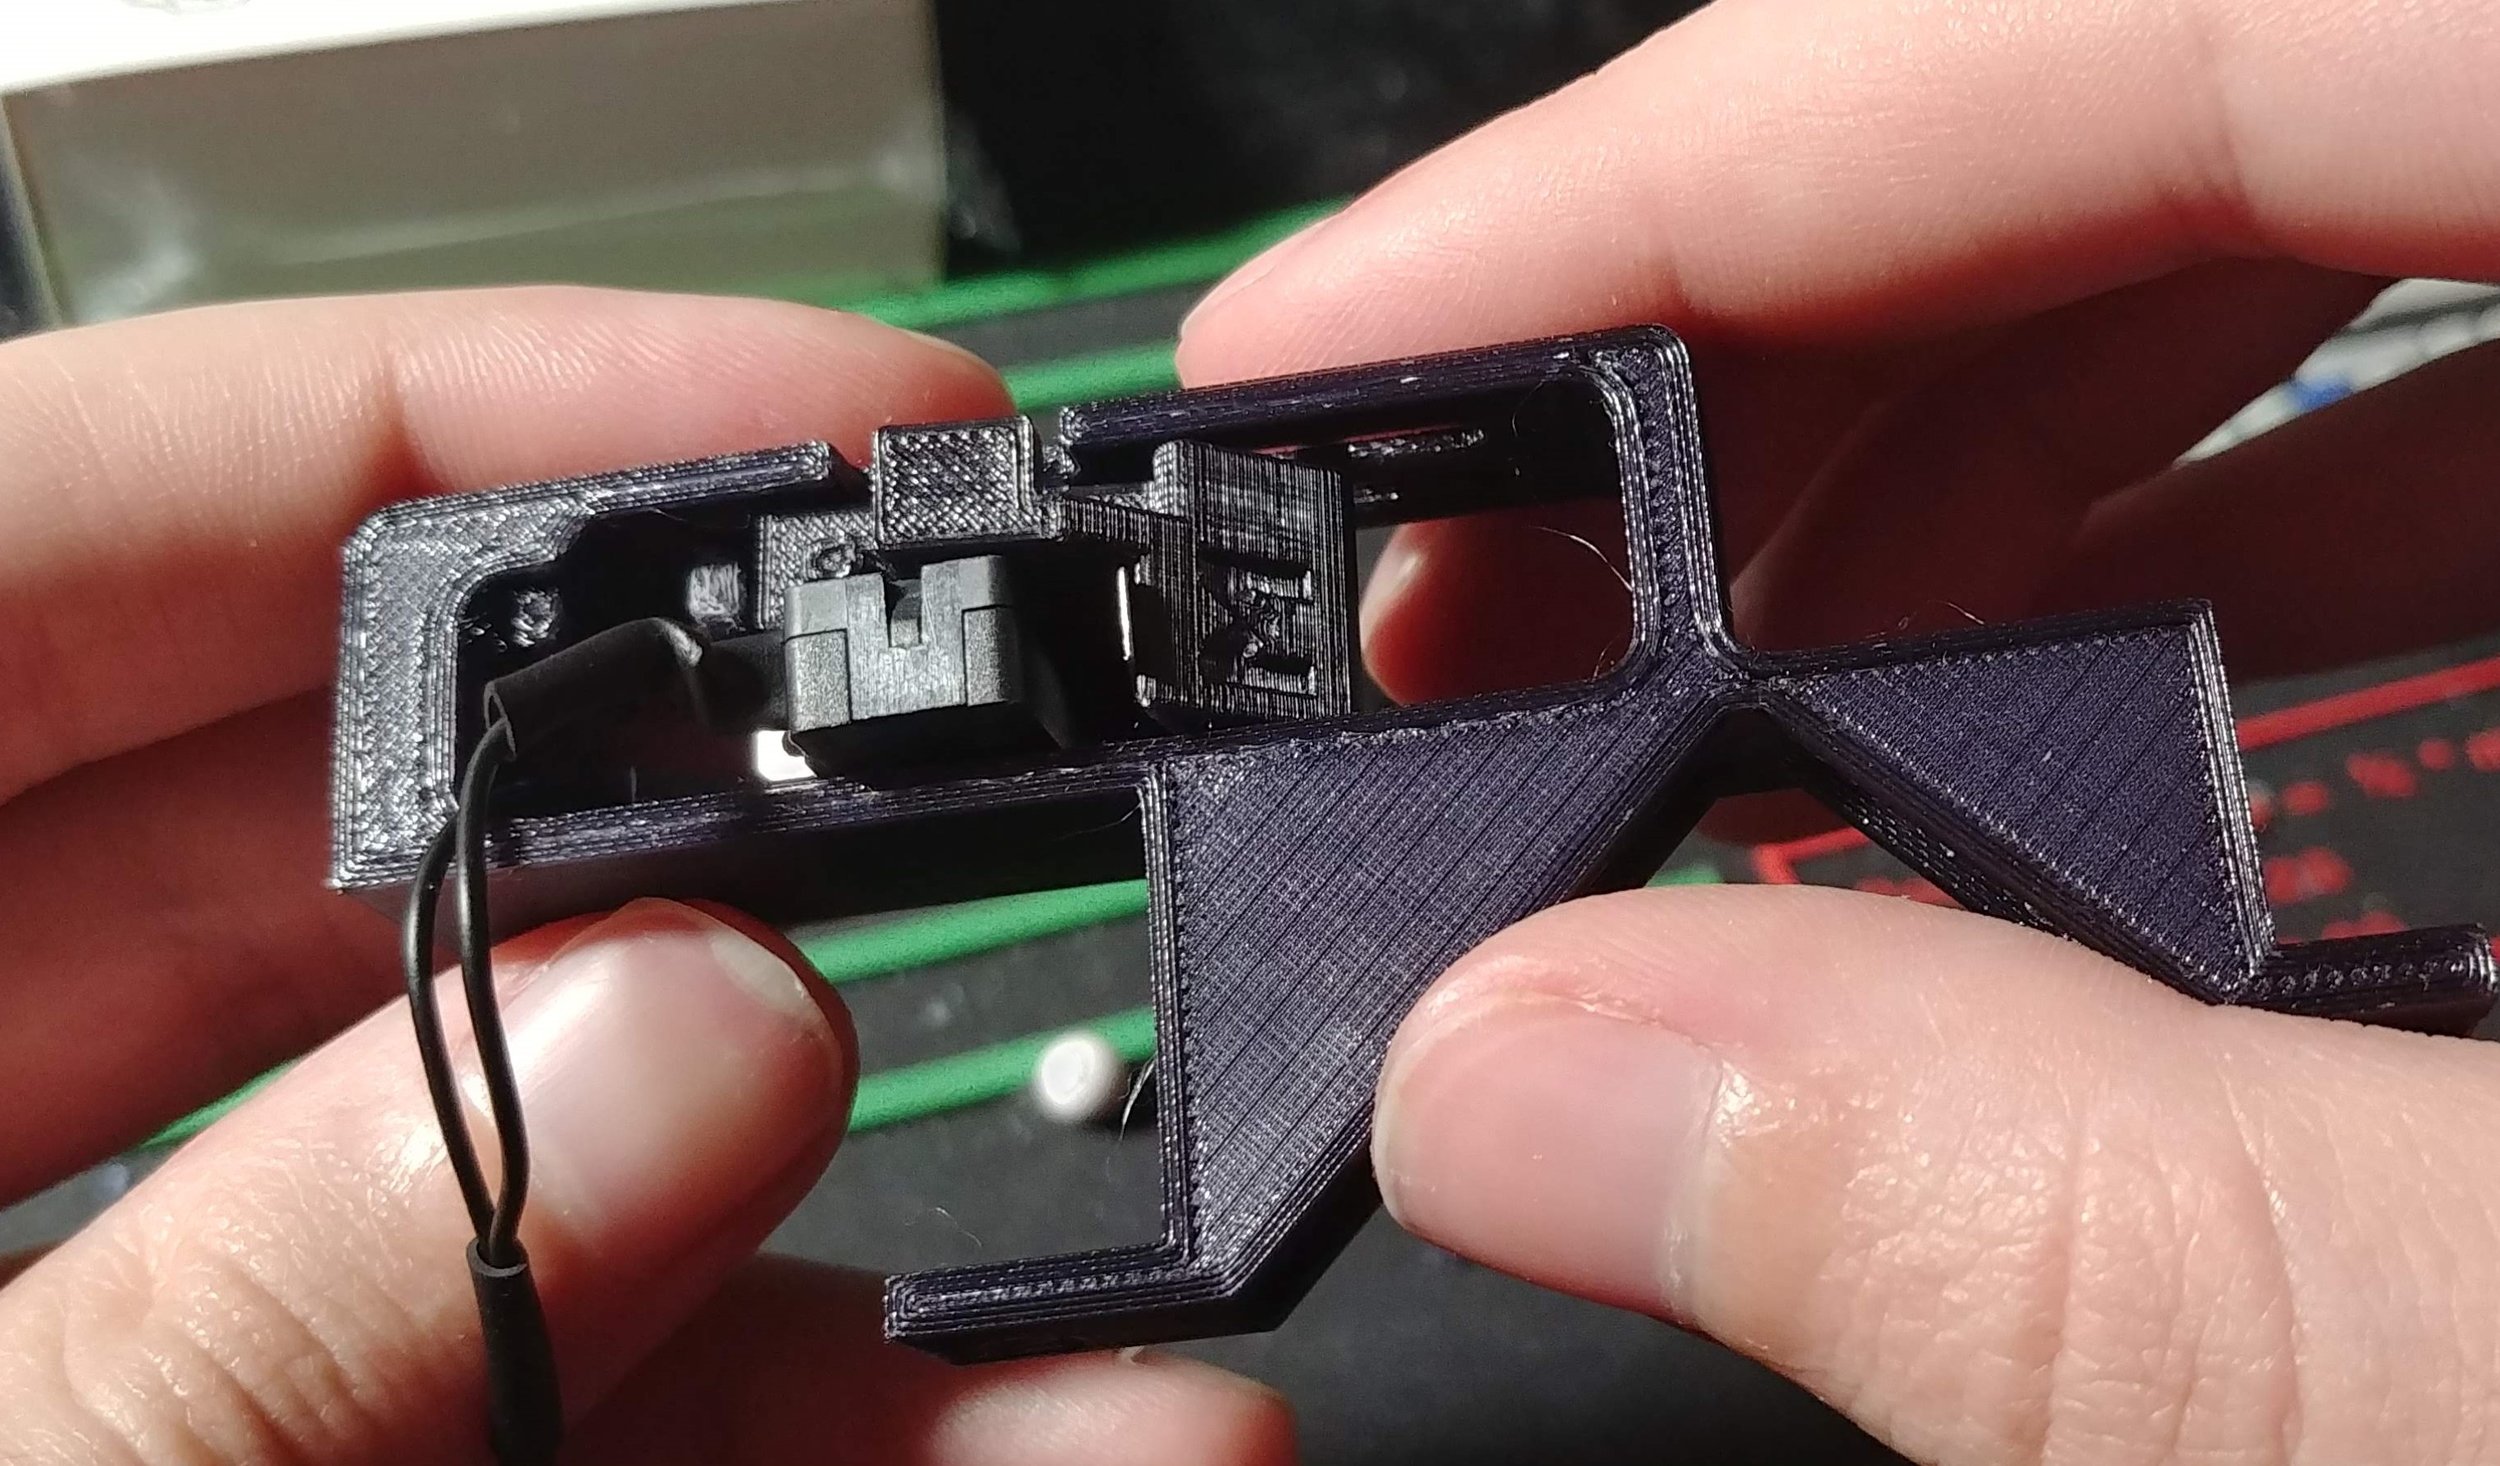
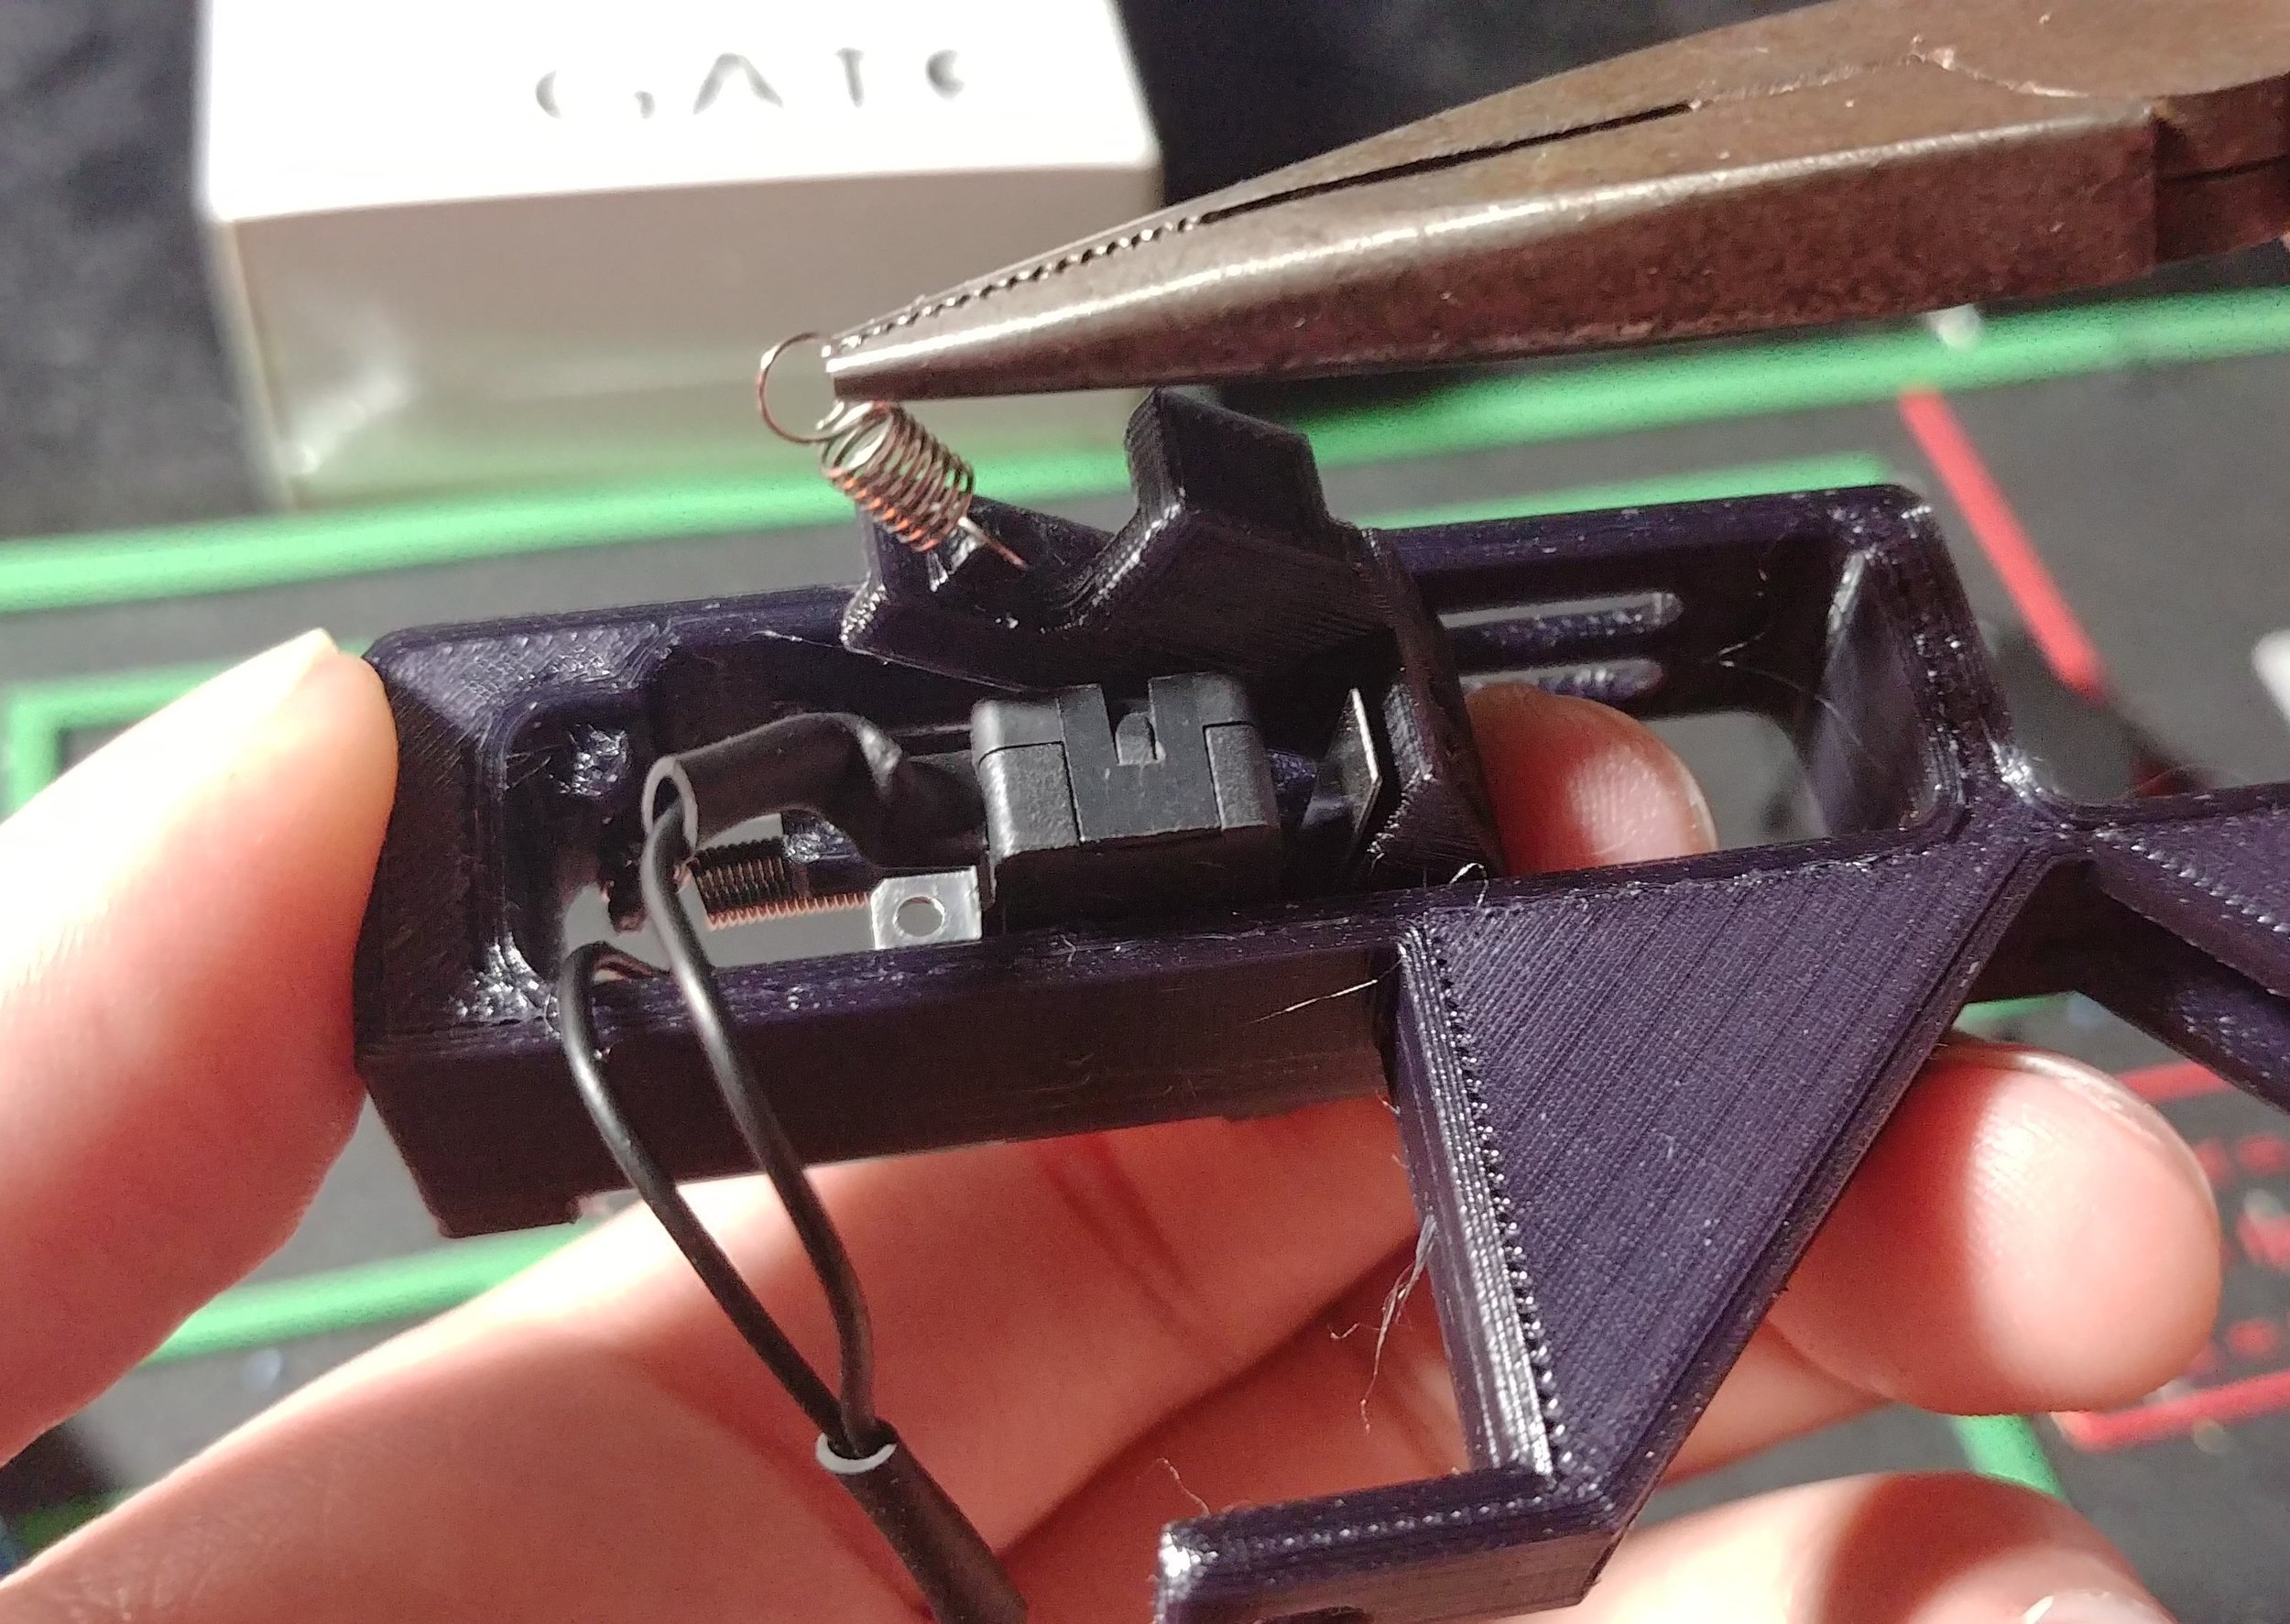
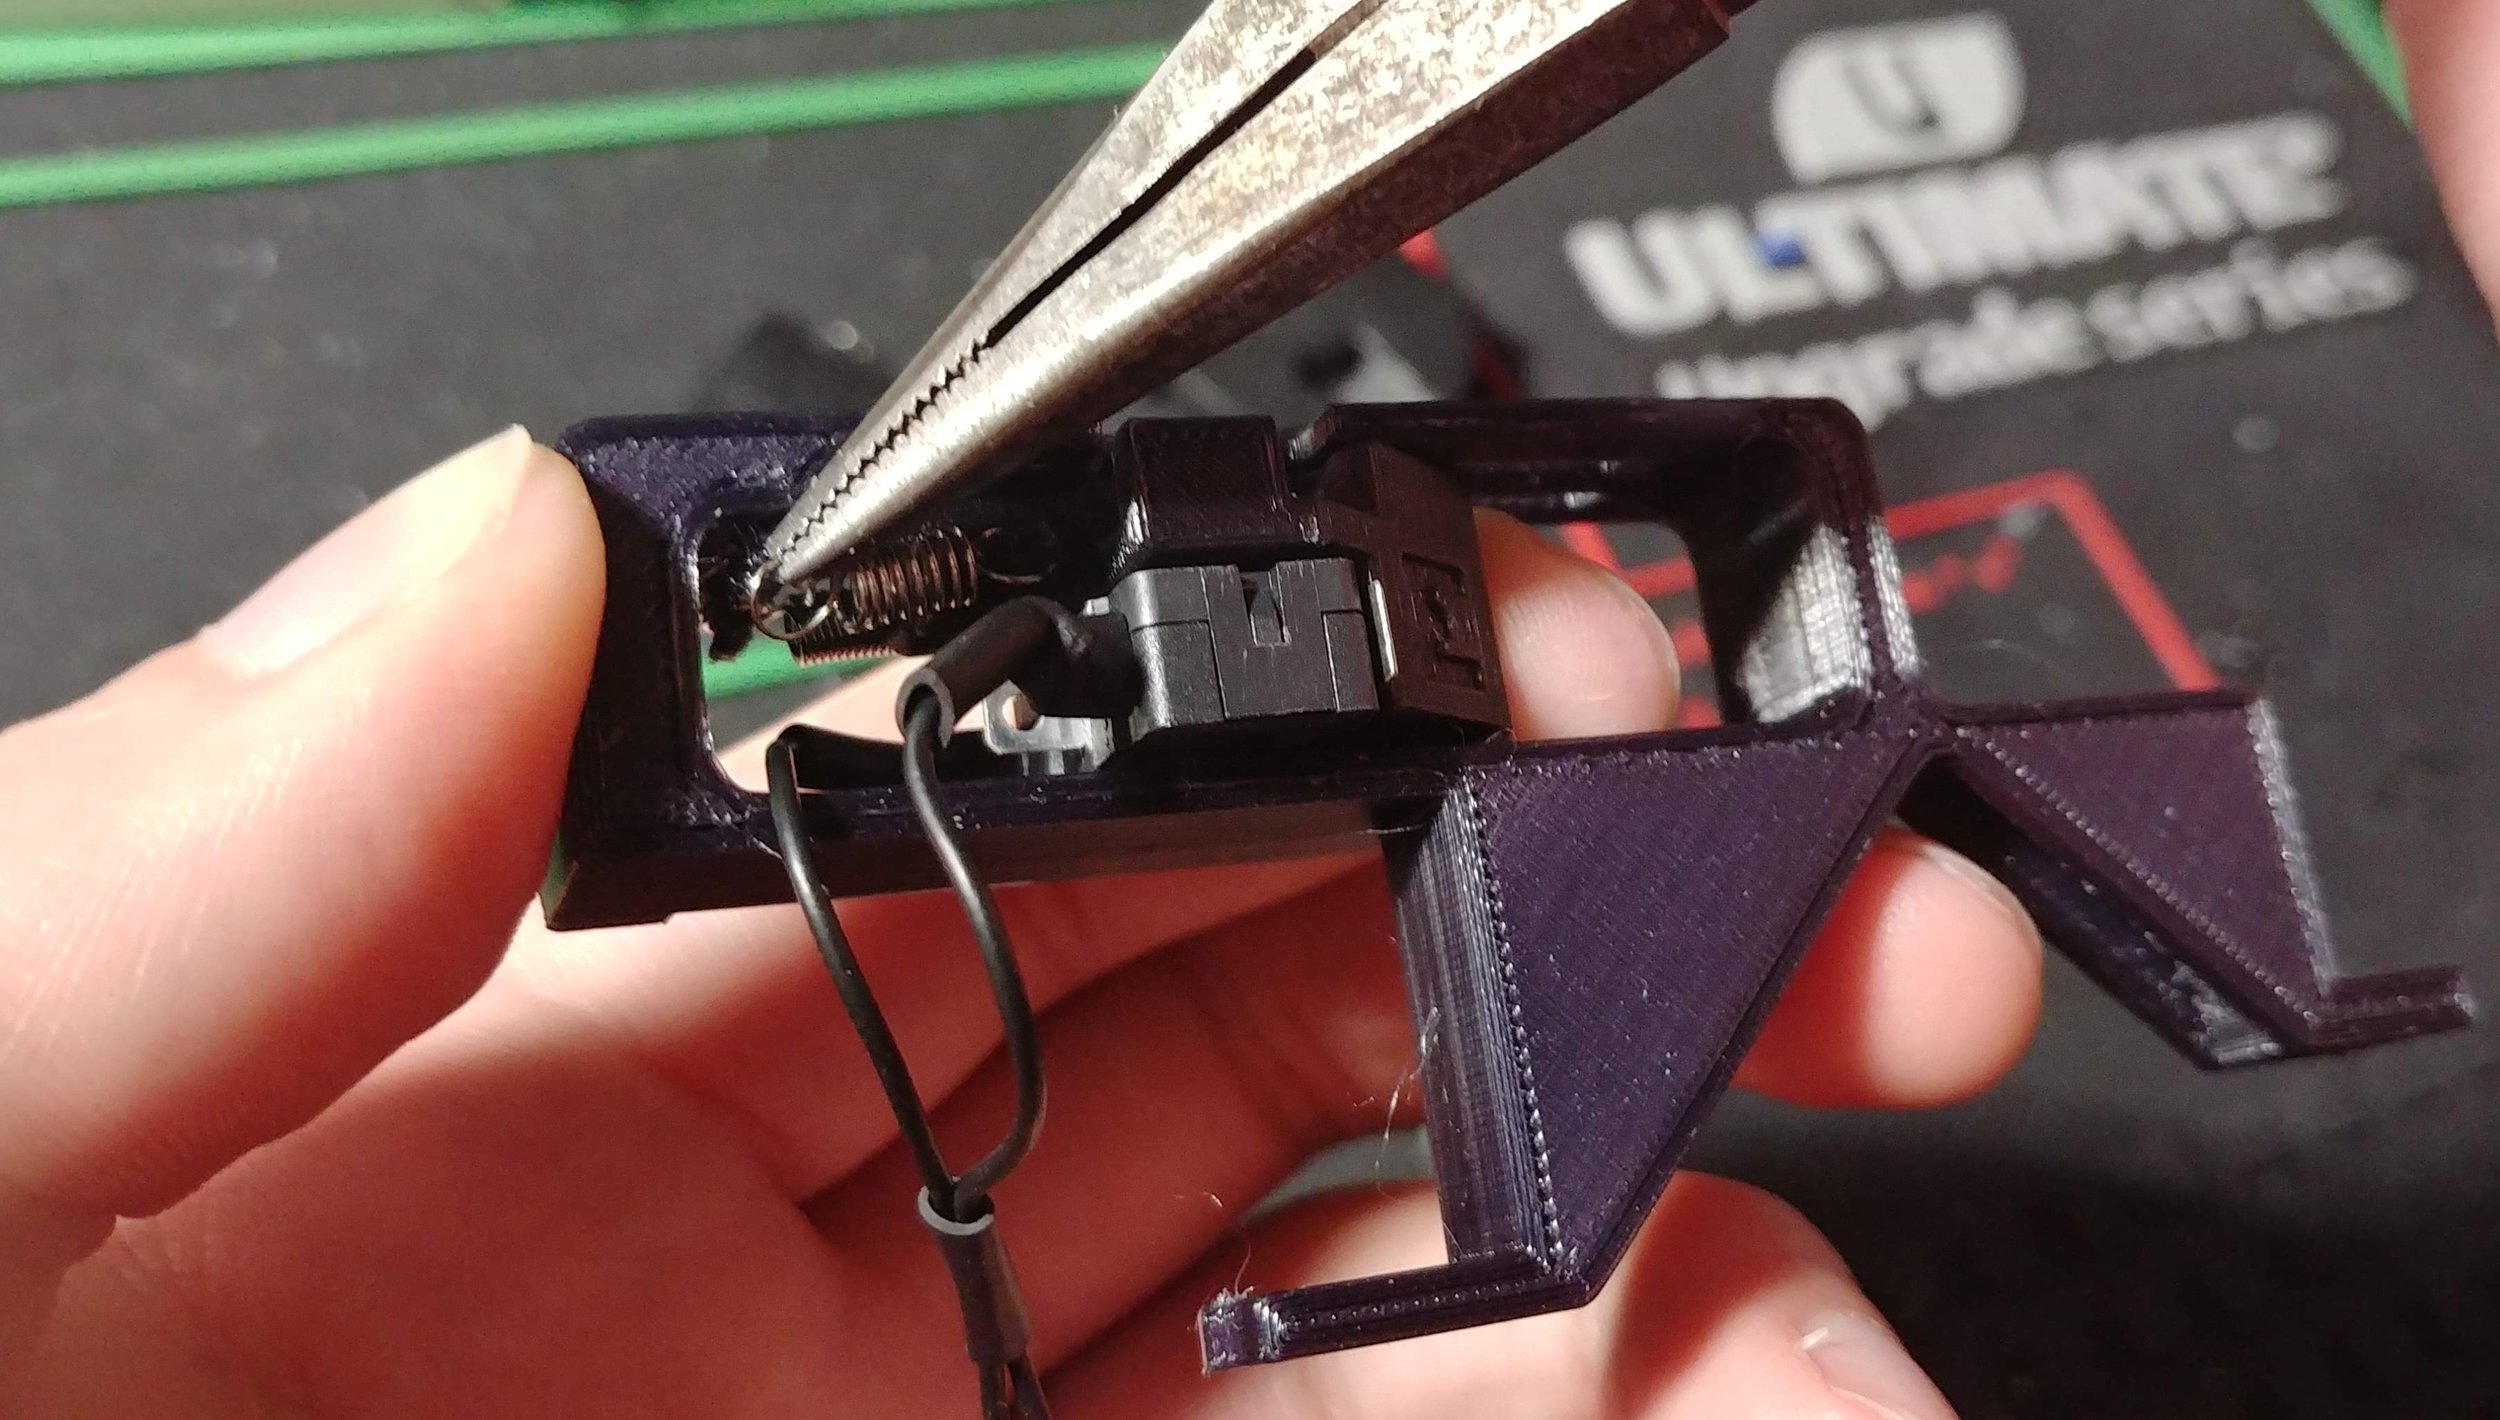
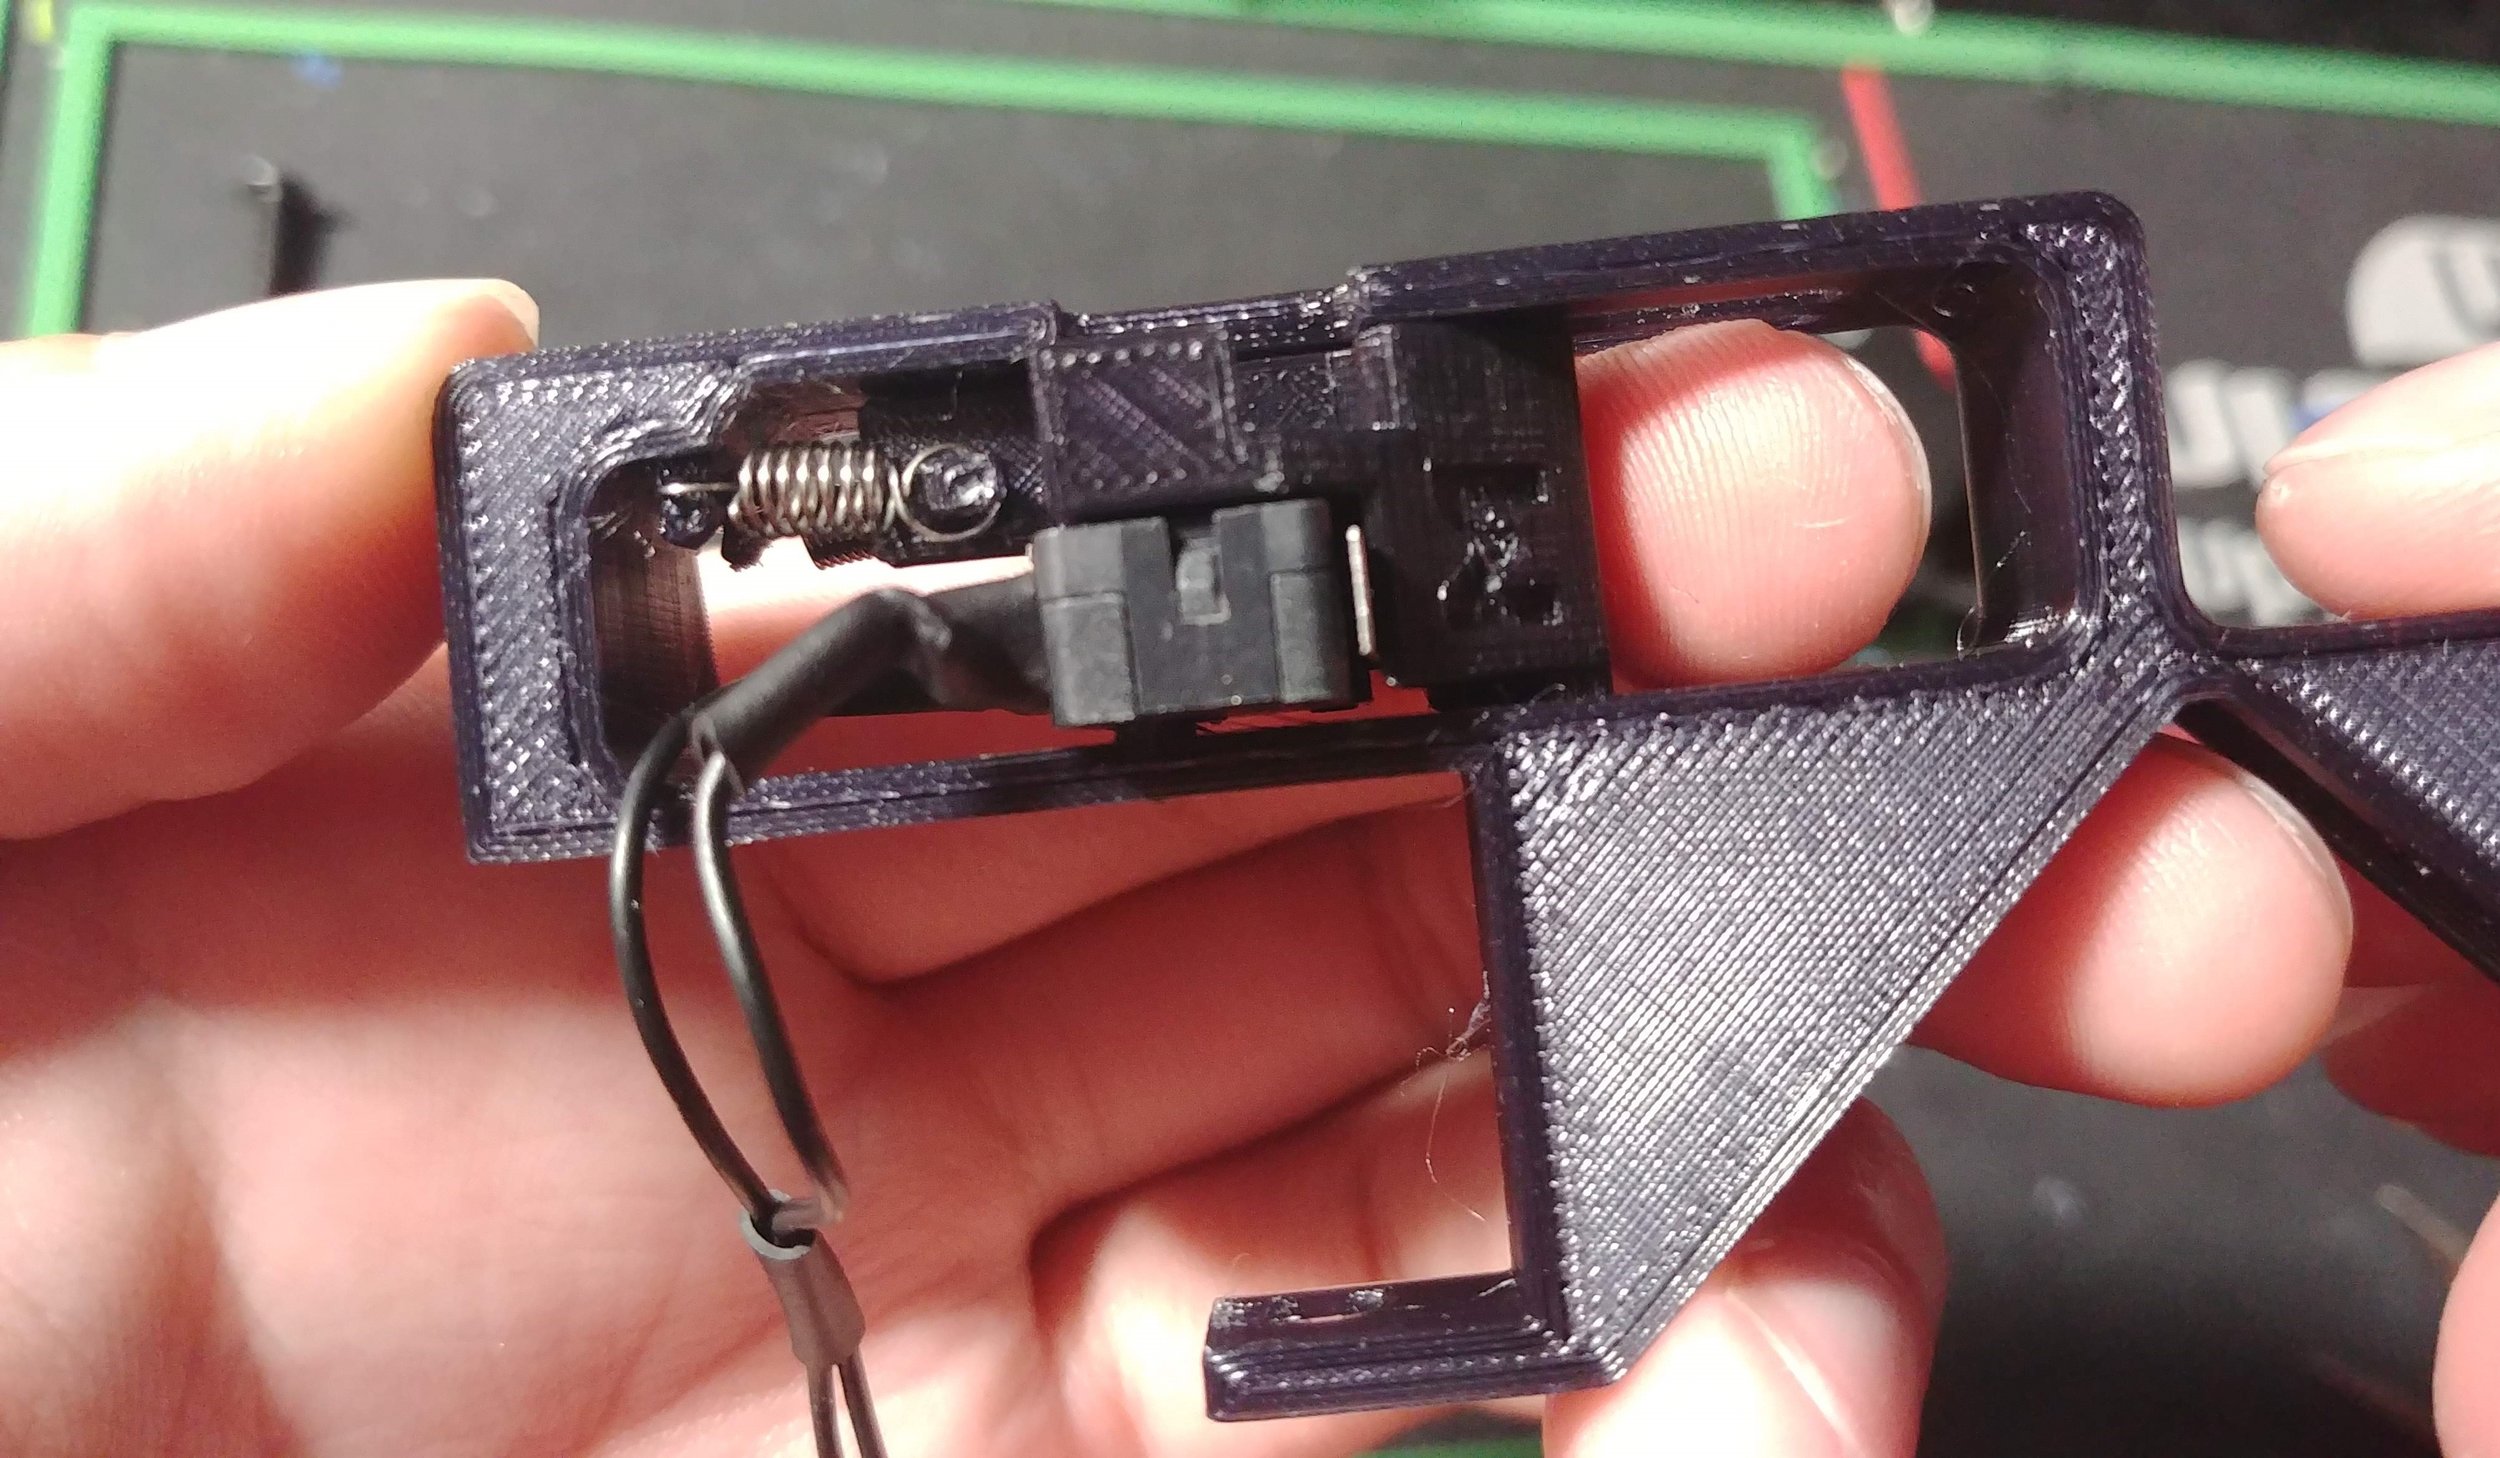
Step 4: Insert trigger trolleys into base and attach springs
The base is slightly flexible for the two trigger pieces to squeeze into the guide slots.
You can squeeze the pieces in however you like, but this is my process for installing the springs and trigger pieces (see slideshow):
Start with the microswitch on the pegs, with the lever pointing back and down
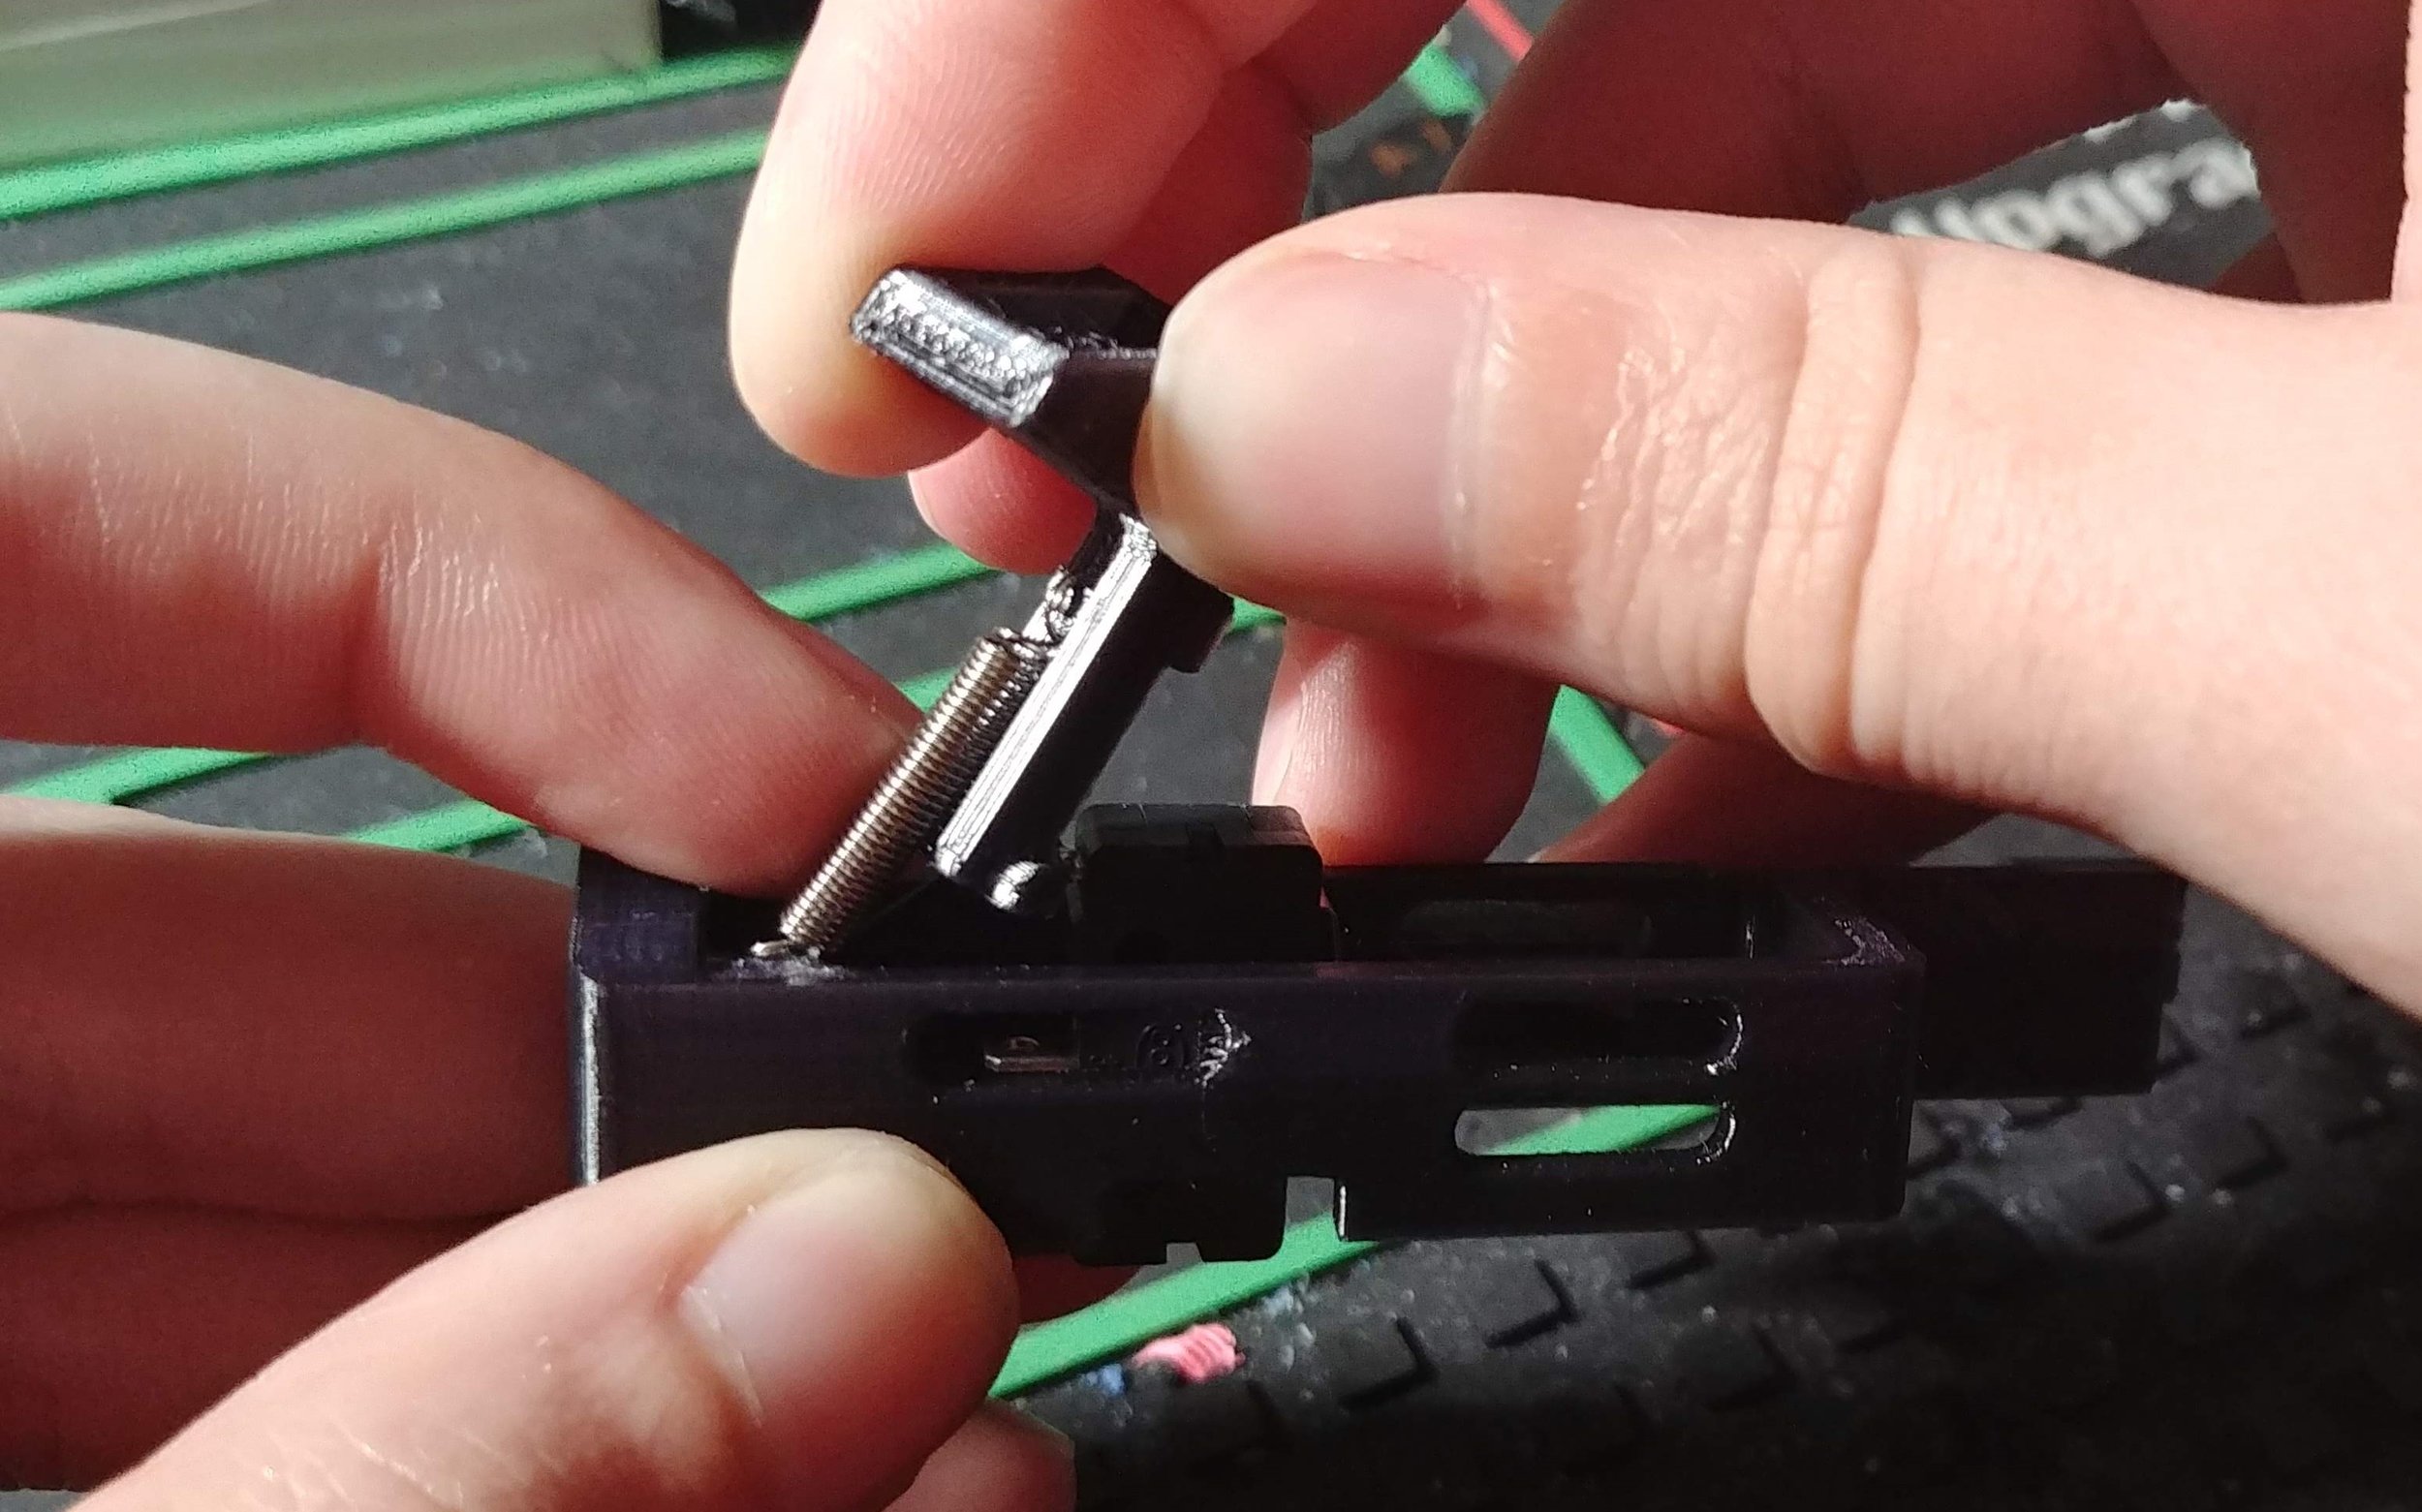
Attach the long spring between the base and the upper trigger piece
Insert the upper trigger piece into the guide slot at the front
Bring the back of the upper trigger piece down and slightly twist it to fit it into the back guide slot
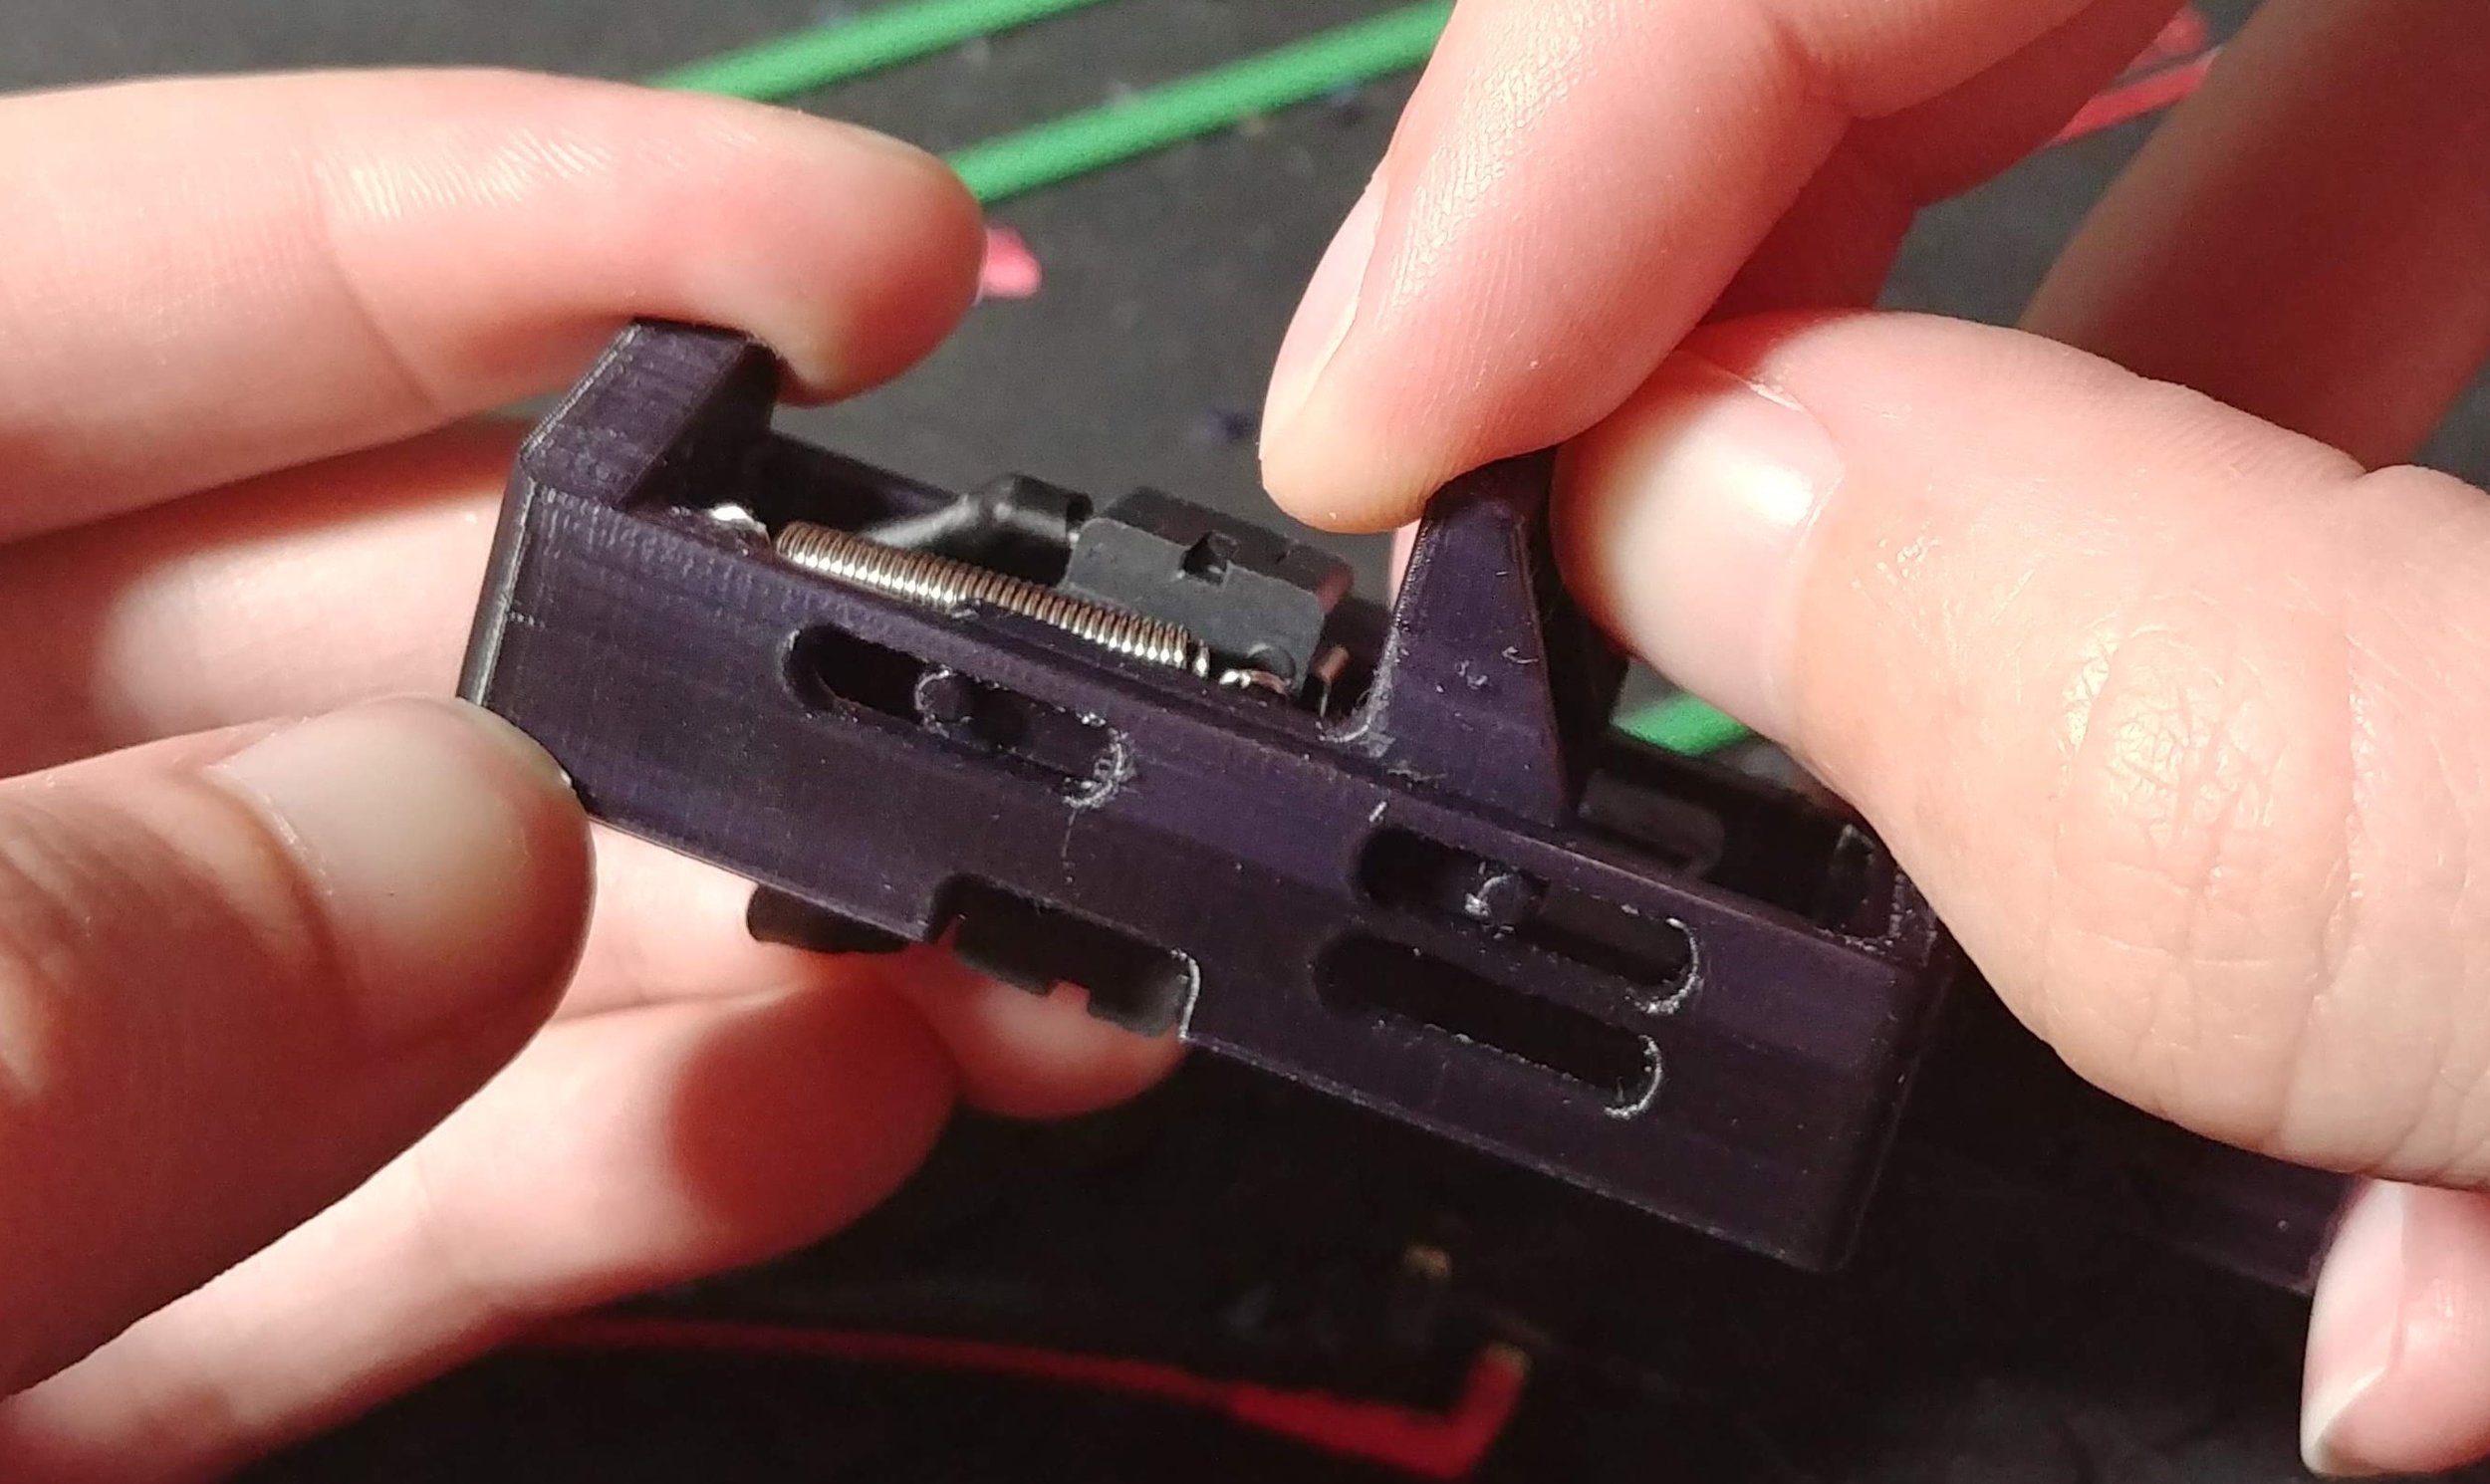
Turn the M-Trigger around, and push the last peg into the guide slot by flexing the base piece slightly
For the lower trigger piece, it can be inserted into its guide slots by simply rotating it into position
Use small pliers to fit the small spring to the lower trigger piece, then pull and attach the spring to the base


Step 5: Install M-Trigger onto gearbox
Use the same screws as the original trigger unit.

Verify that the cut-off lever engages correctly with the small trigger piece.
The cut-off lever should barely touch the ledge of the small trigger piece. There should not be a gap, and it should not be pulling on the trigger piece while it is at rest. This will lead to semi-auto malfunctions.
For F2000’s: G&G seems to have made the F2000 with at least three different cut-off lever designs, all with slightly different sizes. The M-Trigger ships with three sizes of the small trigger piece: small (S), medium (M), and large (L). Use the size that best alligns with the surface of your cut-off lever.
For P90’s: Cut-off levers are consistent between brands, so the M-Trigger ships with only one size of small trigger piece. If there is an alignment problem, the small trigger piece can be modified to have better fitment either by adding material to reduce the gap or by filing the ledge to reduce pulling. In extreme cases, a replacement can be supplied with different sizing.

Cut off lever should align with face of trigger piece, not pull it down nor have a gap
Test the M-Trigger by hand.
Connect all necessary wires and battery to test M-Trigger functionality. You should be able to do single shots by pushing the trolley a small amount and full auto by pushing all the way back.
Step 6: Reinsert gearbox into gun
Replace the plastic gearbox bracket. Connect the battery and test fire gun. Semi auto should be a few millimeters of trigger pull, and full auto should be all the way back. If you experience issues at this point, refer to Troubleshooting section.
That concludes the installation of the M-Trigger!
Troubleshooting
If you experience trouble with installation or functionality, send me an email and I can help you sort it out. Detailed descriptions and pictures will help me diagnose the issues.
I assemble and hand test every M-Trigger in my own guns before shipping. Slight dimensional differences between guns may cause fitment issues.
Semi-auto doesn't fire a full cycle: Trolley 2 is disengaging from Trolley 1 too soon. Solution A: The cut-off lever is not aligned properly with Trolley 2 and is pulling it down too soon (see Step 5). Sand or dremel material from Trolley 2 until the cut-off lever does not interfere. Solution B: The front nub on Trolley 1 is too short, in which case I'll send you a replacement.
Burst or full auto on semi: Trolley 2 is disengaging from Trolley 1 too late. Solution A: The cut-off lever is not aligned properly with Trolley 2 and there is a gap (see Step 5). Add material (could be anything such as small pieces of tape, paper, or metal) to fill in the gap between the cut-off lever and Trolley 2. Solution B: The front nub on Trolley 1 is too long. Sand or dremel to remove material (0.5 mm at a time). Remove too much material and semi auto will start to malfunction and I will need to send you a replacement.
Stops shooting after 1 trigger pull: Trigger travel is too short and does not give Trolley 2 enough space to reset after each shot. Solution: Sand or dremel to remove material from Trolley 1 where the trigger bar touches.
No full auto: Trigger travel is too long and trigger does not reach the full auto point. There is a gap between the trigger bar and Trolley 1. Solution: Add material (could be anything such as small pieces of tape, paper, or metal) to fill in the gap between the trigger bar and Trolley 1.
Lost springs: You will need to find new springs. The M-Trigger will not work at all without them. You cannot use springs from different guns' triggers! They need to be P90 or F2000 trigger springs. You will need to find a new or used P90 or F2000 trigger assembly. Note that P90 and F2000 springs are close enough that they can be used in either gun.
Broken pieces: Replacements are free!
Other issues: Send me email at shadowregimedesigns@gmail.com
Feedback
If you have any feedback, please let me know! Also, if you're happy with your M-Trigger, I'd love to hear about it! I want to make sure all my customers are satisfied.